AD | I have been (or could be if you click on a link in this post) compensated via a cash payment, gift or something else of value for writing this post. See the full disclosure policy and privacy policy for more details.
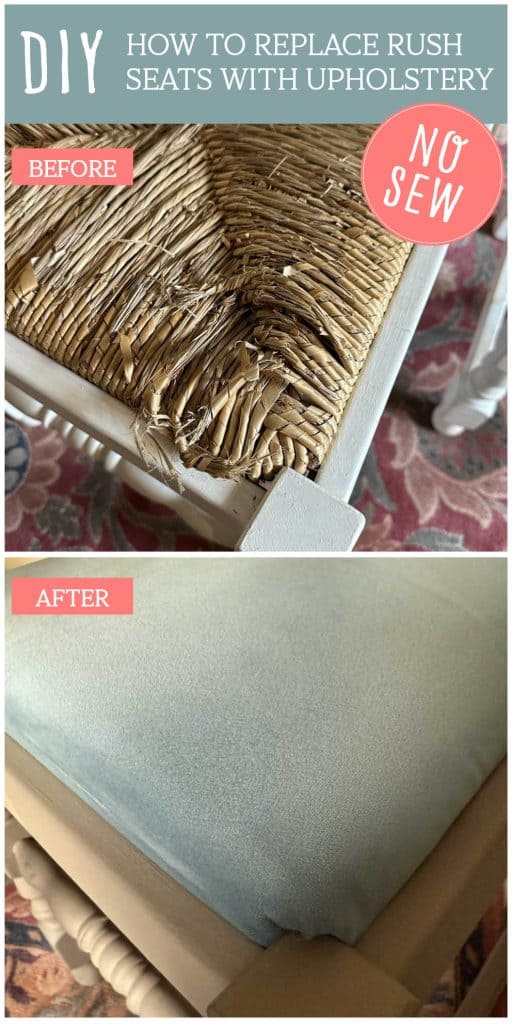
If you’re looking for a rush chair seat replacement DIY tutorial you’ve come to the right place! Our dining chairs were second-hand when I bought them, so were already in pre-loved condition. They had certainly seen better days! I gave my dining room a makeover few years ago and painted the dining chairs and table. But, roll on a few years, and the rush seats needed replacing.

Quick View of What You'll Find on This Page
Replacing Rush Seats
I looked online and it brought up lots of pages of ‘natural pre-twisted rush’ and videos showing how to weave a rush seat.
The issue for me with the rush seats is that our cats use them for scratching posts and although I like the look of the rush, cane and seagrass, it’s just not a practical option in our house!
It’s also difficult to clean (particularly when small children have dropped baked beans — or similar —into the fibres). And, try as I might, I didn’t want to go to the time or expense of repairing them myself or replacing them with a new rush version.
Can I Paint Rush Seats?
The answer to this is yes! Revamping your furniture with paint is always an option. Rush seats can be painted and the end results can look fantastic — IF and I stress the ‘if’ — if they’re in good condition to start with!
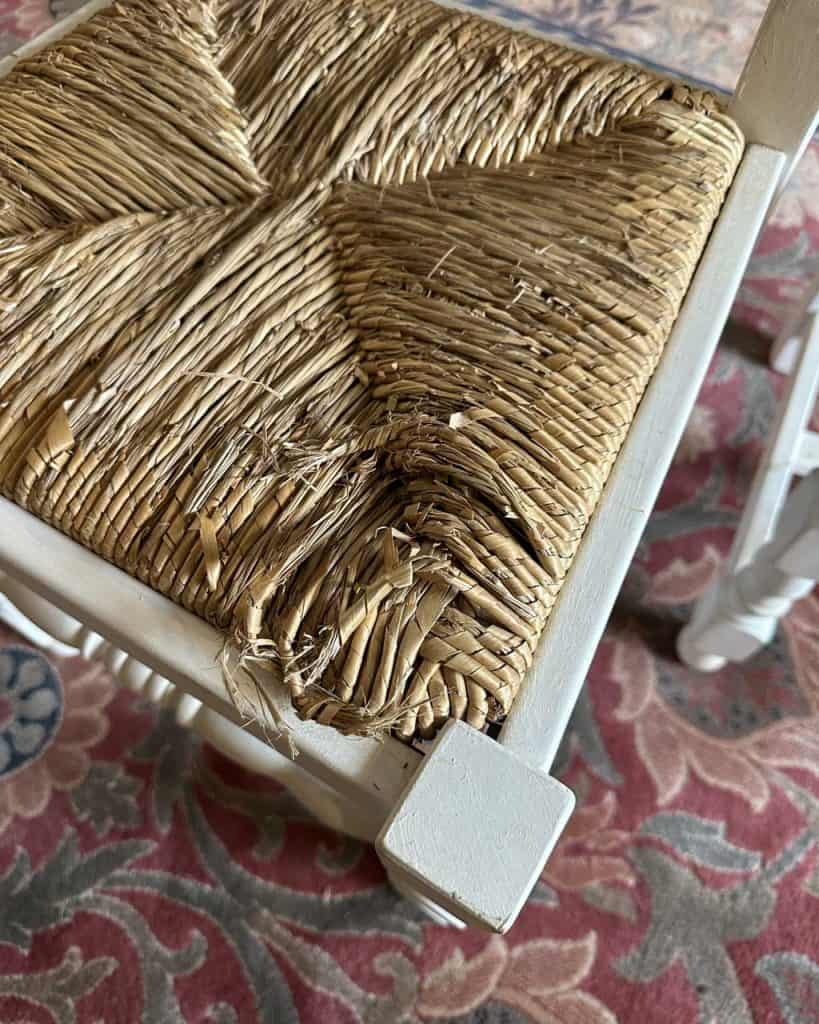
There’s no point trying to paint broken rush seating as it will highlight the problem areas and look even worse. My chairs were in such poor condition, painting the rush seats was not the right solution.
This led me to two conclusions.
I could either:
a. Get rid of the chairs.
b. Replace each rush chair seat with upholstery.
How To Replace a Rush Chair Seat with Upholstery
So — going back to the last point — I definitely wasn’t going to get rid of my chairs. Replacing them would be way more costly than trying to fix them. But that led me to the next question… how I was going to replace the rush chair seat with upholstery?
After all, I’m not an upholsterer! But I have a can-do attitude and a staple gun! I once turned an IKEA shoe rack into a little bench. And I made a no sew DIY upholstered headboard and bed frame which turned out really, really well!
So well, in fact, that I felt confident that I’d be able to give the chairs the same treatment. I figured replacing the rush chair seat with something else would be a similar kind of job.
Here’s what I did.
Rush Chair Seat Replacement DIY Tutorial
As each rush chair seat was just wedged into the wooden frame, it was relatively easy to pop them out. I’ve done this before and turned them over (another great tip if your rush chair seats are looking tired!). It gives you a little more time before you need to replace them!
Once the seat was out, these were the steps:
Creating a New Seat Base
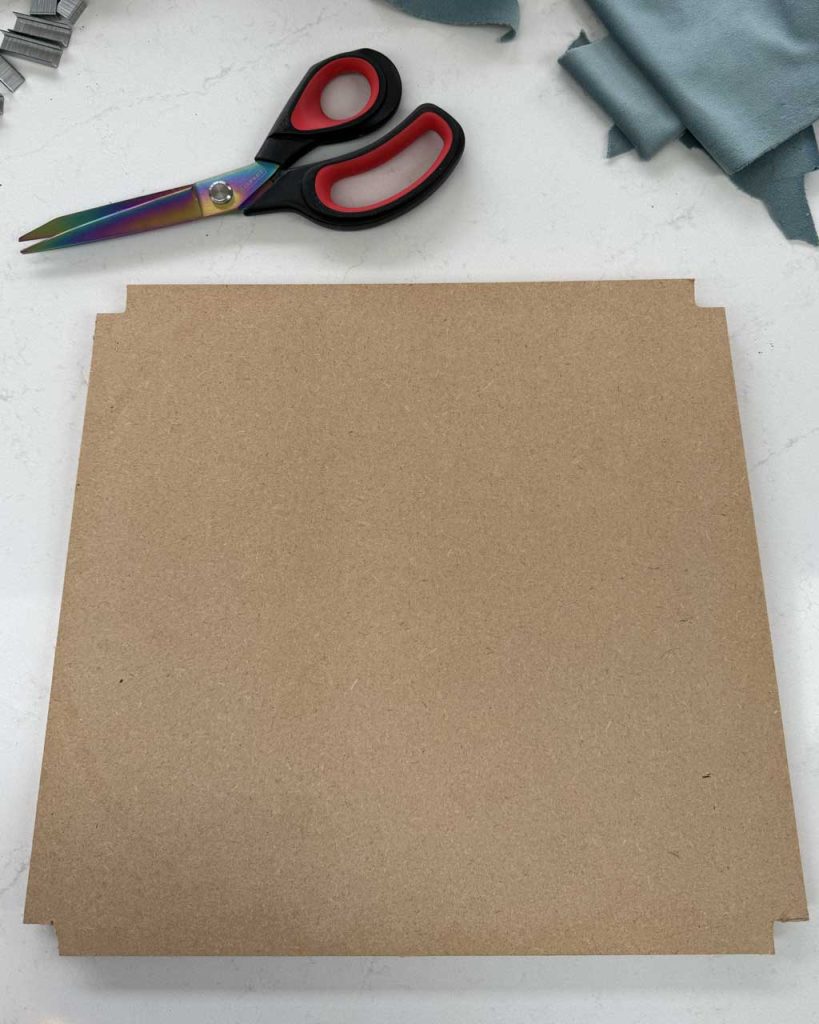
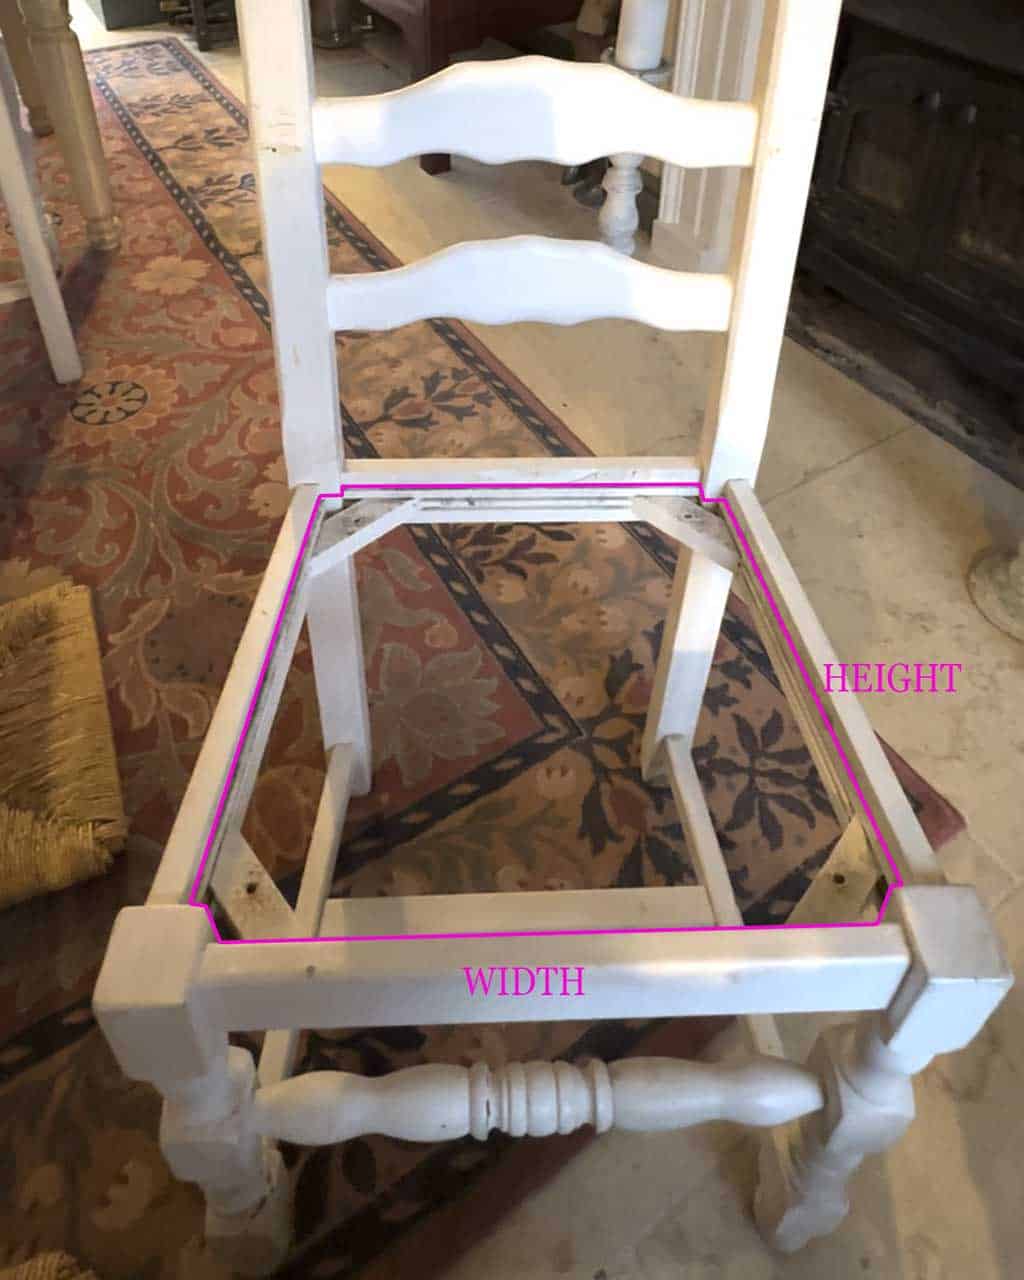
1. I first measured the aperture in the chair frame, to create a template.

I created my template in Photoshop. But you could use Canva or — to be honest — even just a clear pen drawing would work well.
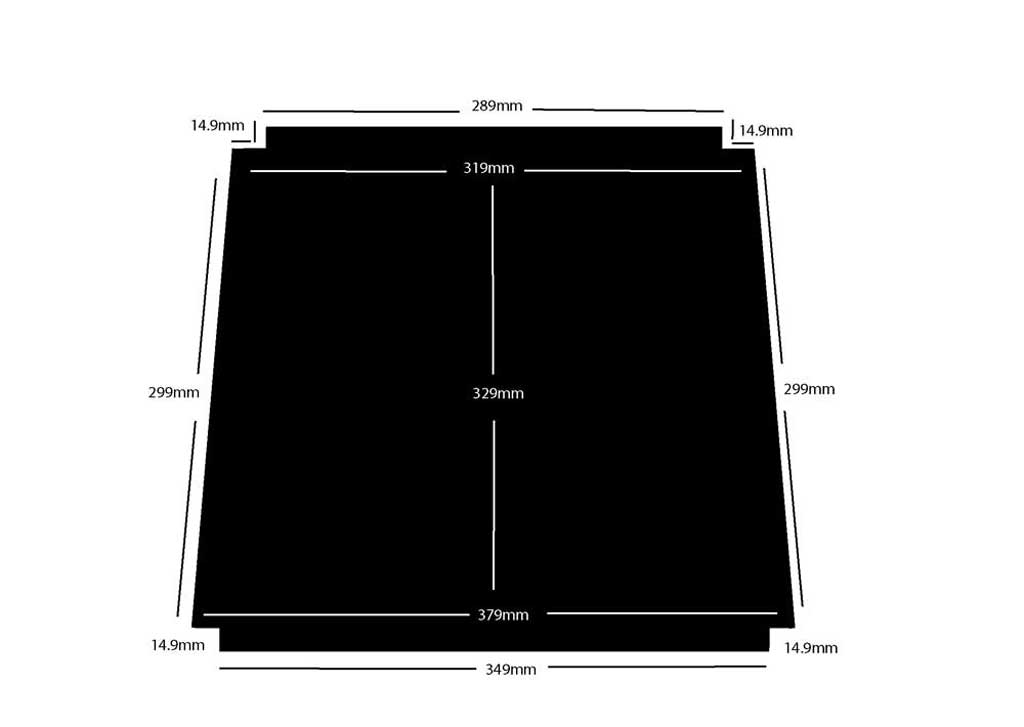
I uploaded my design to Cut My a UK-based business that offers high-quality custom-cut plastic, metal and wood sheeting. They can cut various materials to any size or shape, and deliver direct to your home.
I chose 15mm MDF, although if you wanted to replace rush seats with wooden seats — rather than upholstered ones — ‘Cut My’ also does wood veneered MDF (walnut, oak, maple etc) that would work a treat.
Painting The Old Chair Frames
Whilst I waited for my cut MDF replacement seats to arrive, I got on with painting the 6 chairs.
Because painting chairs (in my humble opinion) is a massive ball-ache, I opted for a no-prep, no-fuss paint option.
I chose to use Rust-Oleum Matt furniture paint in Cafe Luxe; a perfect taupe brown neutral, which complements the fabric I’d chosen to upholster the rush seat replacements with.
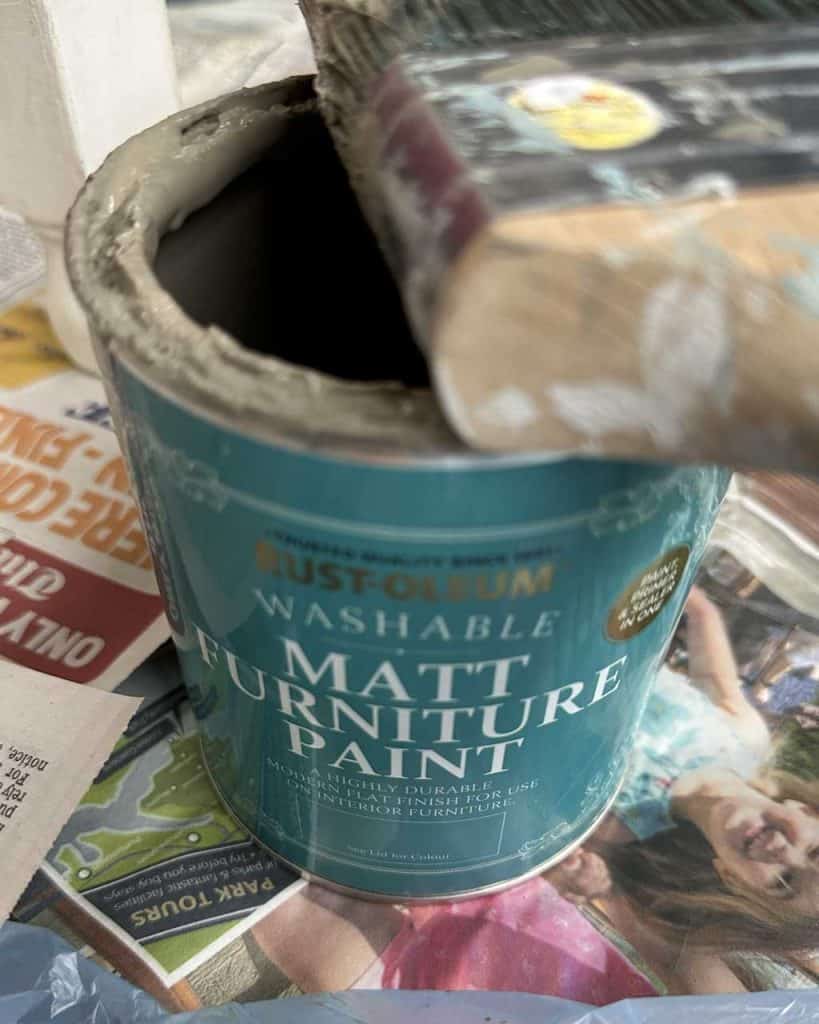
The paint requires no sanding or primer before you use it, which is perfect when you have a lot of fiddly painting to do. The first coat looked quite alarming and the finish was very patchy.

But by the second coat, the finish was starting to look exactly as I’d hoped; lovely and matt, with an opaque, velvety finish

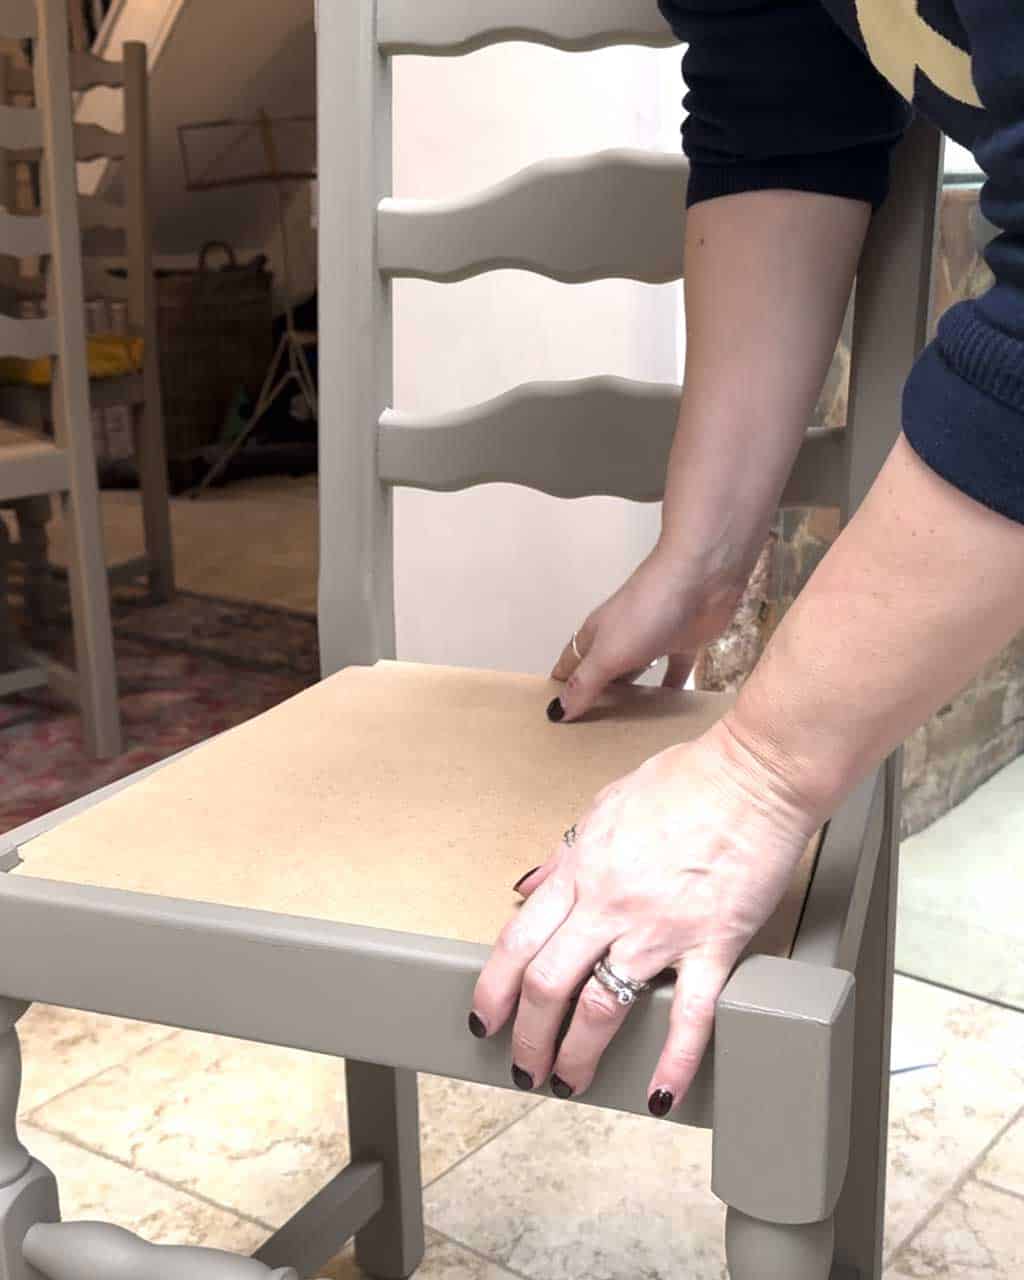
By the time I’d painted all the chairs the MDF bases had arrived and, thankfully, they were a perfect fit!

At this point, I did actually think I could just paint the MDF seats and the chairs would look brilliant. But as I’d already bought foam and fabric, I decided to stick to my original plan and continue with my plan to DIY upholster each rush chair seat replacement.
Upholstering The MDF Rush Chair Seat Replacements
Before I explain this process, let me just say that this job would have been a whole lot easier if I’d had a better staple gun — or I’d chosen plywood instead of MDF for the seat bases. My staple gun really struggled with the MDF; even though it’s an electric stapler, the MDF was just too hard for it to push the staples in easily.
If I were ever to do this again, I’d get a pneumatic stapler or have the rush chair seat replacements made out of plywood.
Save your fingers (and your sanity) and learn from my mistakes!
But anyway! On to the process. This is what I did:
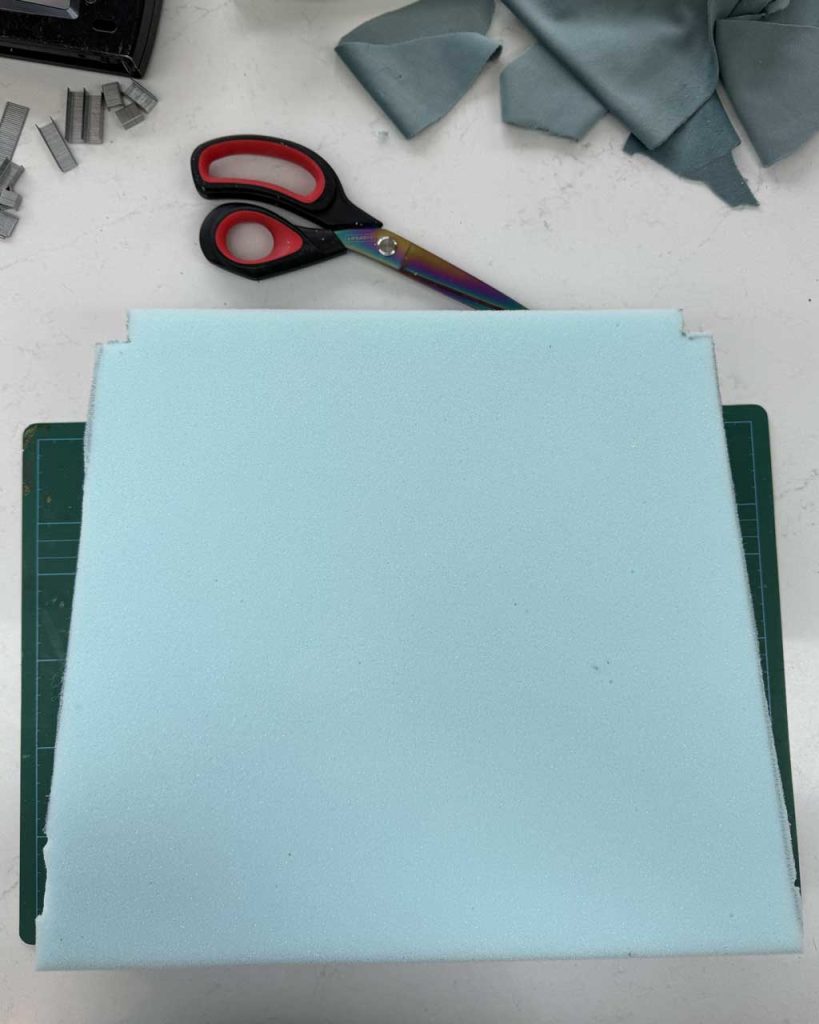
1. Use one of your MDF rush chair seat replacements as a template to cut your foam to size. I used 5 cm high firm upholstery foam, from ‘eFoam UK’ cut to a width of 33cm and a length of 38cm, then I notched out the corners at the top of the foam, which is where the legs would be, using a serrated bread knife.
2. Next, cover this with wadding. I used bonded wadding, from Terry’s Fabrics, as it has a tough, fabric cover over the actual wadding.
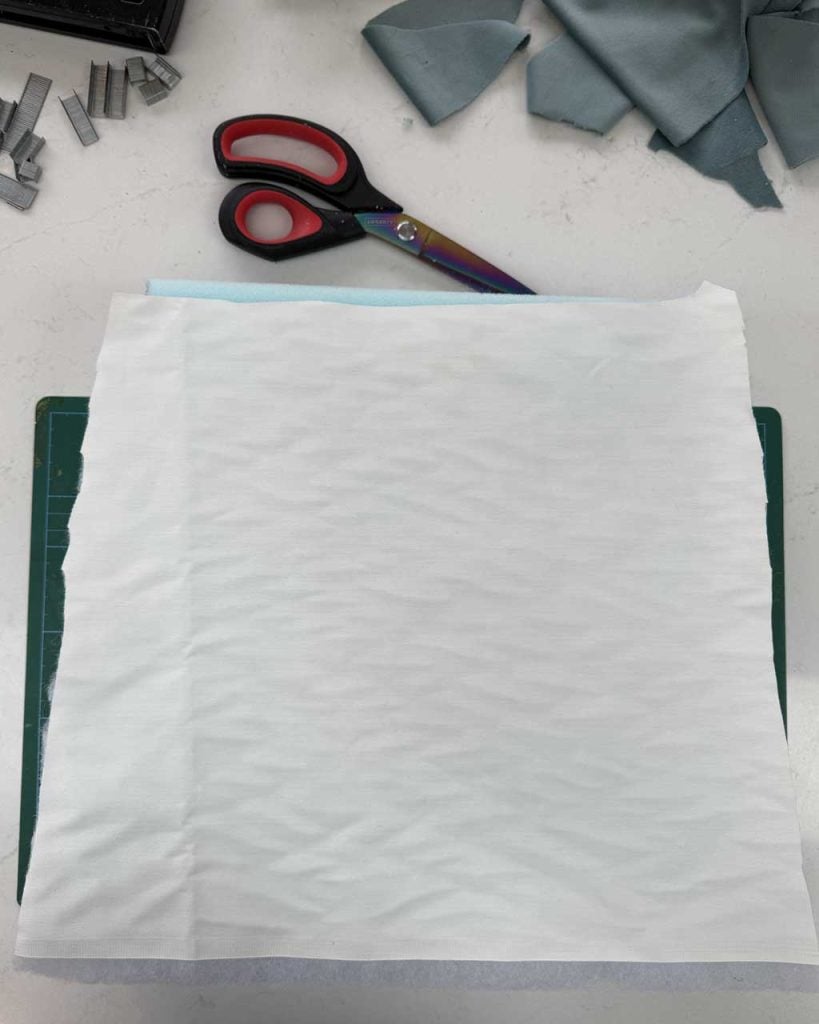
3. Turn the whole lot over and place it on a piece of your fabric of choice. Then cut around the edge, leaving at least 10cm.
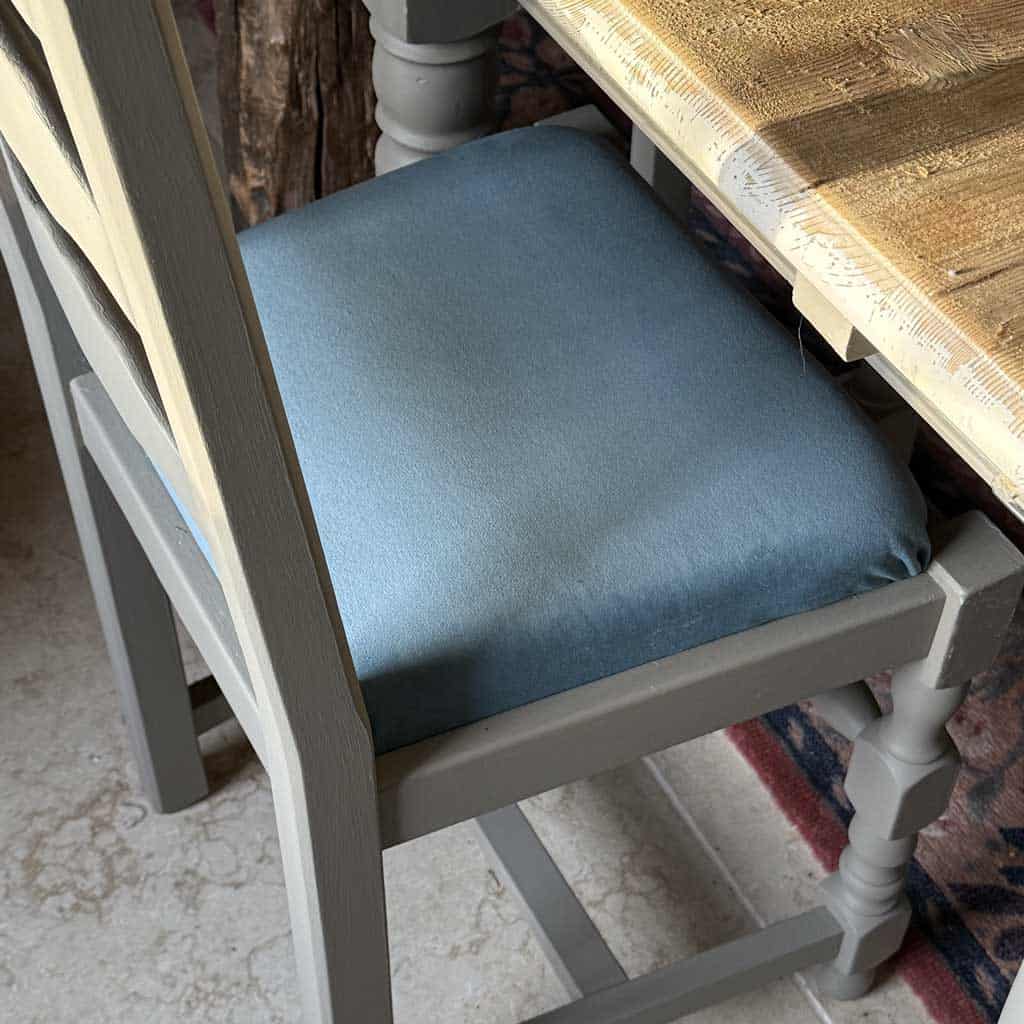
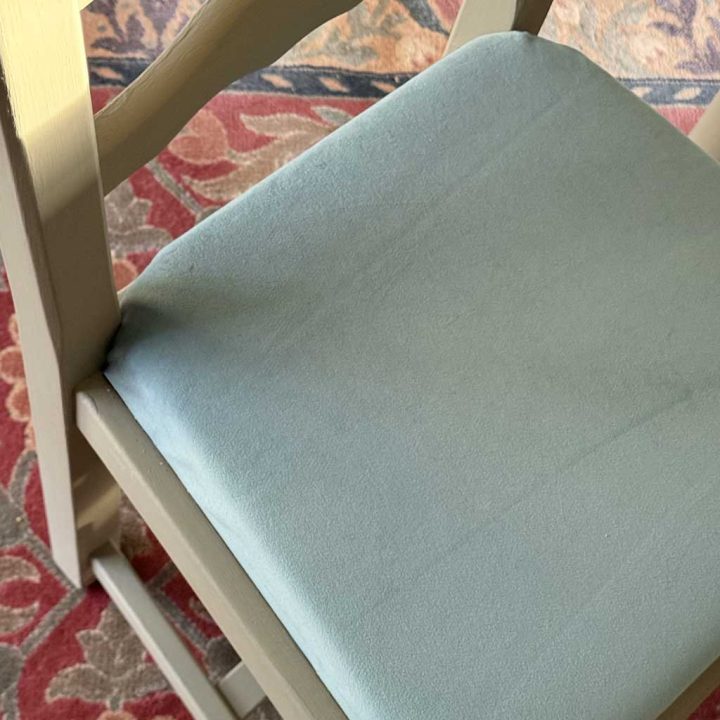
I used a beautiful smokey-blue upholstery velvet — Clarke & Clarke Alvar Velvet Fabric in Aqua.
Our cats don’t scratch velvet, as it’s not an open-weave fabric, so this is the perfect material to cover our chairs seats! Plus the colour is beautiful and goes well with the taupe paint I chose for the chair frames.
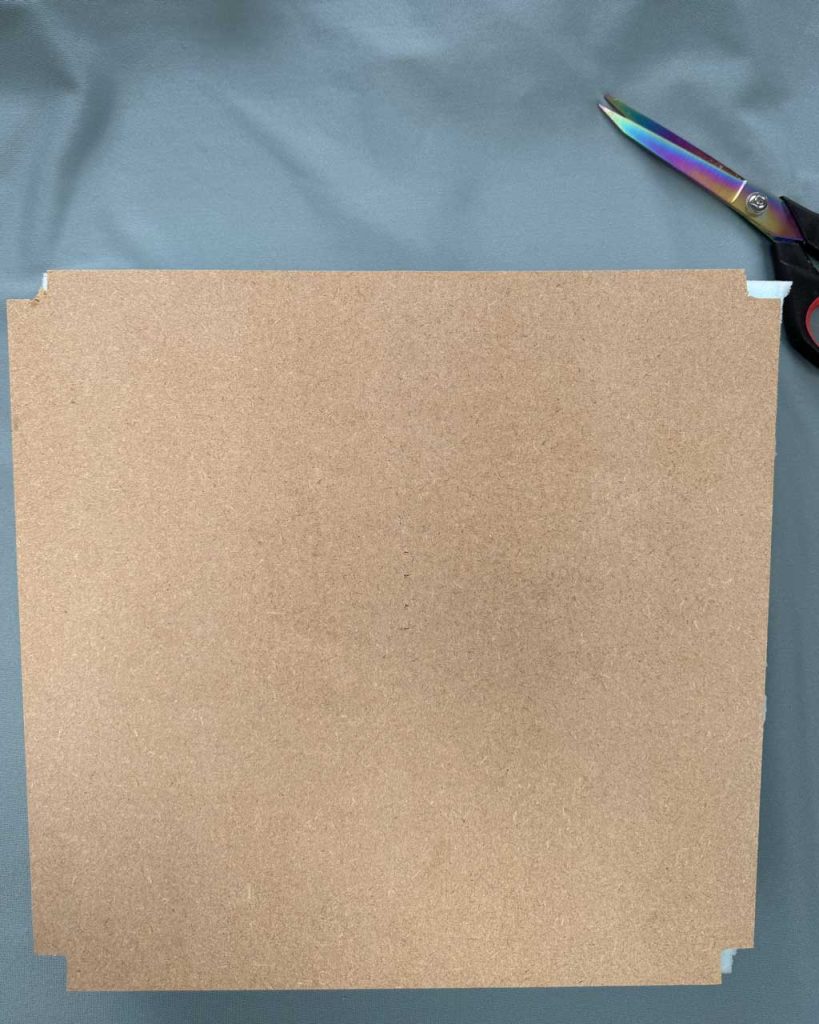
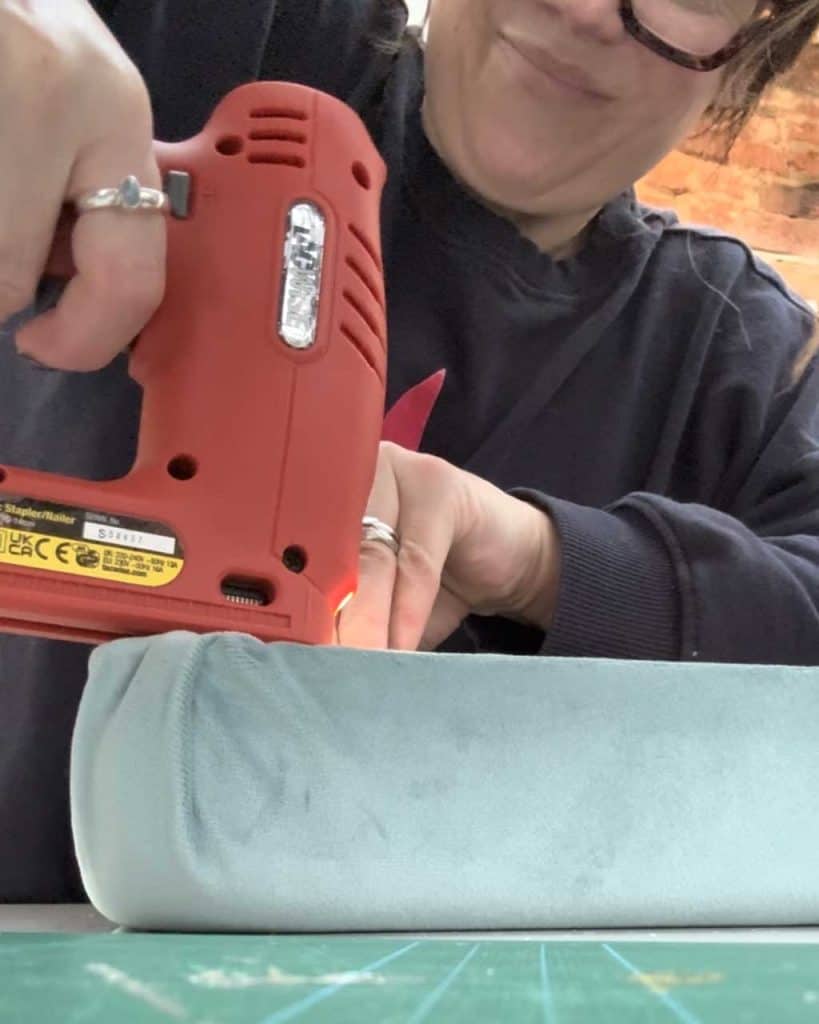
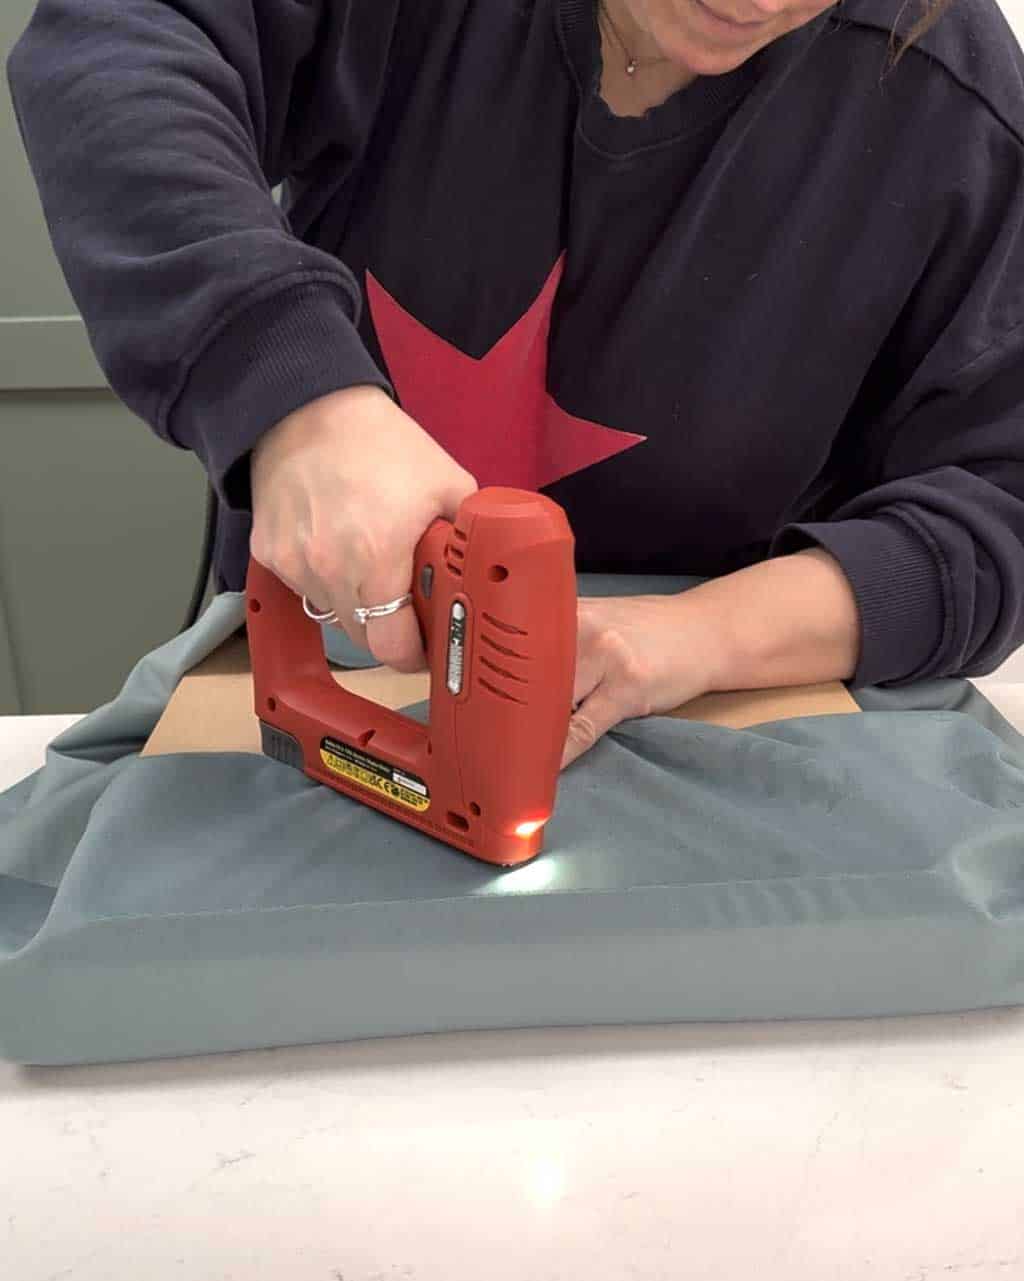
4. Pull one side of the fabric taut and staple it onto the MDF base. Make sure the staples are evenly placed and have gone in all the way into the MDF.

5. Next, pull the fabric to form the corners of your cushion. I just folded and gathered with one hand, then stapled with another.
I’m sure that real upholsterers would not do it like this — there’s probably a ‘proper’ way to do it — but this worked for me!
6. When the fabric is completely attached to the MDF and is secure, you can pop your new seat onto the chair frame.
Initally, I didn’t think my replacement seats would fit in the frames with the added fabric around the sides, but we gave the seat a tap on the corners with a rubber mallet to fix it into place.
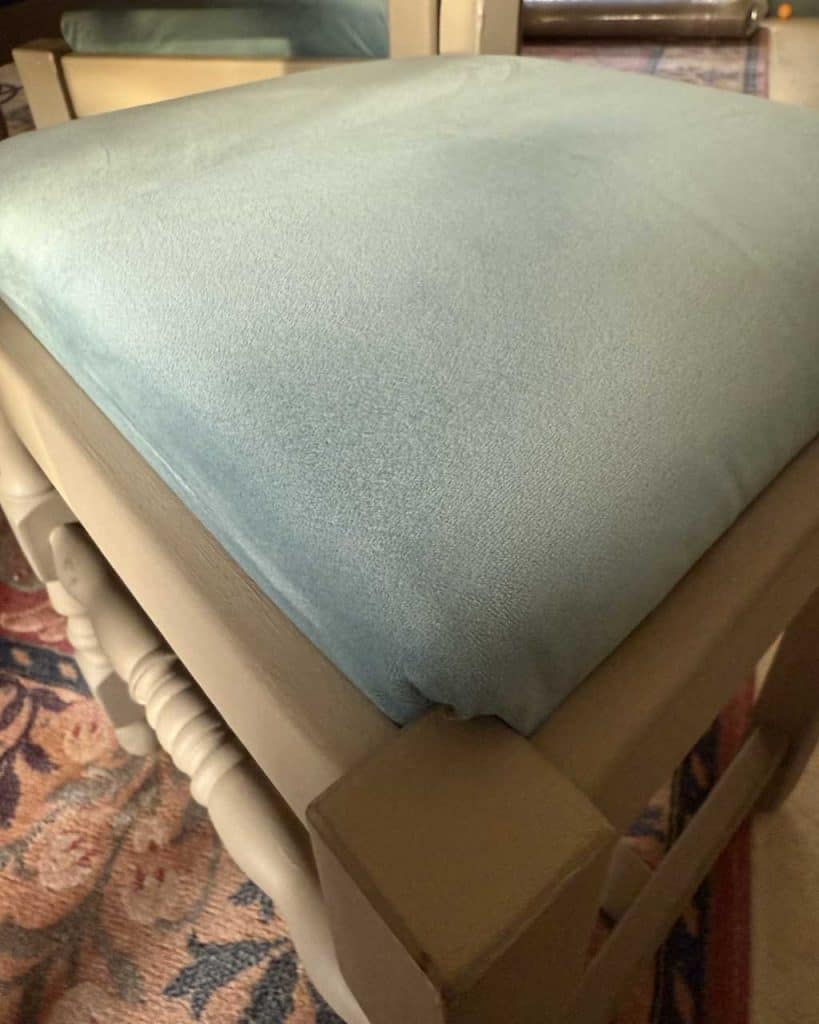


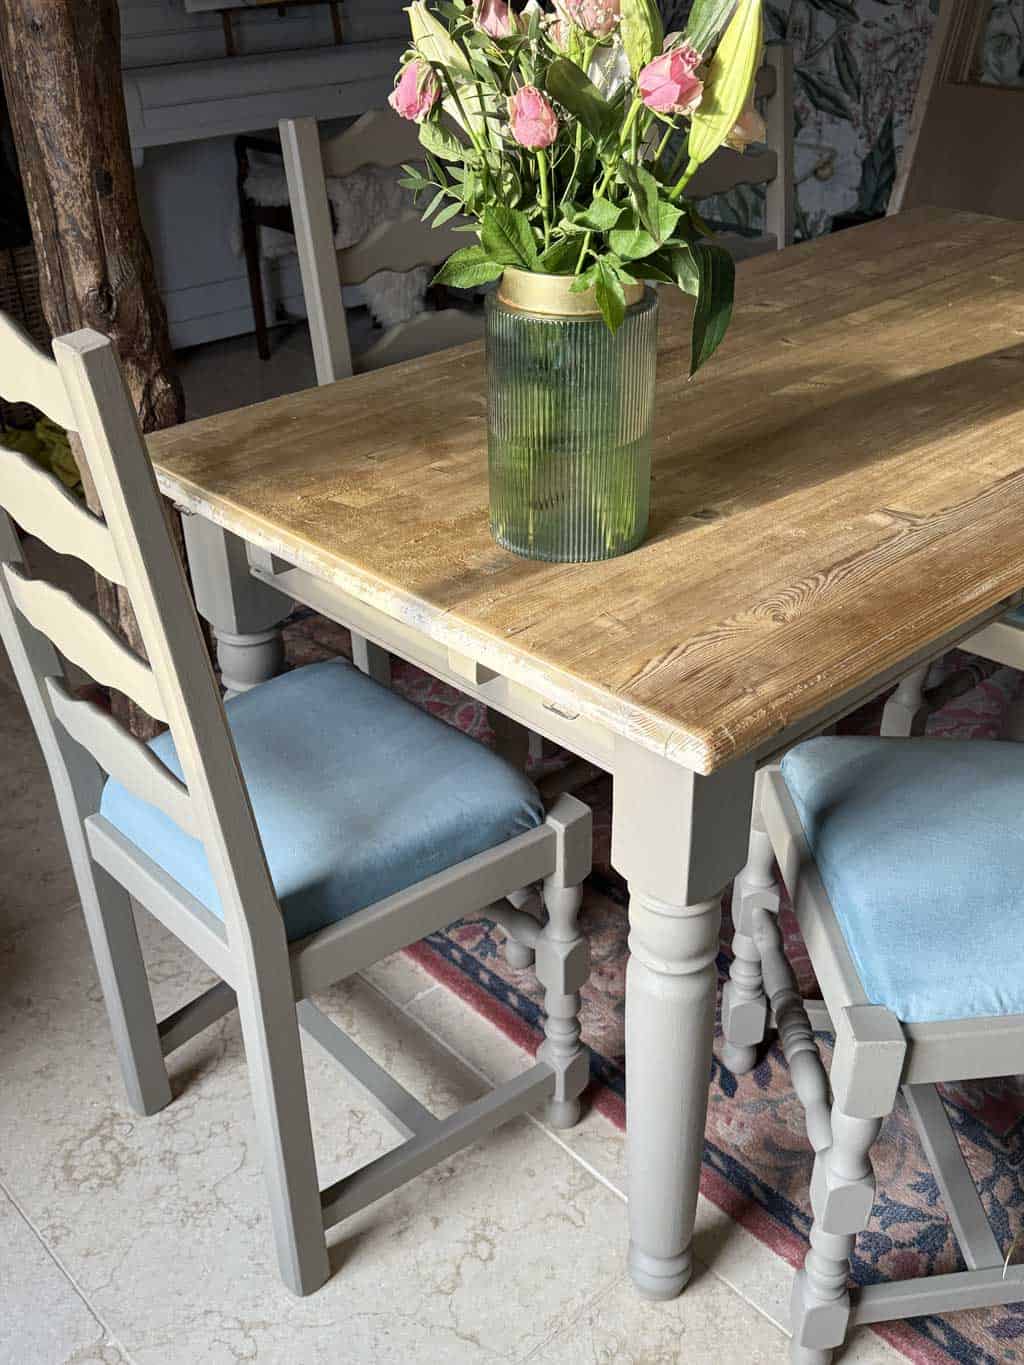
Et voila! That’s how I replaced our rush chair seats with upholstered seats.
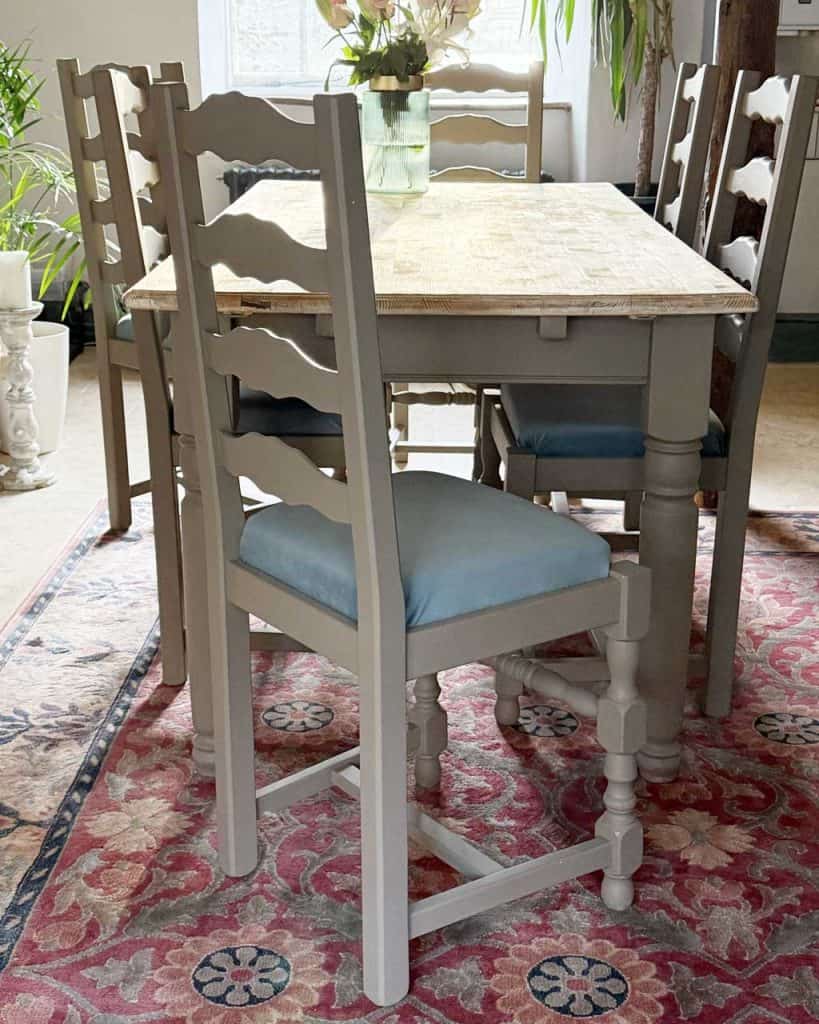
I’m so pleased with how they turned out!
The old rush seats looked so tatty. They had definitely seen better days but the chair frames were still so solid and sturdy. I’m so glad I upcycled them and gave them a new lease of life.
Best of all, they’re super comfy now.
If you’re thinking about replacing your rush chair seats with upholstery I highly reccomend giving it a go! But would also stress to use plywood — rather than MDF — unless you have a really heavy duty stapler.
DIY Upholstery Tutorial For Rush Chair Seat Replacement
How To Replace a Rush Chair Seat with Upholstery
This is how I replaced a rush chair seat with an upholstery alternative. I'm not an upholsterer — there's no sewing needed! You just need a good staple gun and a little bit of confidence!
Materials
- MDF or Plywood Seat Replacements
- Bonded Wadding
- 5cm Firm Upholstery Foam
- Upholstery Fabric
Tools
- Electric Staple Gun
- Staples
- Scissors
- Measuring Tape
- Pen
- Paper
Instructions
- 1. Remove the old rush seat and measure the aperture to create a template.
- Create your template. You can use Photoshop or Canva or create a simple, clear pen drawing. Upload this to Cut My. Their designers will create a template using your design. Your seat bases will be made using this. Select what material you want the seats to be made from and place your order. Simple as that!
- When the seat bases arrive, check that they fit in the chair frames snugly.
- Use one of your MDF rush chair seat replacements as a template to cut your foam to size. I used 5cm depth firm upholstery foam, from 'eFoam UK' cut to a width of 33cm and a length of 38cm, then I notched out the corners at the top of the foam, which is where the legs would be, using a serrated bread knife.

- Cover this with bonded wadding.

- Turn it over and place it on a piece of your fabric of choice. Then cut around the edge, leaving at least 10cm.

- Pull one side of the fabric taut and staple it onto the MDF or plywood base. Make sure the staples are evenly placed and have gone all the way into the MDF or plywood.
- Next, pull the fabric to form the corners of your cushion. I folded and gathered with one hand, then stapled with another.

- When the fabric is completely attached to the seat base and is secure, you can pop your new seat into the chair frame. Tap down the edges with a rubber mallet to ensure it fits the frame properly. Stand back and admire your handiwork
Save or Print This Rush Chair Seat Replacement DIY Tutorial For Later

Caro Davies is a former art-director turned writer and content-creator, and editor behind UK lifestyle blog The Listed Home. She writes about home-related topics, from interiors and DIY to food and craft. The Listed Home has been featured in various publications, including Ideal Home, Grazia, and Homes & Antiques magazines.

Thanks! Very helpful.
My pleasure! Glad you found it useful :)