I’ve been meaning to write this post for AGES. I’ve had so many messages from people over recent months, asking what I use for painting a caravan exterior.
So I thought I’d finally jot down my method; before another year passes by.
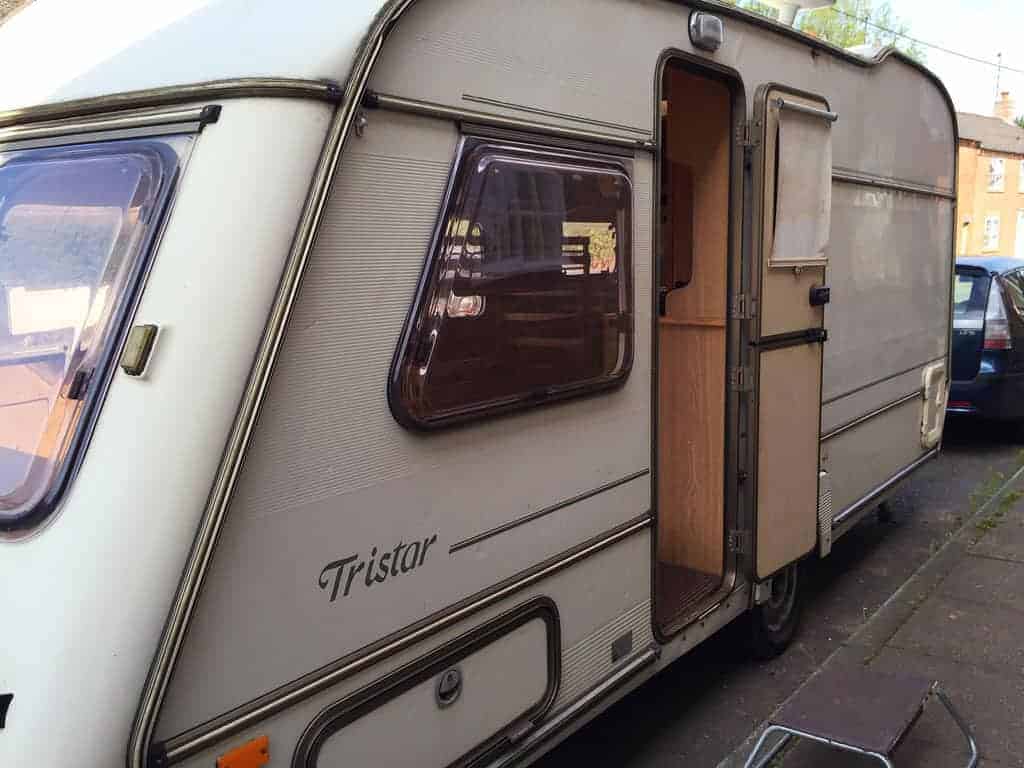
Caravan painting is nothing new — people have been doing it for years! These days, however, most vehicles are factory finished. So a caravan respray at home fills a lot of people with fear.
My first DIY caravan makeover post — Tips For Decorating a Caravan — concentrated on painting and wallpapering a caravan interior. So this next instalment concentrates on the outside! What caravan exterior paint to use etc…
Quick View of What You'll Find on This Page
Can I Paint The Outside Of a Caravan?
In a word yes!
When we were renovating Dolly 1, I did a little bit of research on paint suitable for caravan exterior. Seeking the advice from other caravan enthusiasts in particular.
Googling ‘can you paint a caravan’ led me to various forums. Where I learned that although standard gloss paint may seem like a good idea (and look good initially) I was warned that it may crack and peel over time.
The same can be said for any ‘standard’ exterior paint.
The surface of a caravan flexes and moves, so the paint you use needs to work with this.
What Paint do I Use for Outside of Caravan?
After speaking to various train, boat and motor enthusiasts, I decided to do as they all suggested. And use Tekaloid — or coach enamel paint.
I have written a whole post on what paint to use on the outside of a caravan. But in a nutshell this is it.
Apparently Tekaloid 318 is ‘a superior coach paint with excellent flow characteristics. It is particularly suitable for brush application but can be sprayed. It has excellent gloss and colour stability, a superb appearance and durability’.
Sounds great doesn’t it?
Also a bonus that you can get it mixed to any colour you choose.
I had a look online and found a fab company who sell coach paint (amongst other things), mixed to order.
You can imagine my joy when the little pots of Tekaloid paint arrived. In exactly the right shade of powder-blue that I’d picked from my Pantone book.
Definitely a case of easier said than done
When it came to painting with said coach enamel, all the promise of ‘excellent flow’ kind of fell flat.
Coach Enamel Paint
All the years that I’ve been using paint — everything from oils, enamel, gouache and watercolour — to emulsion, gloss, eggshell and chalkpaint — I have never come across anything that behaves quite like Tekaloid.
For a start, you can’t paint the middle then cut in the edges afterwards (or vice versa). If you do, you’re left with a really uneven texture; you can almost see the division between the different coats.
And if you paint in wind or sun, you get really odd strands of paint — almost like spun sugar — coming off your brush. It’s bizarre.
That said, it does give a lovely high gloss finish and it’s tough and flexible, so no cracking or peeling. Even after a few years — that I can vouch for.
So would I use it again?
Yes.
And I did!
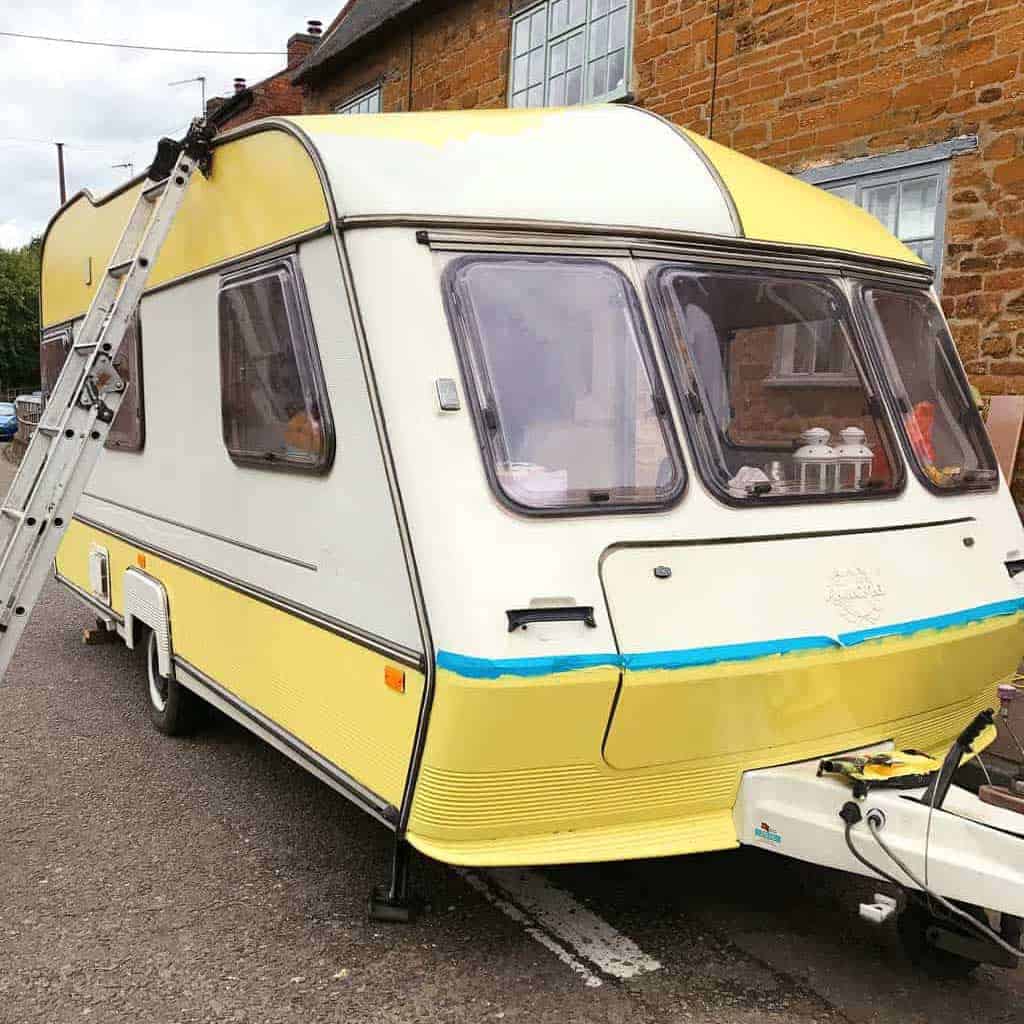
When we bought Dolly 2, I decided that I’d use the same coach enamel paint. But — using the knowledge that I’d gleaned from Dolly 1’s makeover — a different method to apply it.
With Dolly 1, I’d used a brush for the edges and filled the middle in with a roller.
I was left with (what I thought was) a very visible paint line around the edge. The paint layers didn’t merge at all, they literally just sat on top of each other.
So with Dolly 2, it was all about the prep.
This is what I did.
Method For Painting a Caravan Exterior
How To Paint a Caravan Exterior
Instructions
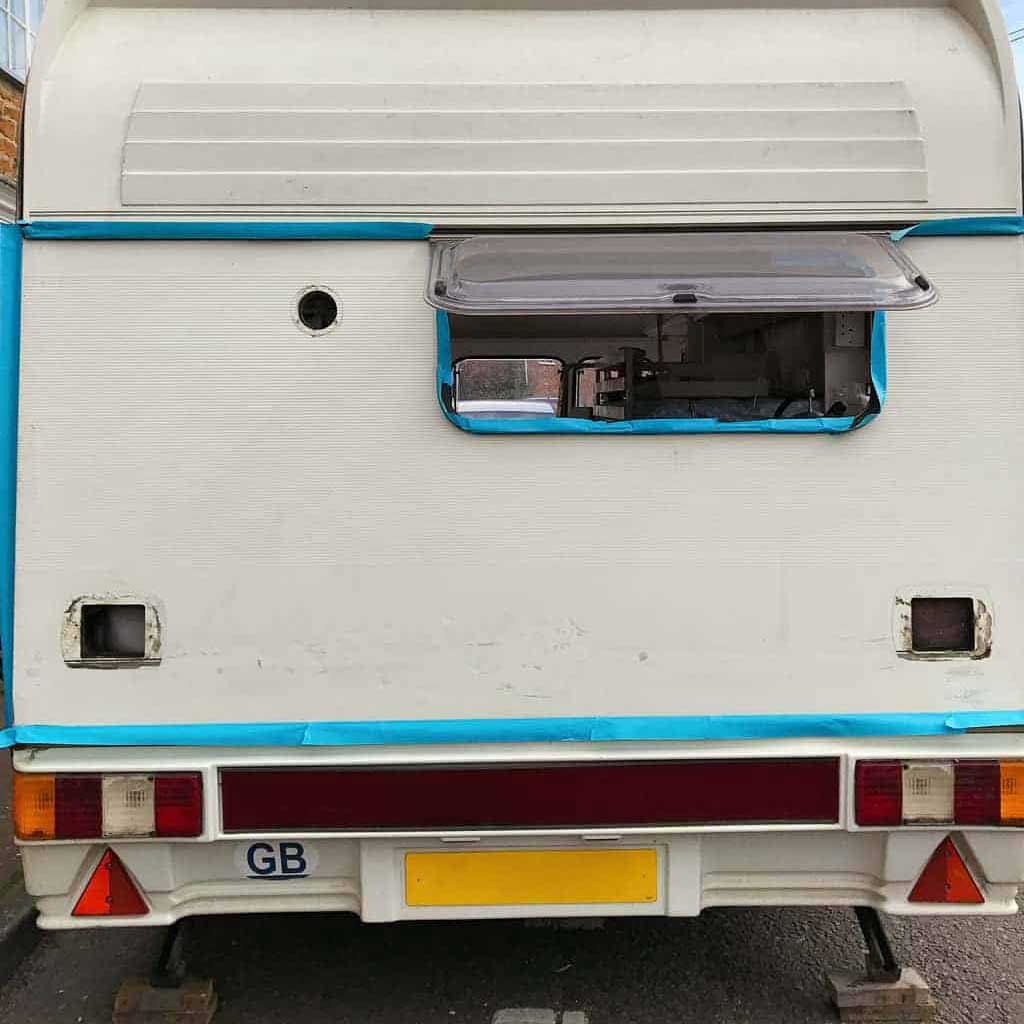
- Give the paintwork a good wash, using sugar soap, to get as much grime and grease off as possible., then give the surface a really, really light sand (medium grade sandpaper) to the surface of the areas you wish to paint.

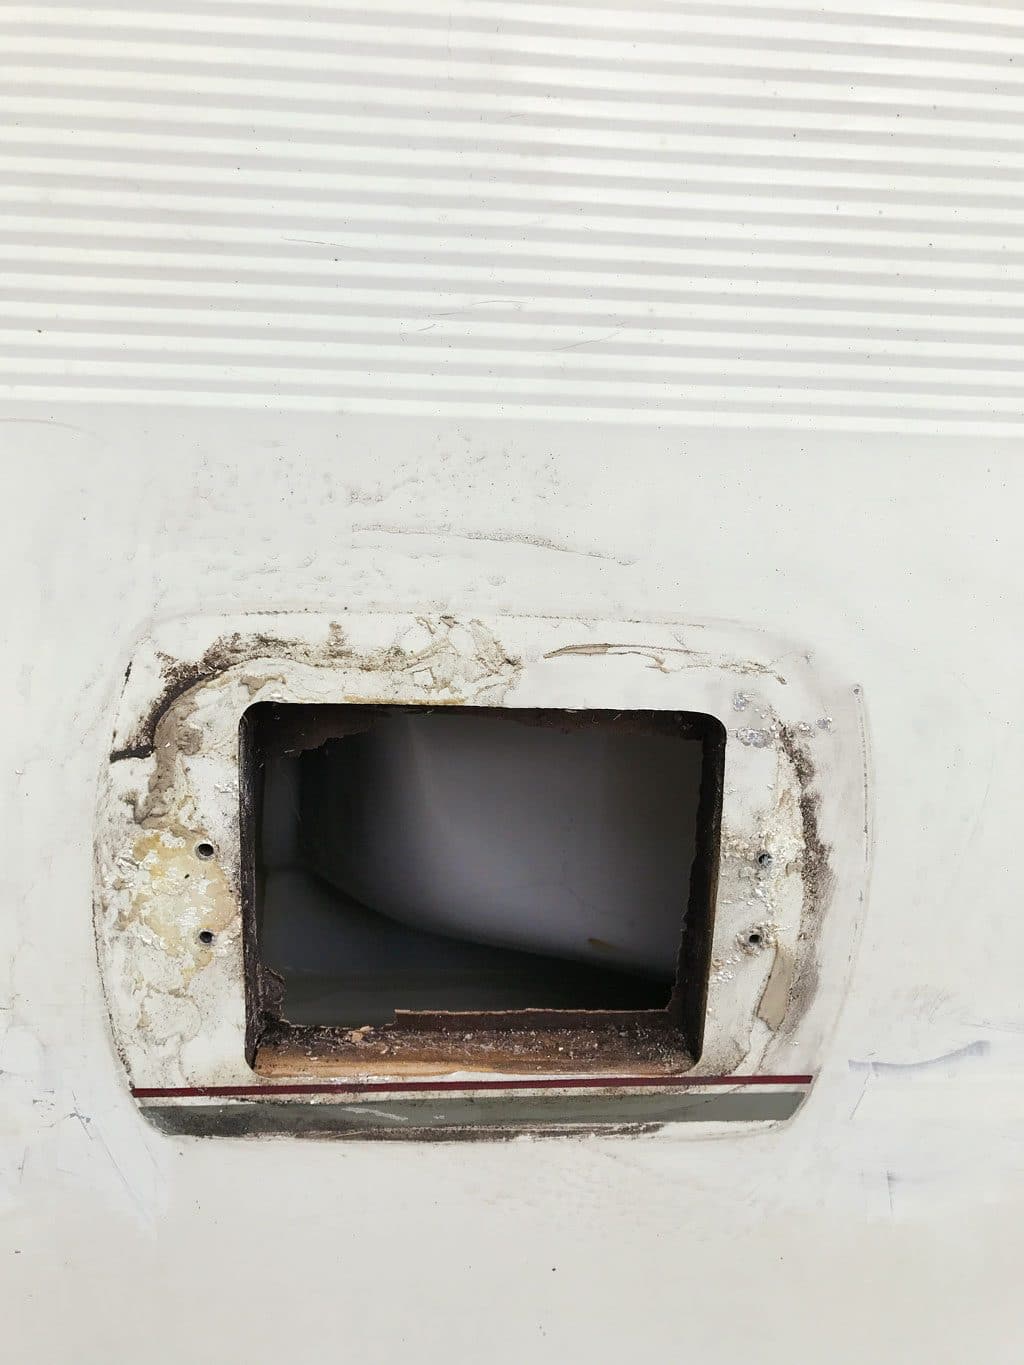
- Remove vent covers, handles — and any other bits and pieces that can be removed. You can spray these separately.

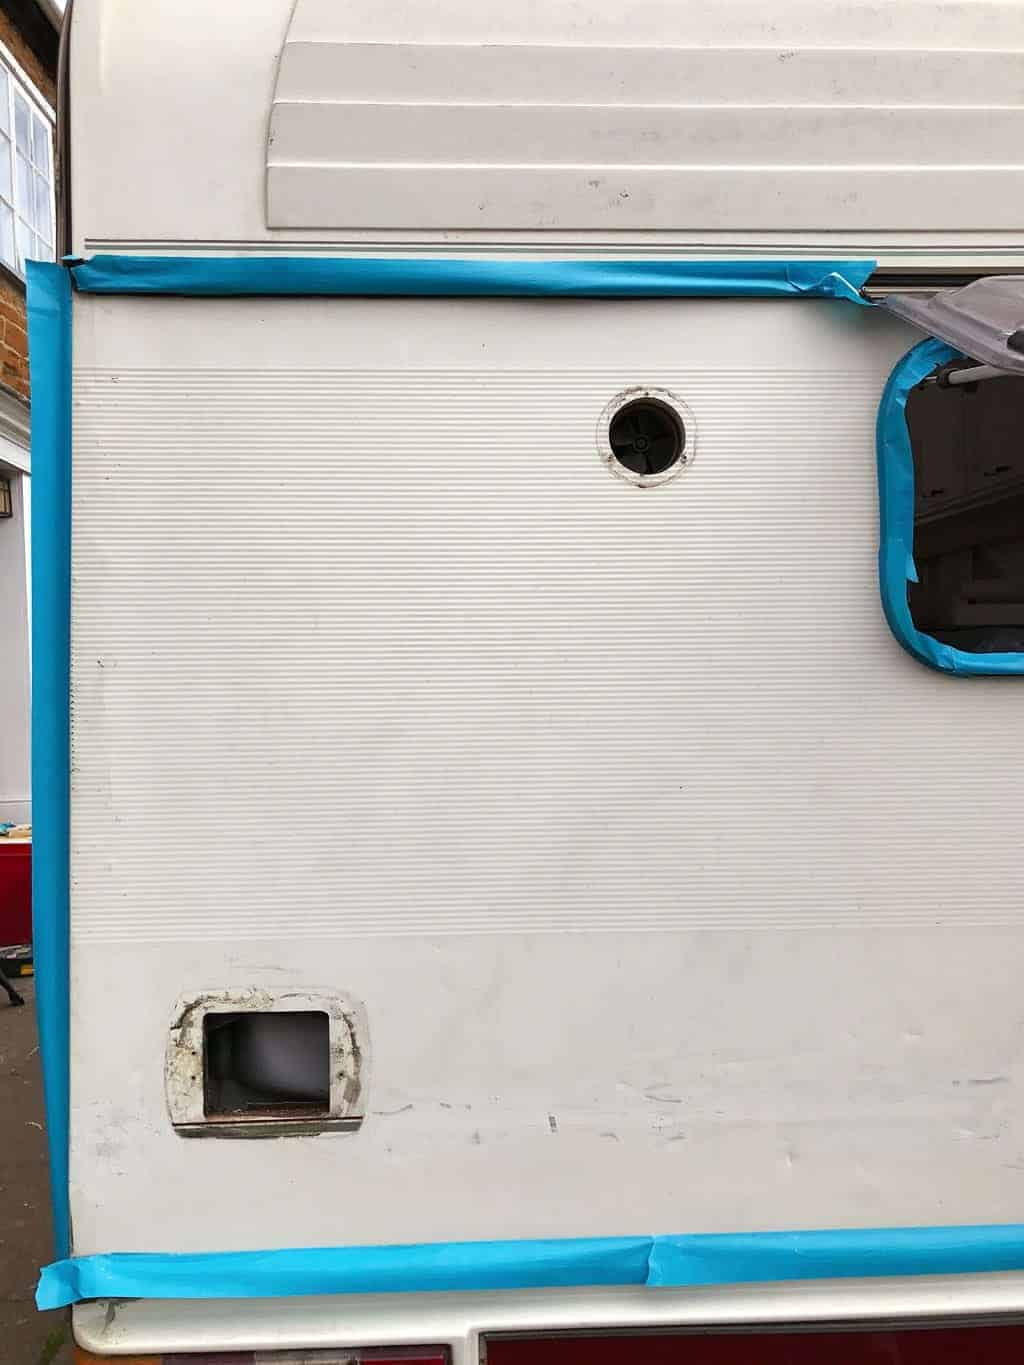
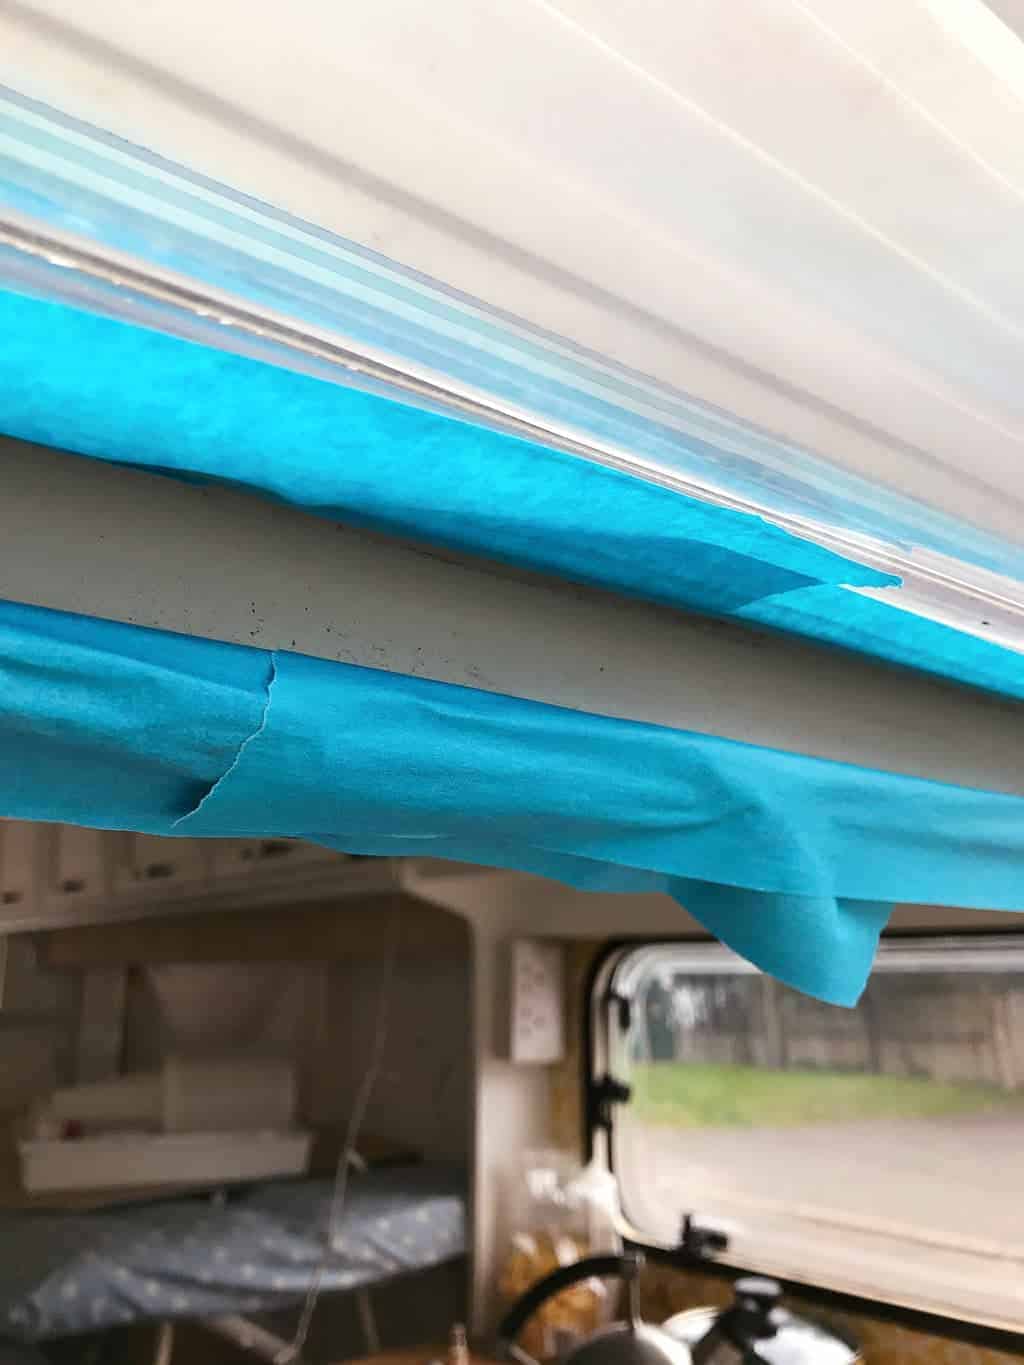
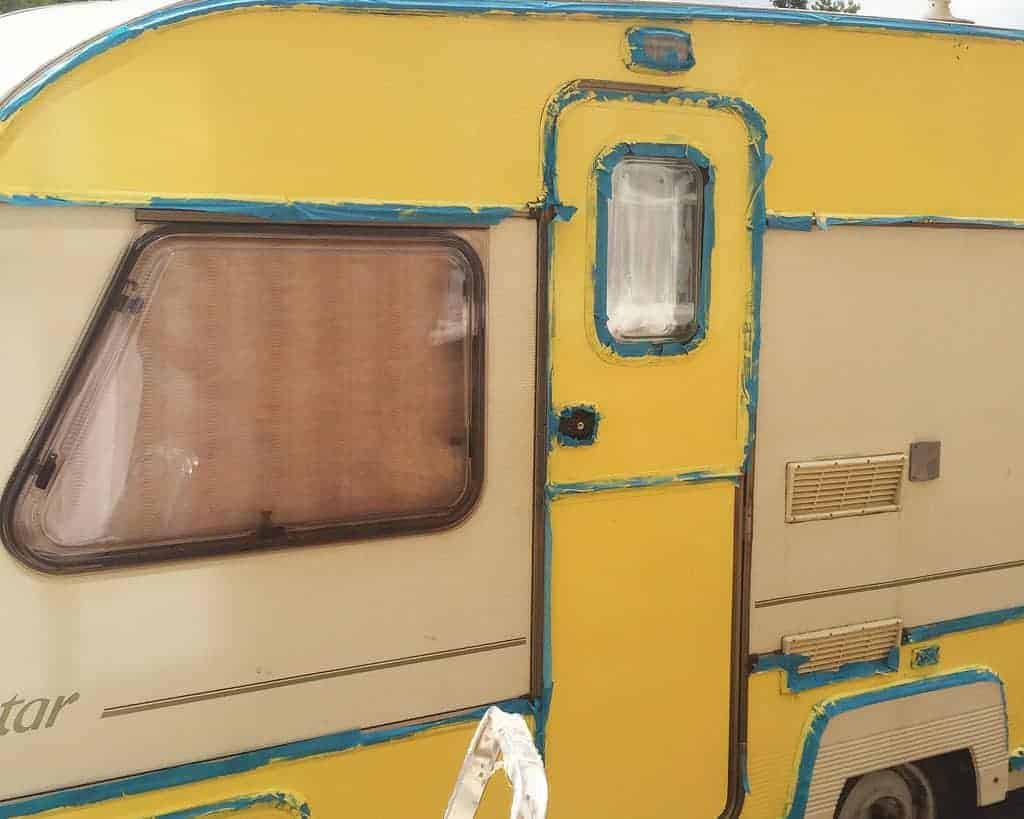
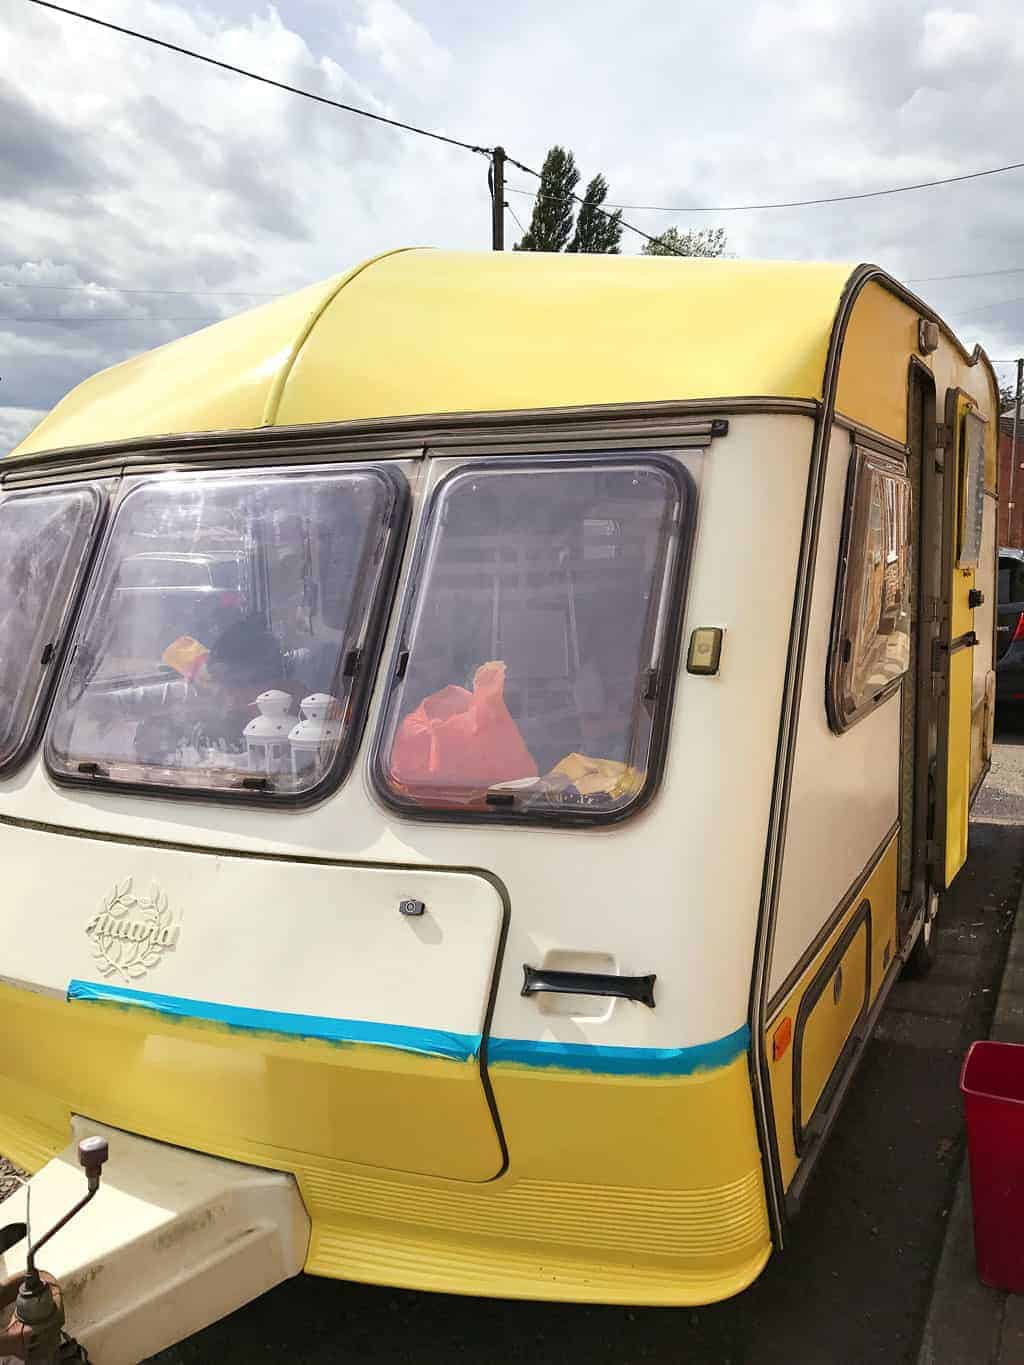
- Mask off the edges of any areas that you don't want to paint with automotive masking tape.
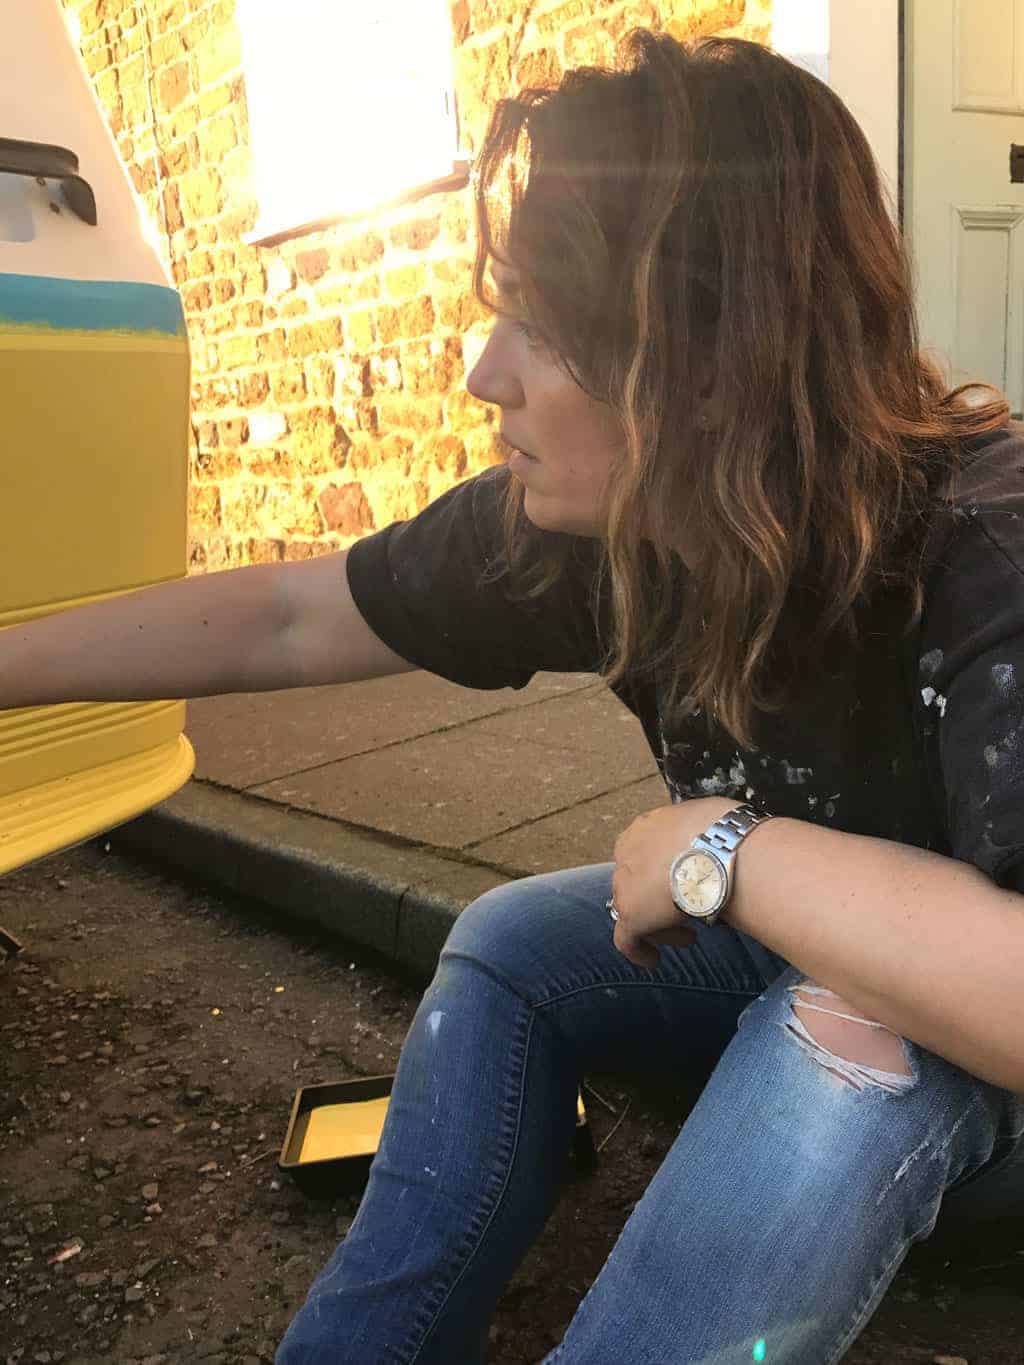
- Once all the edges are masked off, begin painting the outside of the caravan with your coach paint. I used a mini gloss roller.

- I let the paint cure for a full 24 hours before painting a second coat. If I'd had more time, I think I would have left it even longer between coats. We don't have a garage — or covered space — large enough to fit Dolly though, so painting took place over a dry bank holiday weekend.
- Remove the masking tape then stand back and enjoy your handiwork.
Notes
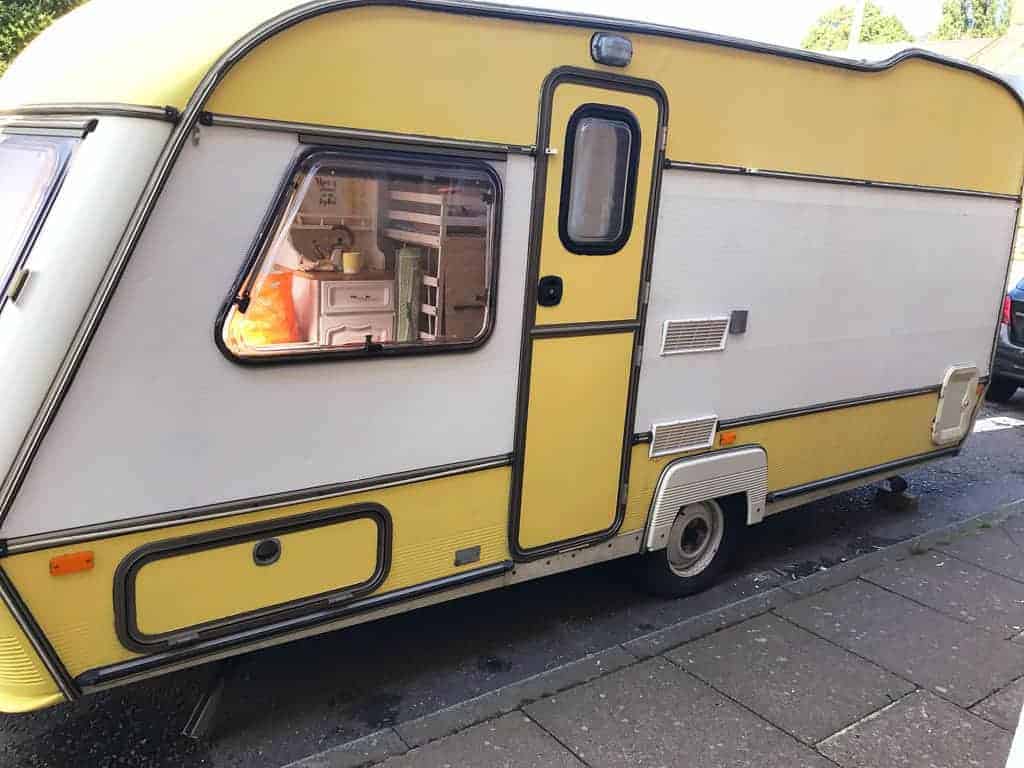
Hand-painted coach paint is never going to give the same modern, professional finish as vehicle spray paint; but for a vintage caravan look — which I wanted for my caravans — hand painted coach enamel is, by far, the best option
Granted, it's not going to be totally perfect and without it's defects, but that's how people used to paint caravans in years gone by, and the flaws and imperfections are part of the charm.
Automotive Masking Tape
Just a quick mention about investing in automotive masking tape.
This stuff is BRILLIANT. It’s really flexible, low tack and gives a lovely clean, crisp edge, when you peel it back after painting.
It’s absolutely key to use this — rather than standard decorator’s masking tape.
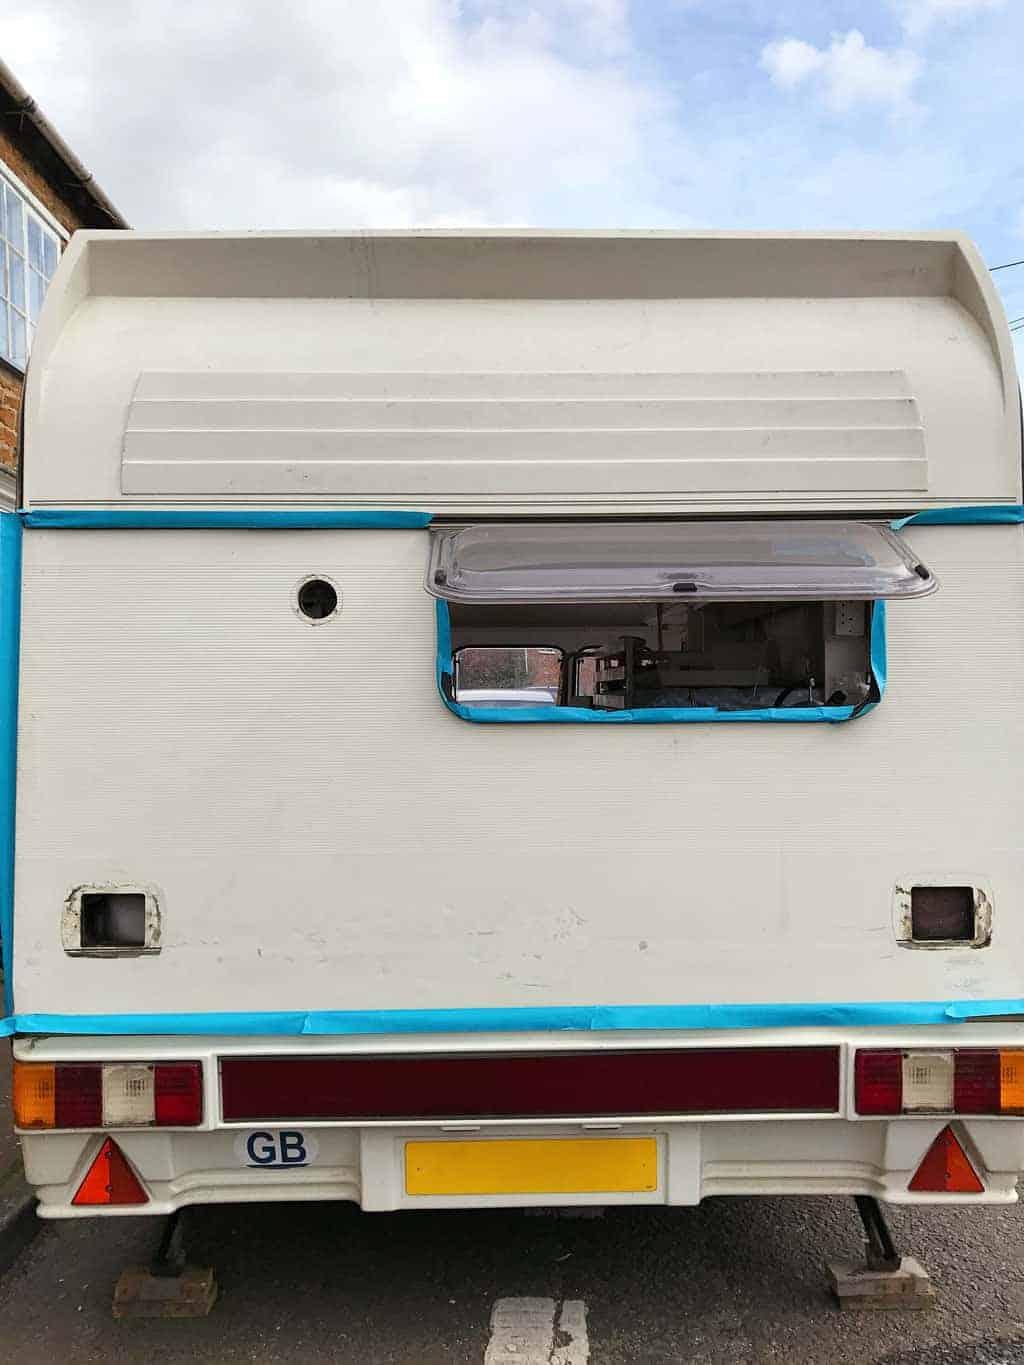
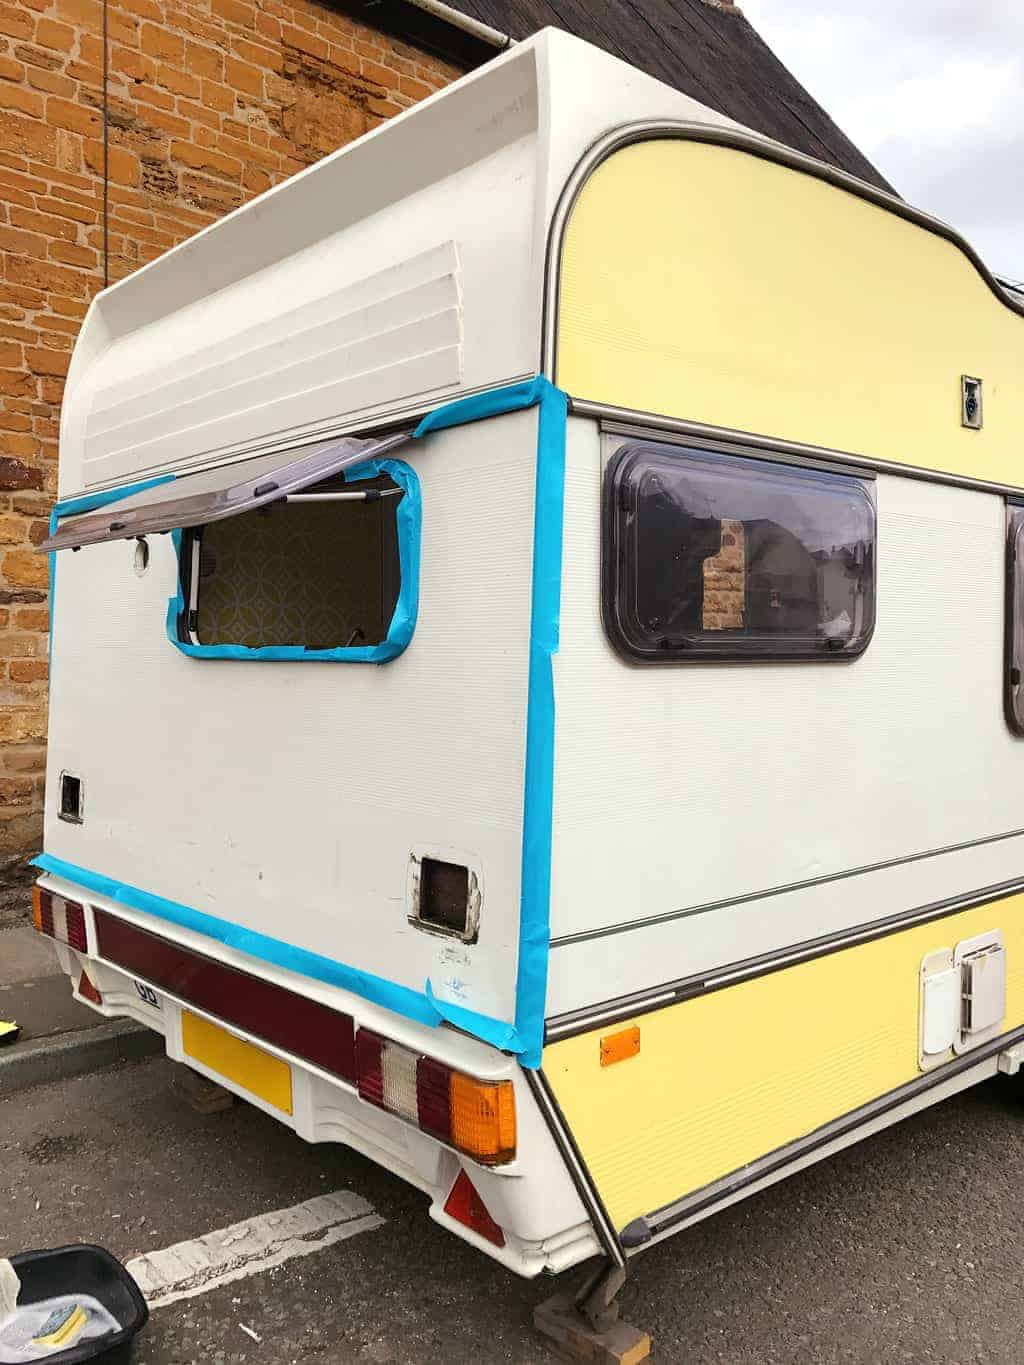
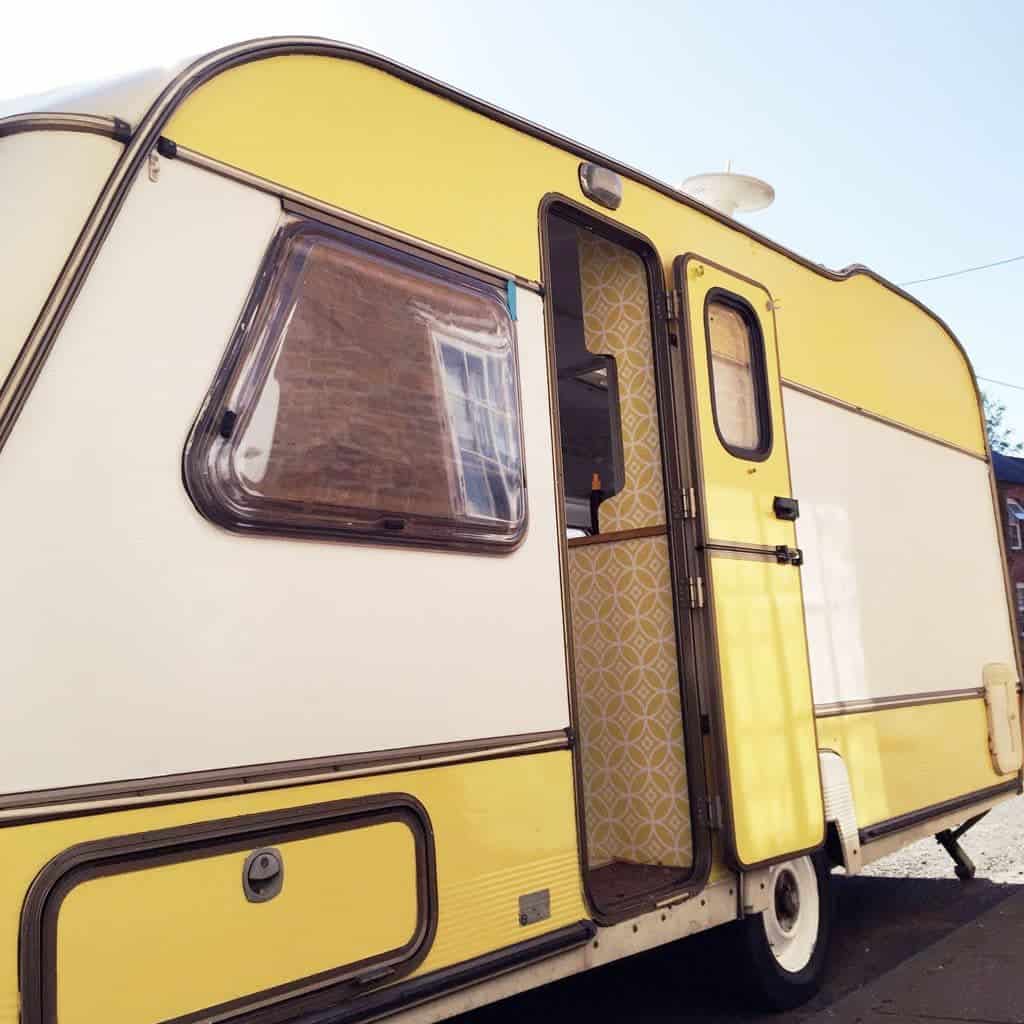
After Masking
Once all the edges were masked off, I began painting the outside of the caravan with the Tekaloid coach paint.
I used a mini gloss roller (make sure you definitely use the foam gloss kind, not the hairy emulsion ones!!) to fill in between where I’d masked, stroking over the joins with a soft decorators paintbrush to get a lovely even finish.
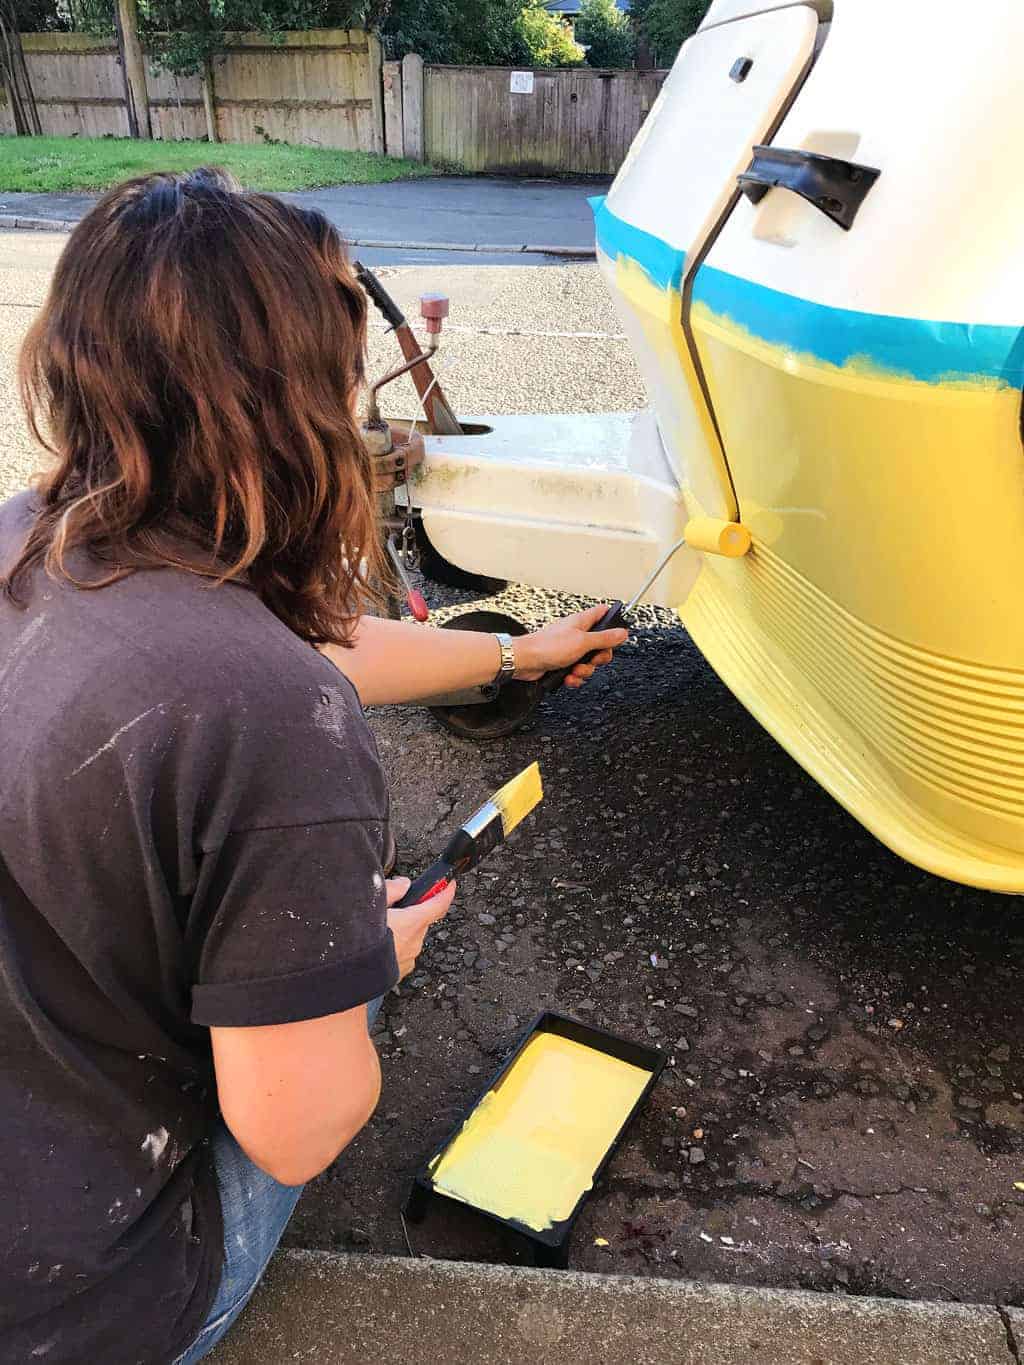
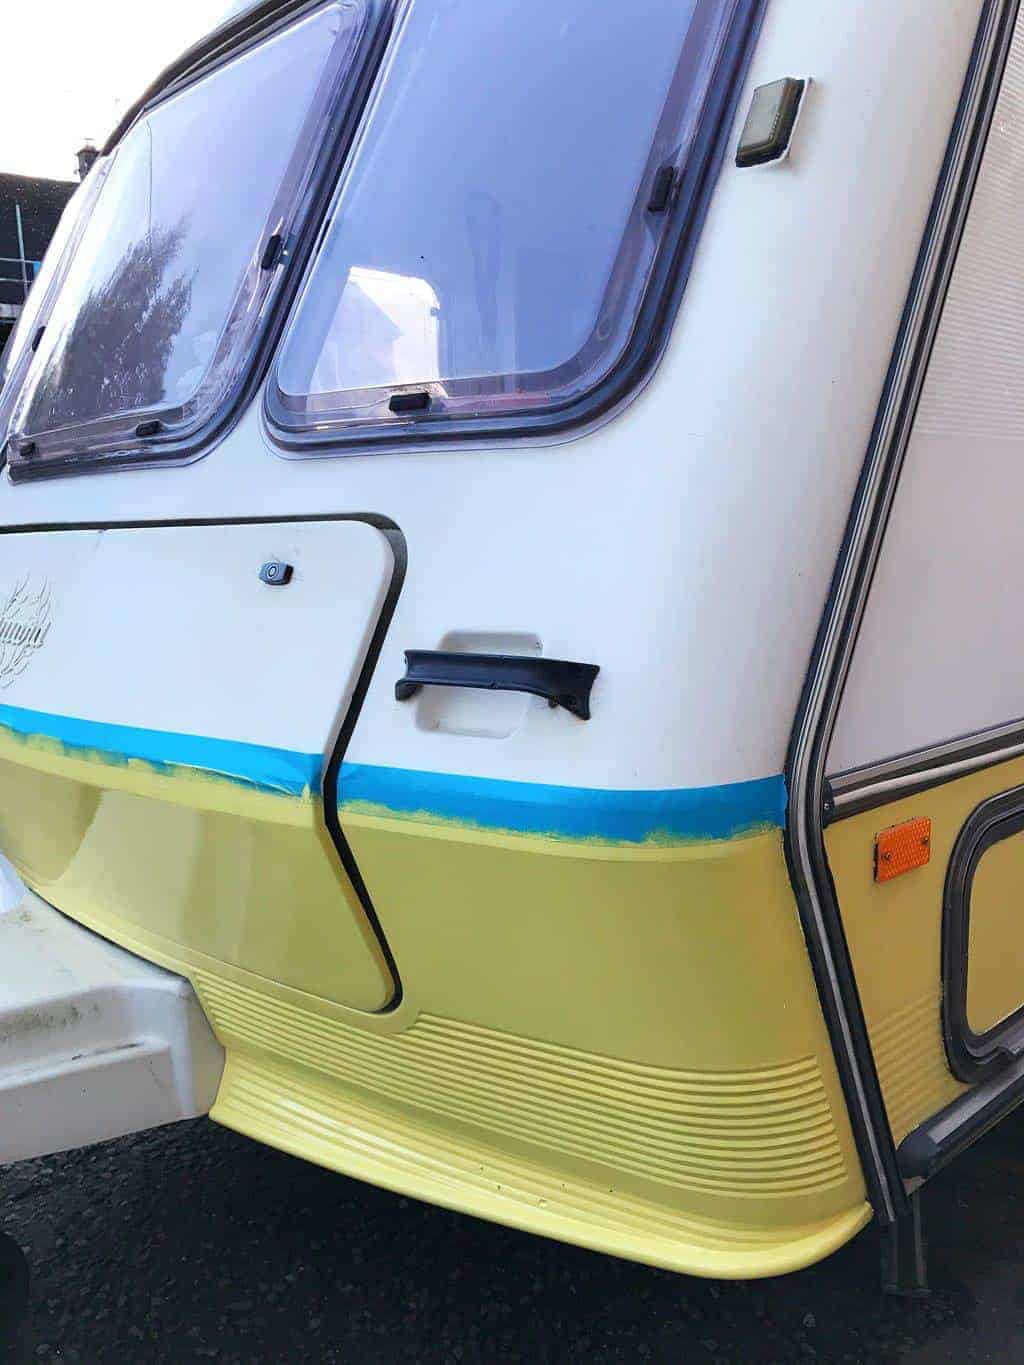
This worked SO much better than trying to paint the middles and cut in the edges separately!!!
Hand-painted coach paint is never going to give the same modern, professional finish as vehicle spray paint; but for a vintage caravan look — which I wanted for Dolly 1 and Dolly 2 — hand painted coach enamel is, by far, the best option.


If you’re painting the exterior of your caravan outside, make sure that the weather is going to play ball! It’s imperative it’s a dry day and doesn’t rain — you definitely don’t want water marks on your new paintwork!
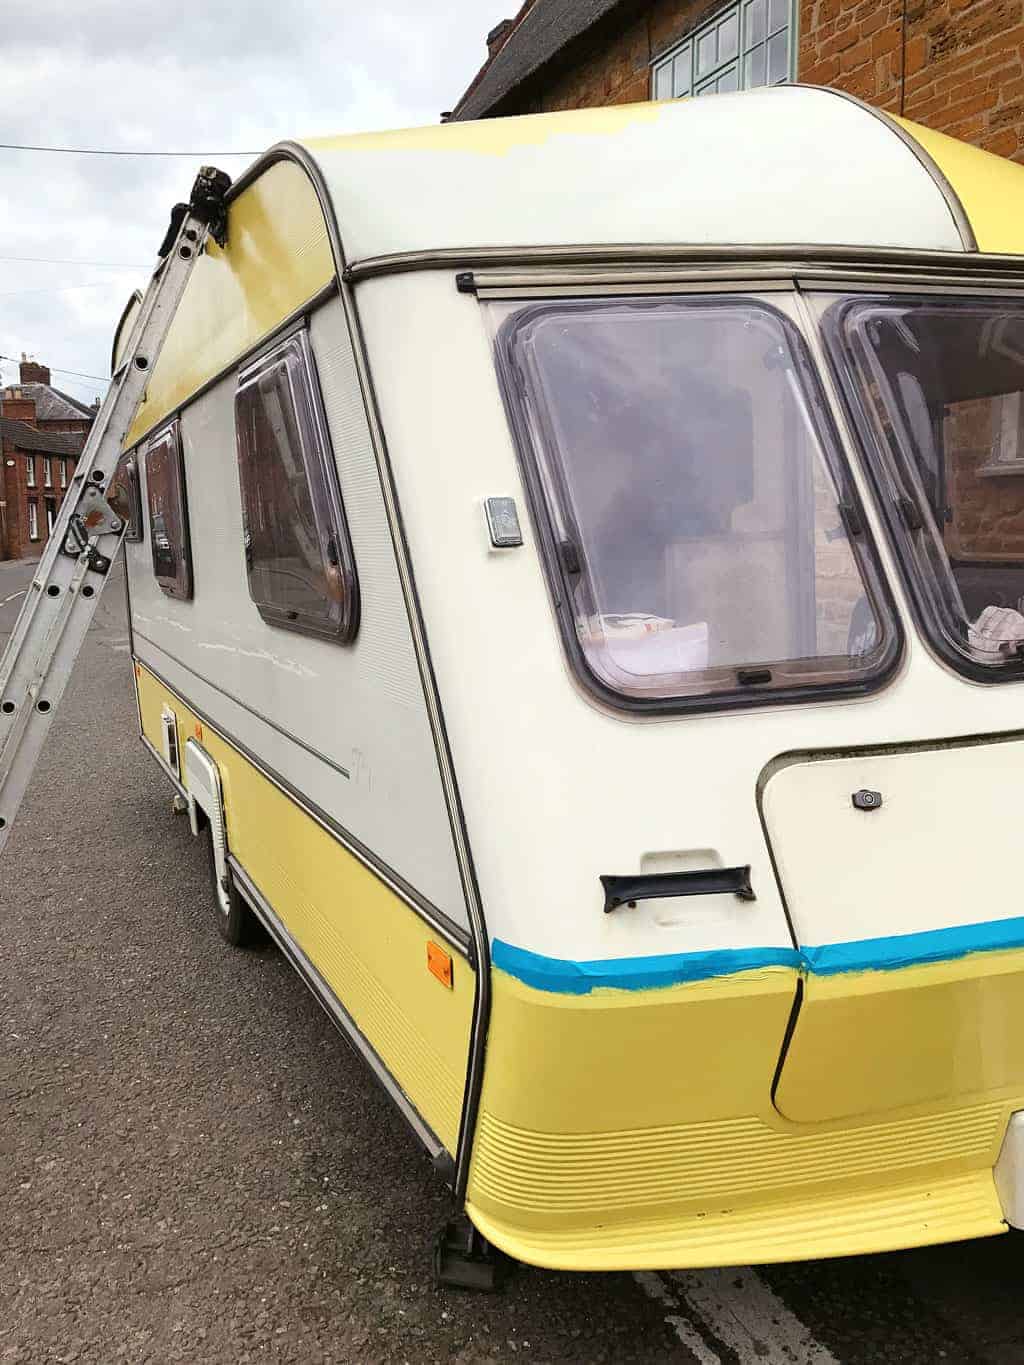
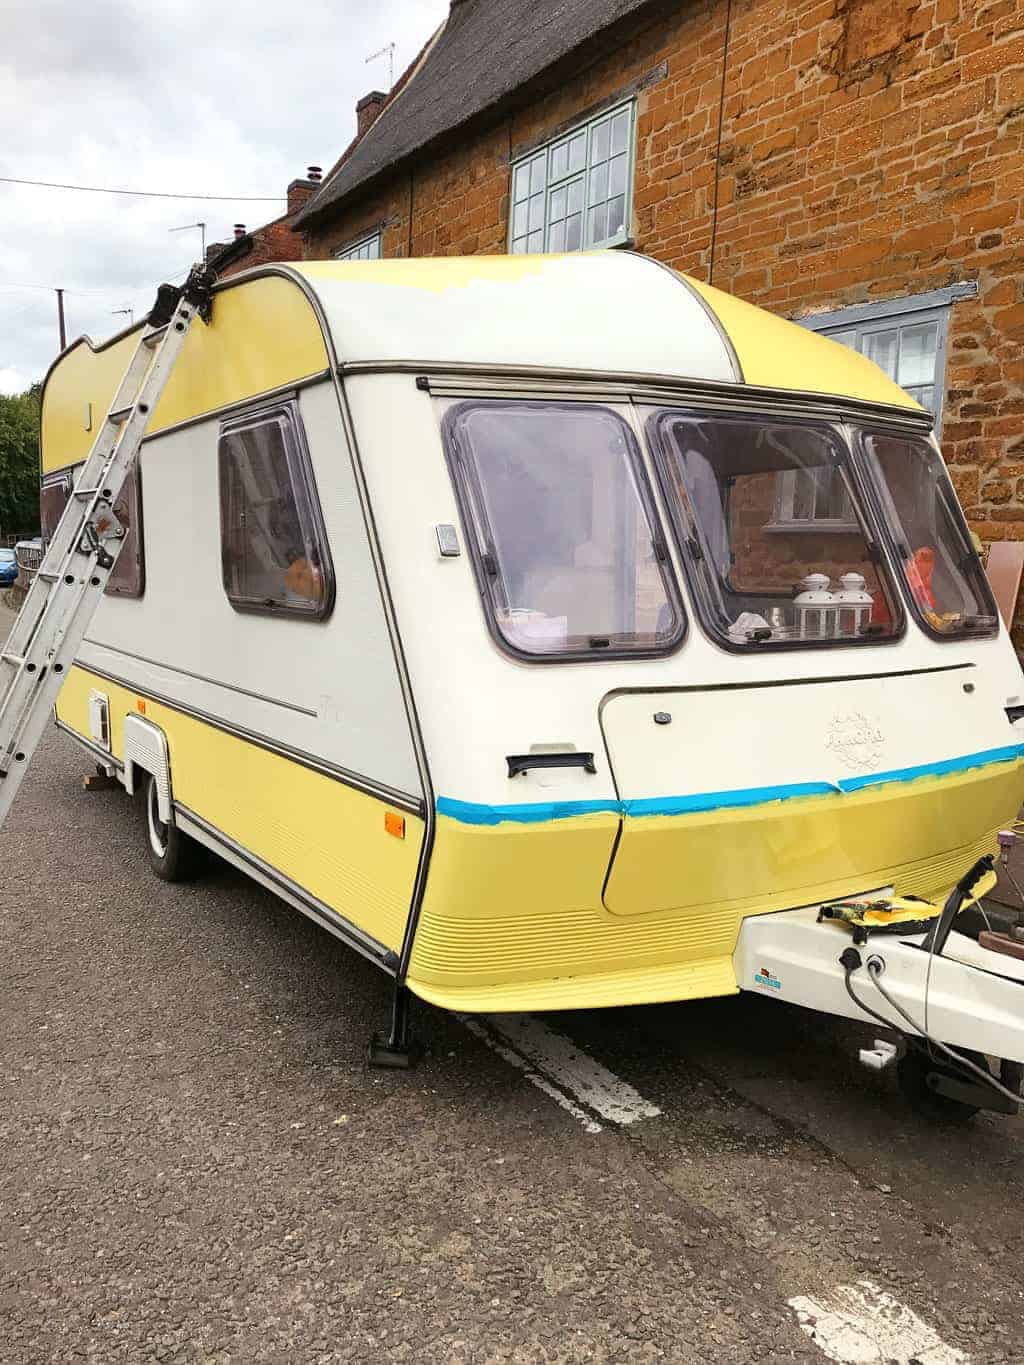
I waited a couple of weeks before painting the white section.
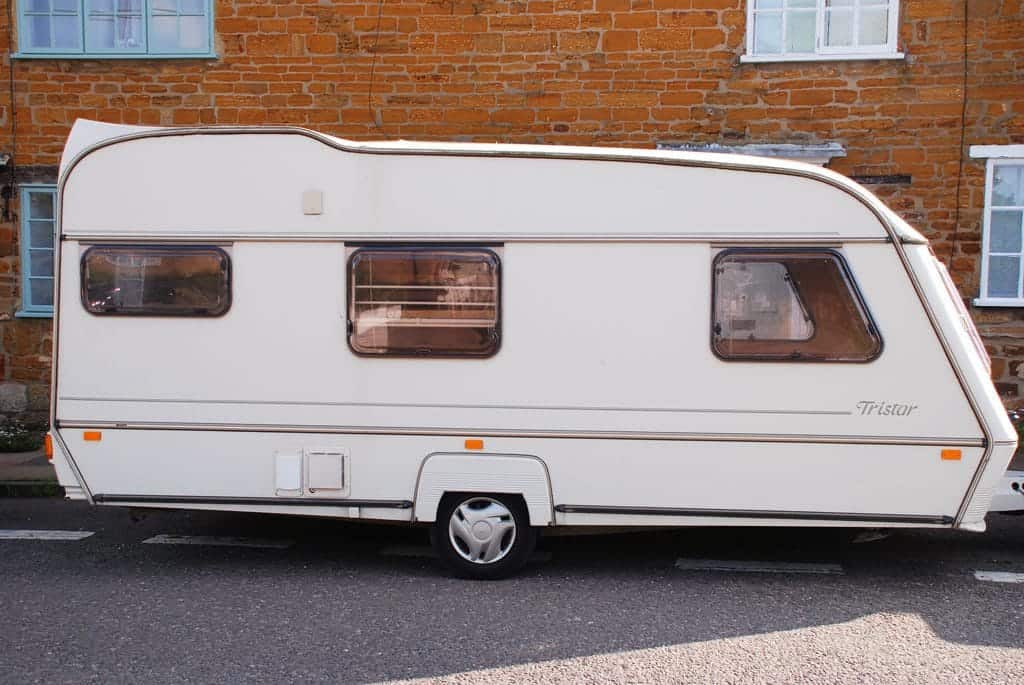
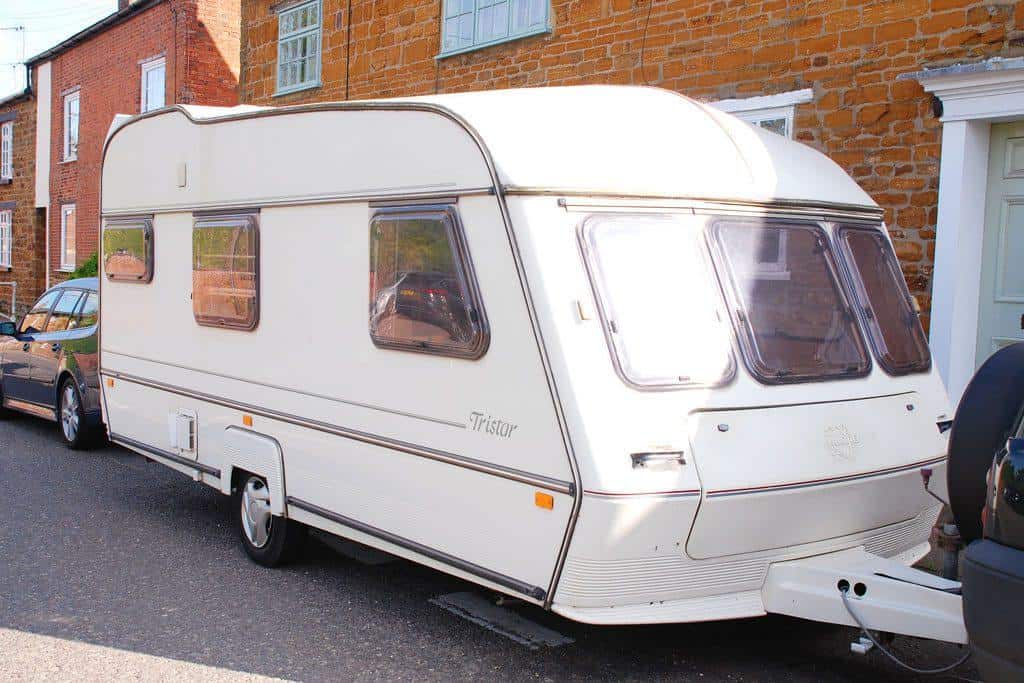
I used a window scraper to remove the Tristar decals and ‘go faster’ stripes, and followed the same procedure as above; sanding the area, before masking it off and painting the areas with a gloss roller.
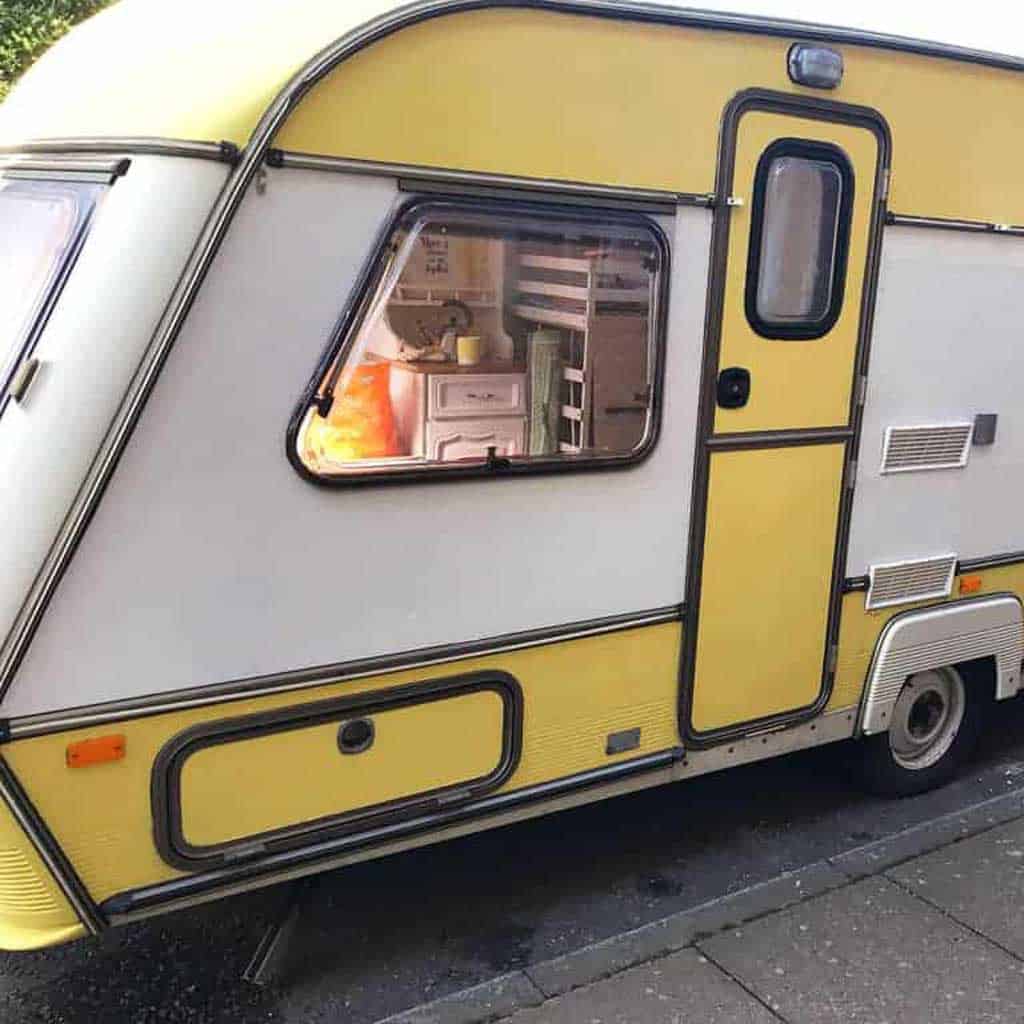
You could potentially leave any white bodywork, but I loved how much fresher the overall look was after a lick of white Tekaloid paint.
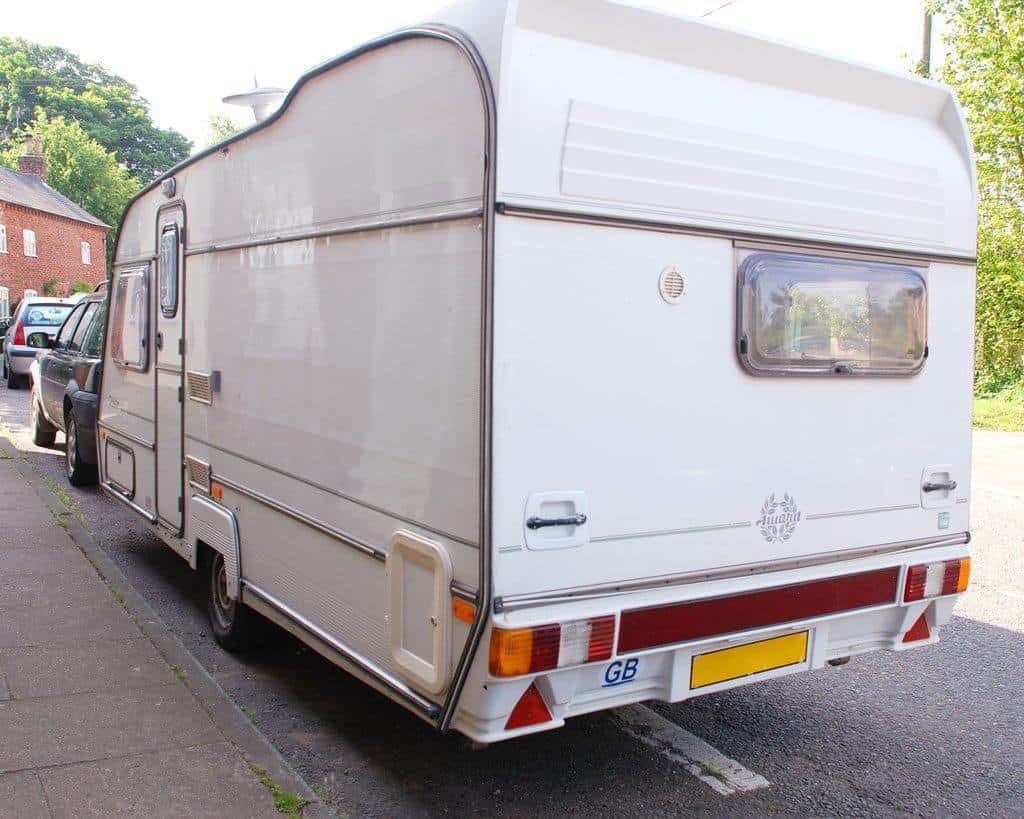
Touring Caravan Paint
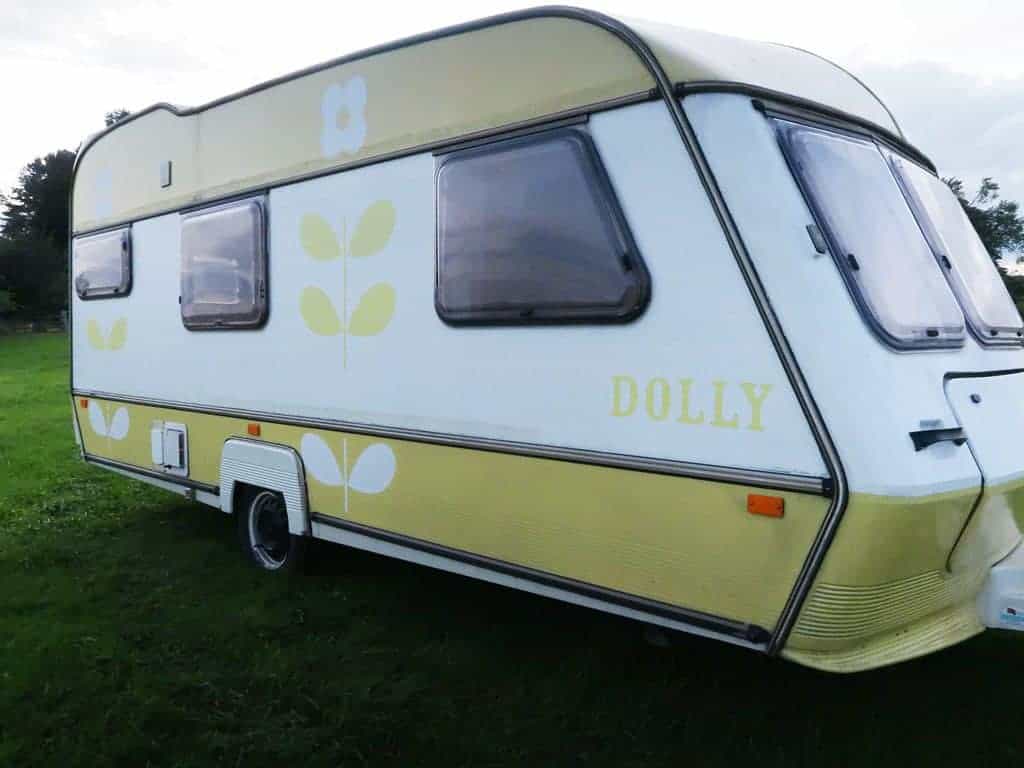
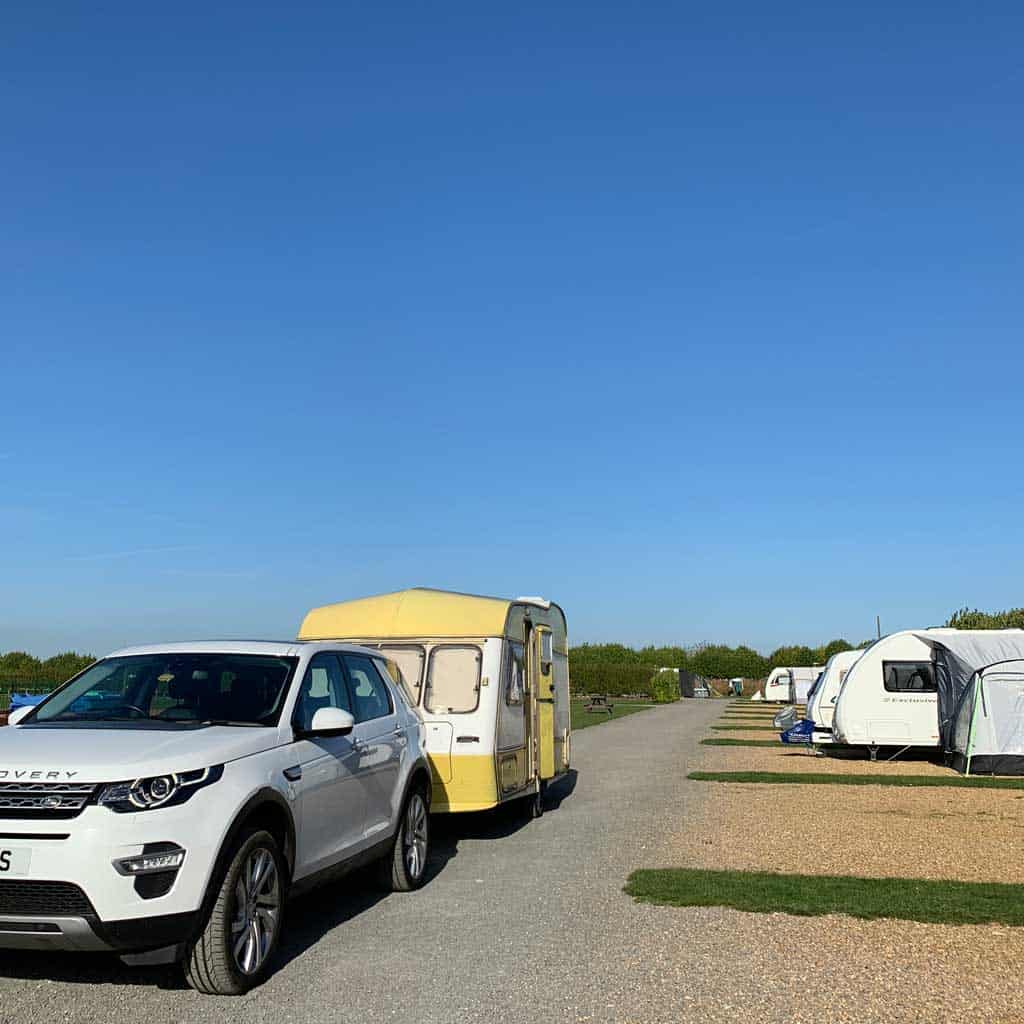
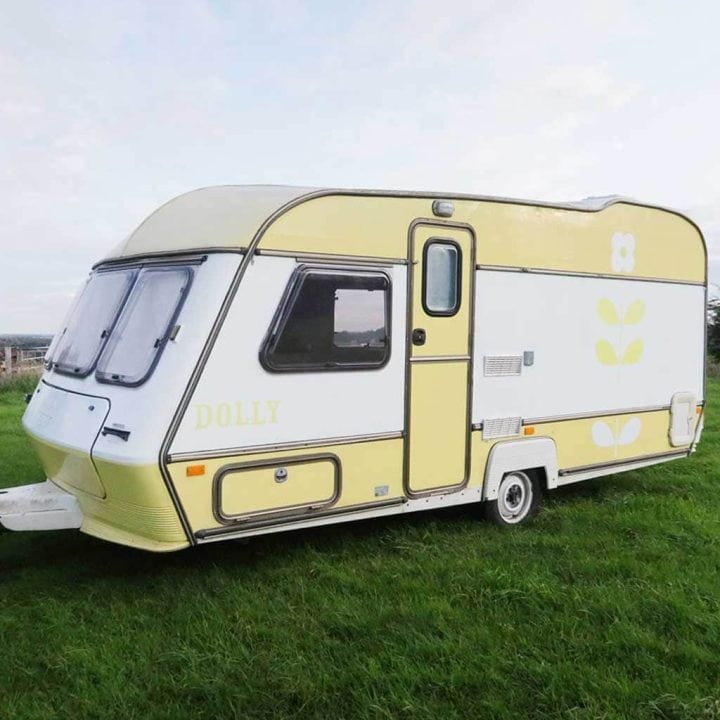
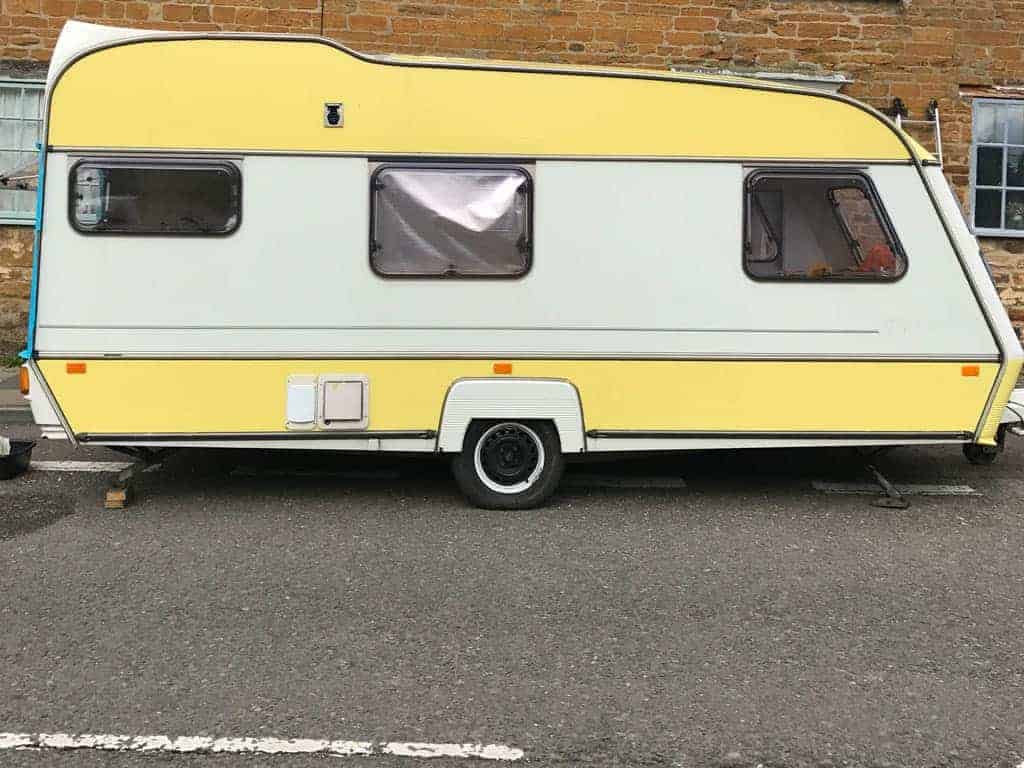
Whilst a sunny yellow painted touring caravan may not be everyone’s cuppa, it’s definitely ours!
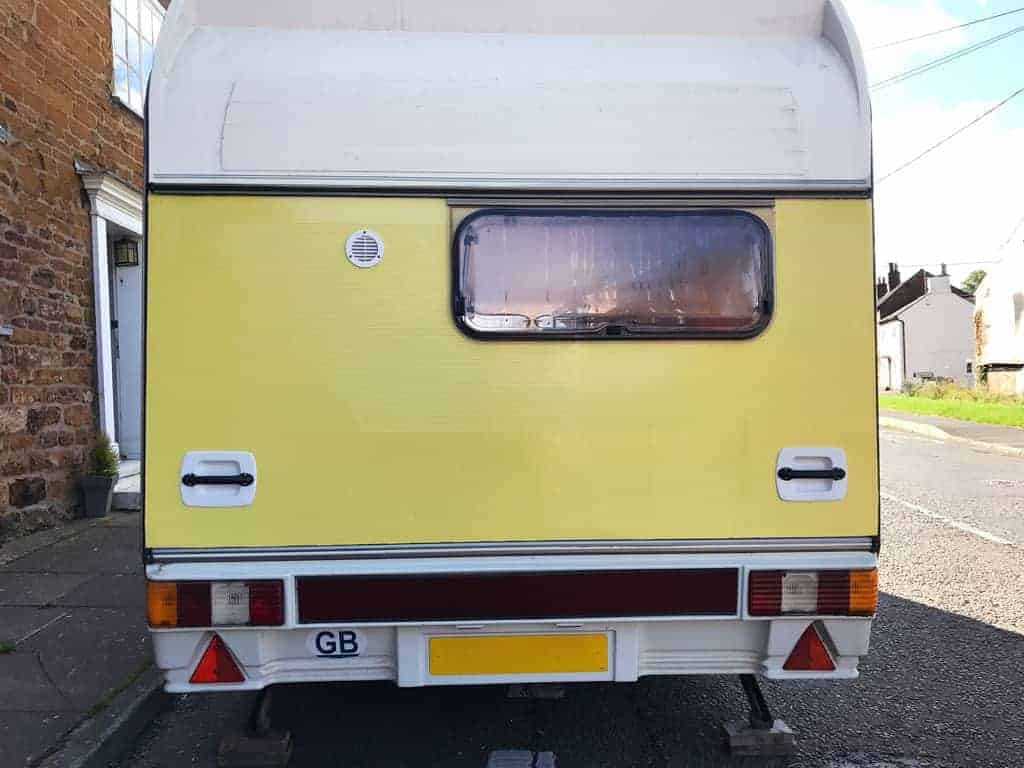
But — even before I painted Dolly 2 — we’d agreed that the caravan makeover wasn’t going to stop at just the paintwork.
I had designed some vinyl decals and the next stage was to find a company to make them. But more on that in another post.
For now, this was a good start.
Roller Painted Van By Hand — or Professional Caravan Respray?
Just to reiterate, hand painting a caravan is never going to be a match for spray-paint; if you want an unblemished, modern paint finish (similar to that of current day vehicles) get it done professionally.
But if you’re wanting to renovate a vintage caravan — or give your ugly old caravan a new look, coach paint is a brilliant option.
Both our caravans were in a pretty sorry state when we first bought them; and it was never my intention to spend lots of money on renovating them.
But I did want to give them a little makeover; and give them the look and feel of a vintage caravan. I’m so glad I didn’t go down the route of painting the caravans with exterior gloss. I’ve spoken to so many people who’ve done this and said that it’s cracked over time and has ended up looking really awful.
Tekaloid — or coach paint — has been designed for this job; it’s what people have used for donkey’s years. The difference these days is, you can get it in literally every colour under the sun.
It’s definitely a tricky paint to work with; however, it gives a brilliantly, shiny finish that protects the van and will last for years and years.
Pin or Save This Method For Painting a Caravan Exterior For Later


Caro Davies is a former art-director turned writer and content-creator, and editor behind UK lifestyle blog The Listed Home. She writes about home-related topics, from interiors and DIY to food and craft. The Listed Home has been featured in various publications, including Ideal Home, Grazia, and Homes & Antiques magazines.

Hello. I Am hoping to paint a design on my good condition caravan. Don’t want the design to peel or crack…do I need to draw, rub down and then paint? Or can I buy vinyl, paint that and stick it on, so it can be removed if needed? Any ideas?
As your van is in good condition, if it were mine, I’d be inclined to create the design, scan it and have it printed on clear vinyl. Thats just what I did with Dolly 1’s name decal :) It was too complicated a design to use a simple vinyl decal, so the company I used printed my design on to clear and they die-cut around the shape.
Hi,
This has been really helpful, thanks, and your ‘vans look fantastic! I’d like to ask did you sand between coats? :)
Hi Gill! Thank you — no, I didn’t. I just painted a second coat.
Just curious why you chose not to spray the tekaloid?
We don’t have a driveway. Or the facilites to spray the van. I do have a paintbrush and roller though — and can use those without getting it all over the highway! :)
Hello there,
Nice job! Very inspiring:)
What kind of volume of tekaloid paint did you get through?
Also, do you have a supplier you would recommend?
Many thanks,
Dave
Hello! If memory serves, I used a couple of litre of each colour. And there was plenty left over for touch ups. I always buy my coach enamel from Tools-Paint
Hi, love your caravan. Just about to embark on my own renovation. Quick question….did you undercoat the exterior first? Also I didn’t realise you could paint to wood inside. Did you consider using vinyl? If so what swayed you towards paint? Just trying to decide. Thanks x
Hi Claire, thanks so much! No – I haven’t undercoated any of the vans I’ve painted the exterior of. We painted Dolly 3 this year, and did it in exactly the same way as the others. Just gave the surface a really good clean, taped off with the automotive tape, then used rollers and brushes.
And no – I didn’t even consider using vinyl on the interior wood! I would never use that at home, in the house. And I have treated the interior of our caravans in exactly the same way that I’d decorate at home. Hope this helps :)
Hi Caro, congratulations on personalising your caravan. The Award Tristar was always one of my favourite layouts. I’m wondering if you checked the wooden structure of the van where you can get to it and if you found any damp? The vulnerable areas on the Award are where there is a roof seam across the top, around the entrance door and in the front pillars to the sides of the front windows. Did you know the Award was fitted with a Delta axle that helps with smoother covering and a better ride? This not currently used on UK vans, which is a big shame, now it’s the slightly cheaper Euro axle, which in fairness does a good job, just not as good as the Award.
Hi there, thanks so much for your lovely message. No — thankfully there was no damp. It was such a dry van — you could leave a loo-roll in it over the winter and it would be dry as a bone the following spring!
Super helpful! Thanks very much, great post
Thanks so much Maria — that’s really kind of you.