AD | I have been (or could be if you click on a link in this post) compensated via a cash payment, gift or something else of value for writing this post about my upholstered bed frame. See the full disclosure policy and privacy policy for more details.
Quick View of What You'll Find on This Page
DIY Upholstered Headboard and Bed Frame
This DIY upholstered headboard and bed frame has got to be one of the easiest — and my favourite — DIY updates for a long, long time! If you’re looking to update your old upholstered bed, I’d definitely recommend giving this DIY a go!
It’s completely transformed the bed —and the bedroom.
A Change for Our Old Upholstered Bed Frame
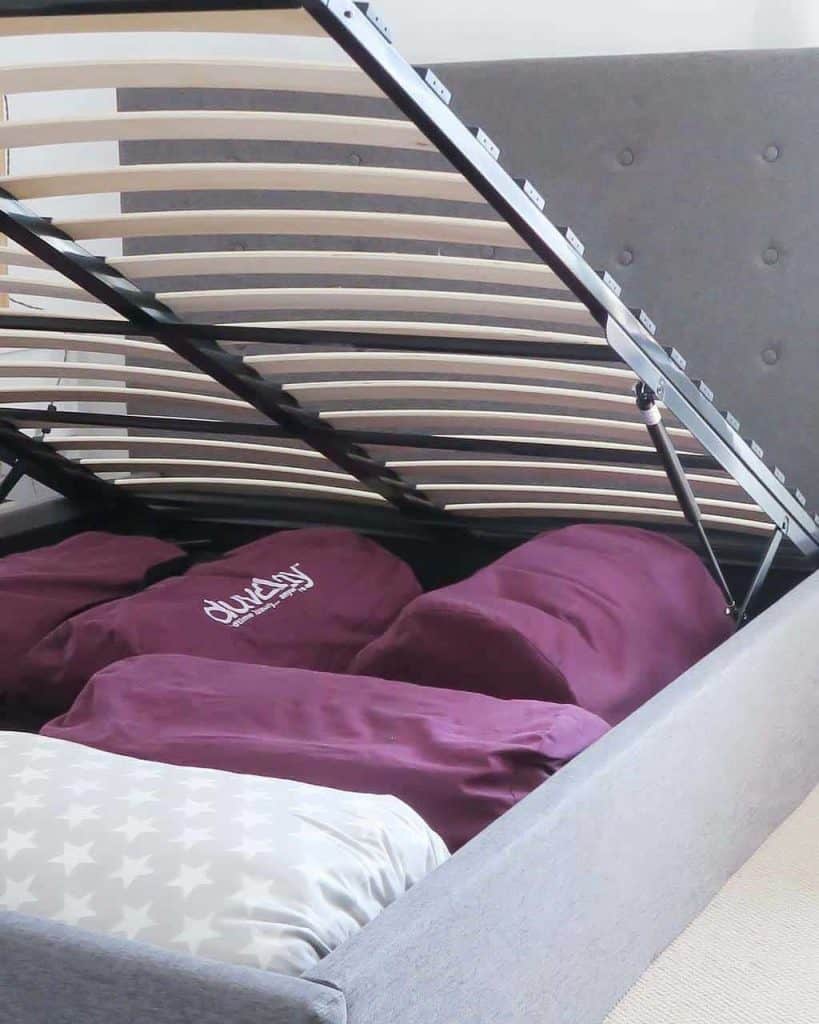
I bought our old upholstered bedframe because it has storage underneath and we can fit quite a lot of bulky items underneath the bed. It was fairly cheap and not particularly attractive. Definitely a case of function over form!
It is great for hiding large things like the bed in a bag from GLTC and our Duvalays.
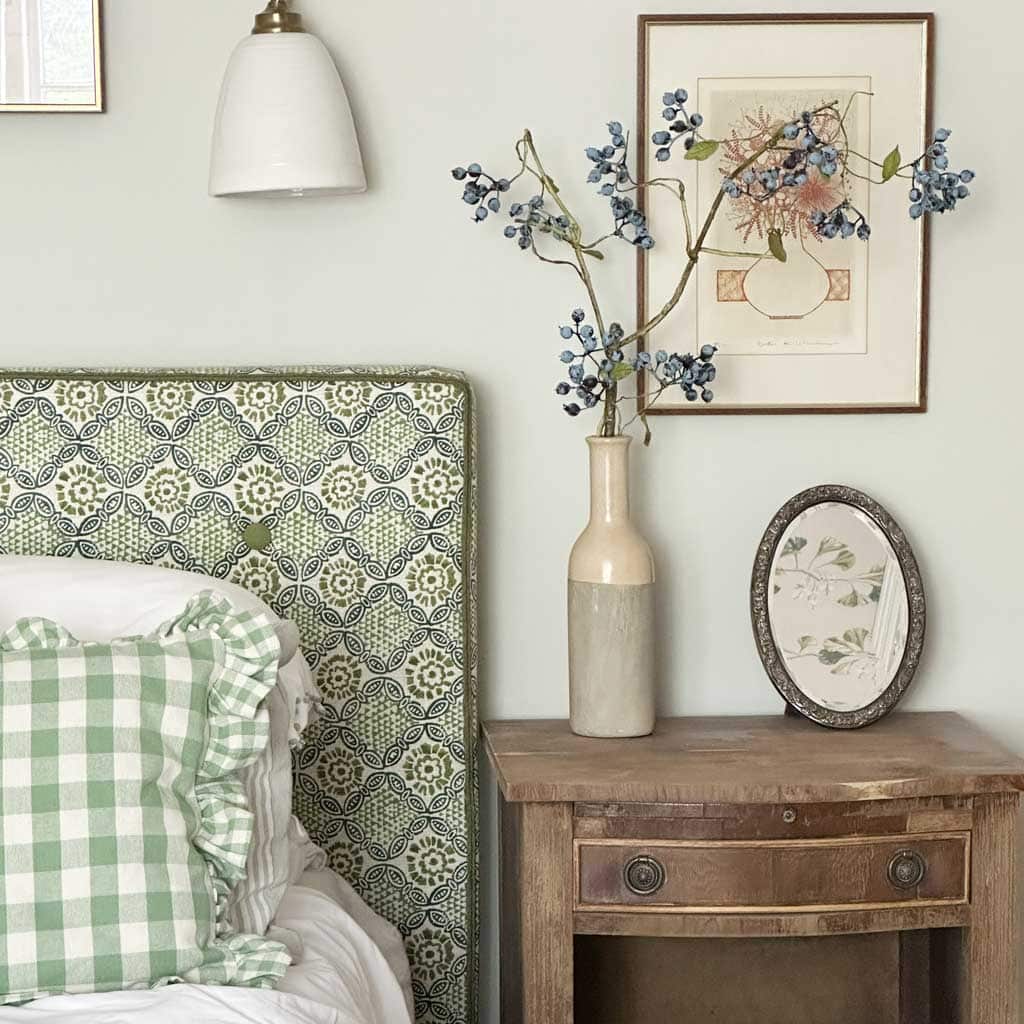
But — as you can see in the picture above— the upholstered headboard and bed frame were originally covered in a mid-dark grey fabric, and in whatever room it was placed in, the bed sat like a big, dark box, sapping all the light out of the space.
I had spotted lots of upholstered headboards on Pinterest, covered in beautiful colourful or patterned fabrics, and —on a whim, one day— decided I was going to try a DIY upholstered headboard and bed frame makeover on my own bed.
No Sew DIY Upholstered Headboard and Bed Frame
OK — so I must just point out that I’m not a professional upholsterer, and anyone who is will probably roll their eyes at this post. But this is how I did my DIY upholstered headboard and bed frame. And it worked for me!
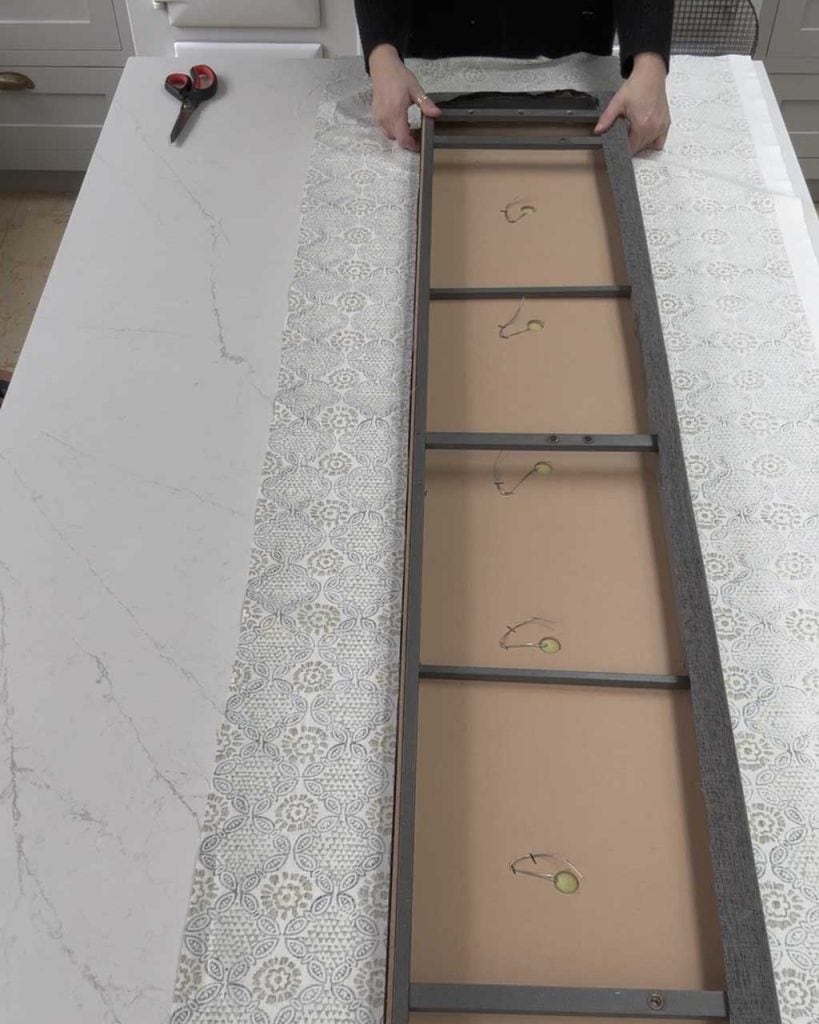
1. Measure Your Bedframe & Headboard
Draw a rough sketch of your bedframe, and measure all the sections. This makes life much easier when you come to order your fabric.
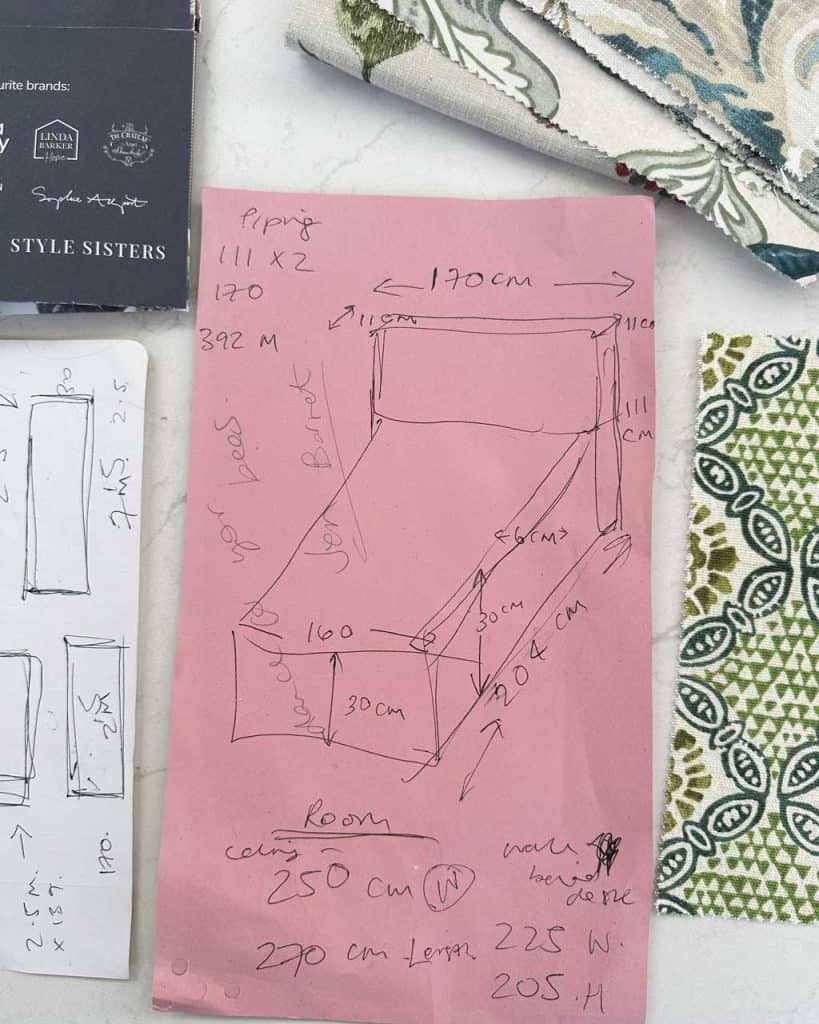

Our bedframe was in 4 sections: the two side pieces, the end, and the headboard.
I took these measurements and, as a result, knew that the bedframe would need 7m of fabric. Plus an extra half a metre for error!
2. Select & Order Your Fabric
Go for a good-quality upholstery fabric—I got mine from Terry Fabrics, who have an amazing choice. Remember, you’ll be pulling the fabric taut and stapling it, so it needs to be able to withstand this. Dressmaking fabric could tear or fray.
A few tutorials I read suggested that if the bedframe or headboard you’re covering is dark, you may want to cover it first in a calico (or a pale fabric) so the original colour doesn’t show through your new fabric over the top.
But if you choose a really good quality upholstery fabric, you shouldn’t need to do this.
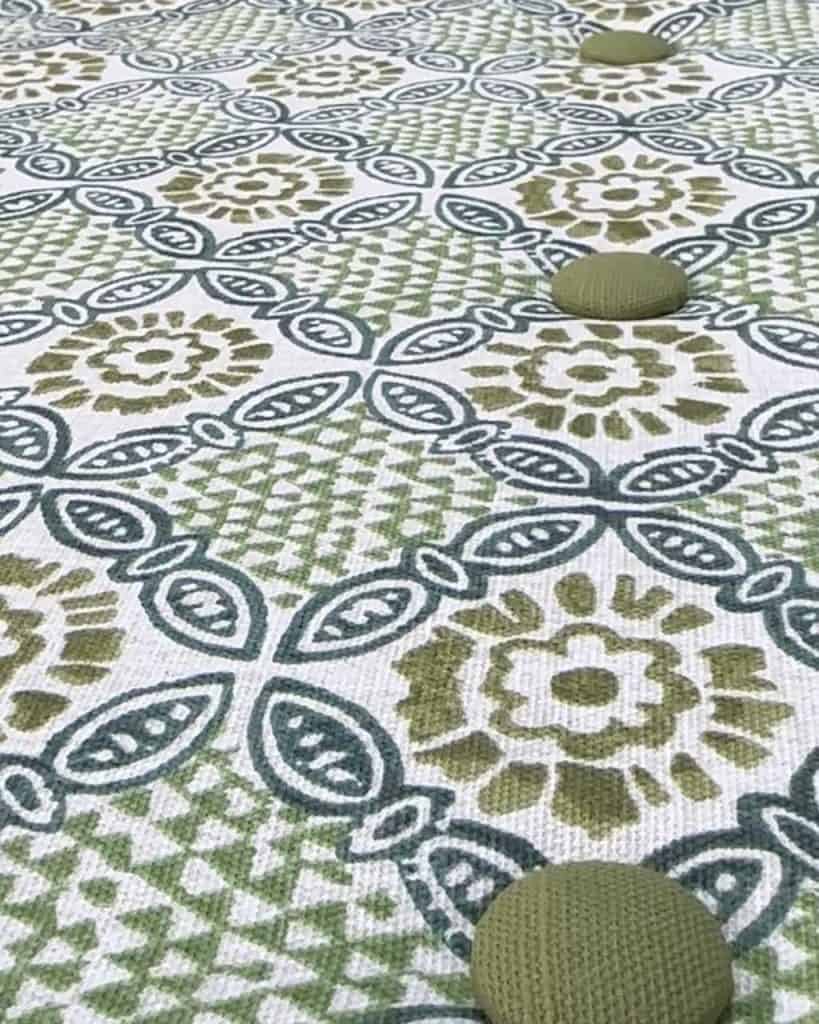
I ordered quite a few swatches and eventually chose a beautiful handblocked print from iLiv Fabrics called Stardust in Absinthe.
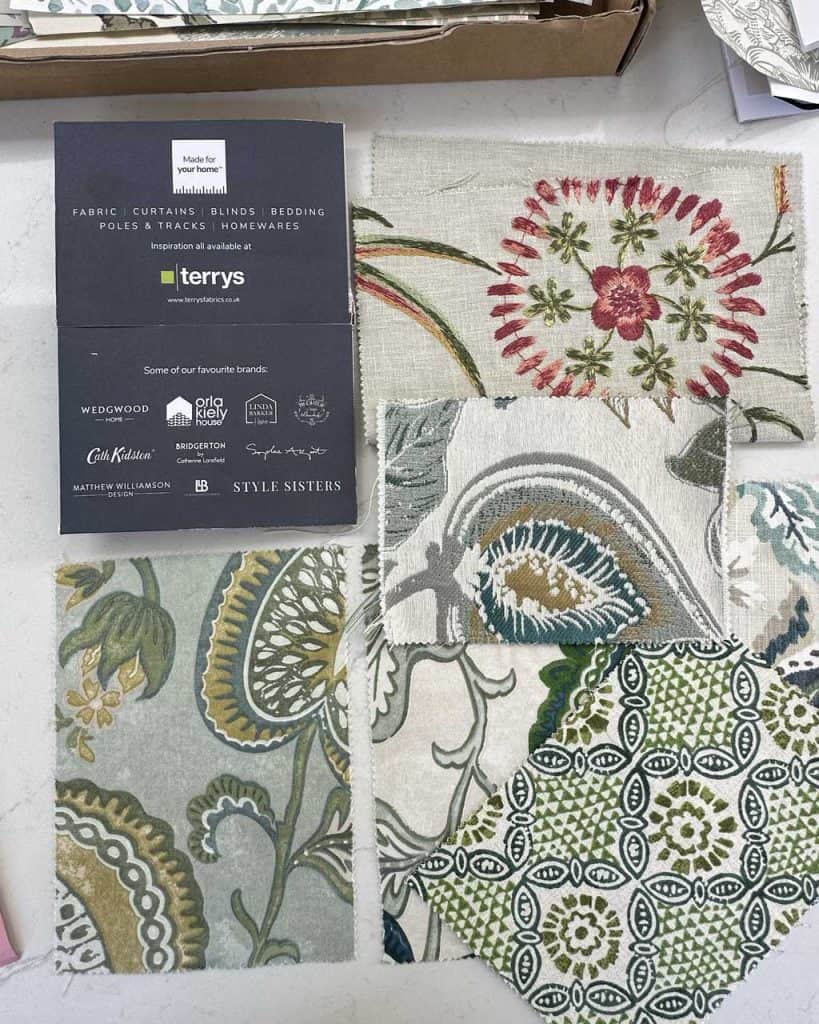
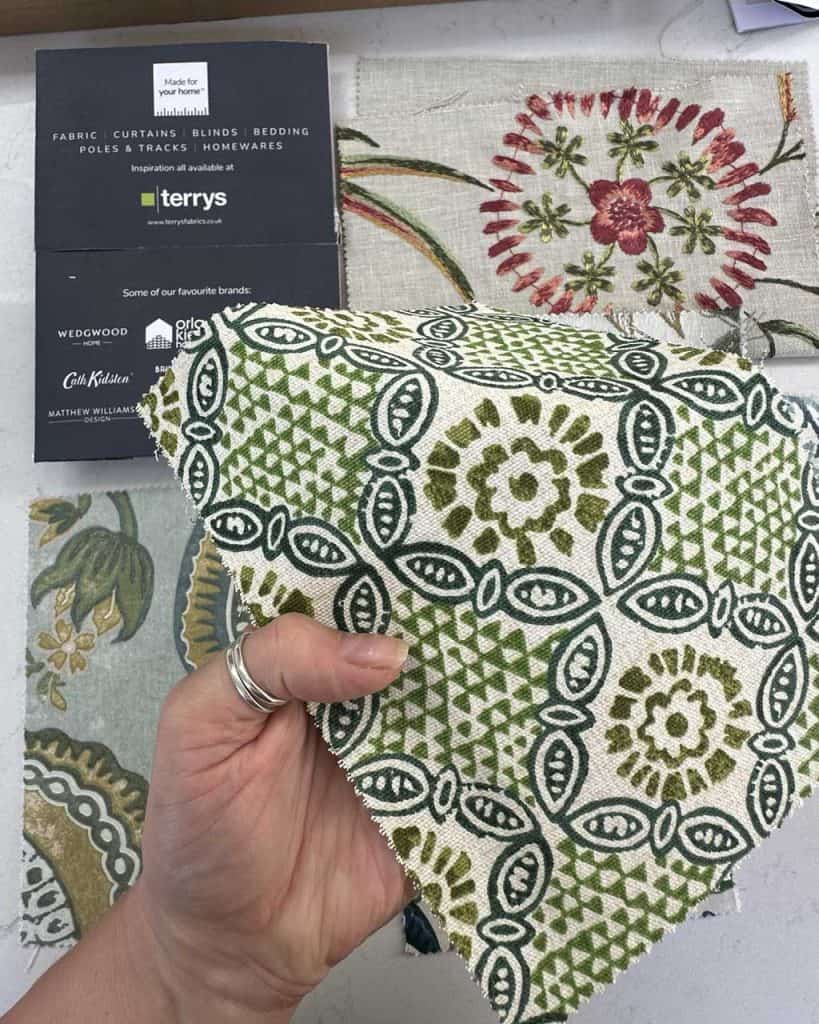
I also ordered a set of easy-cover buttons and a contrasting green fabric to cover them in.
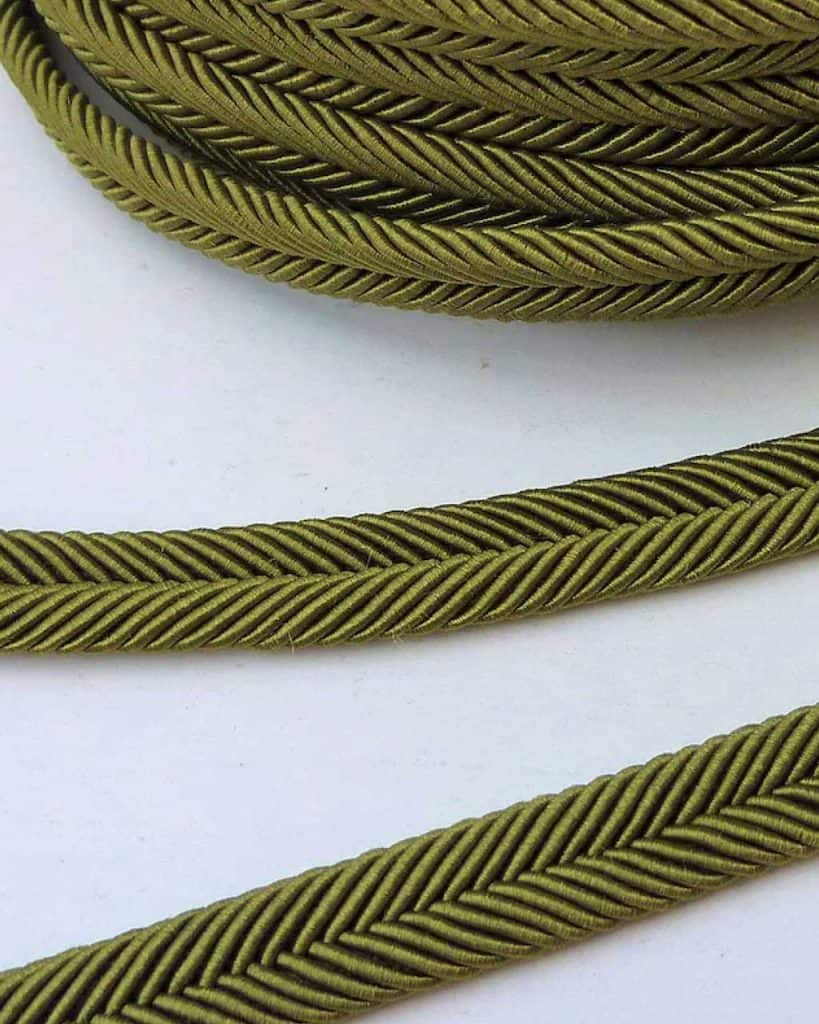
Plus, 5m of flat gimp braid trim (upholstery trim) from Etsy in a beautiful olive colour to contrast with the fabric.
NOTE
One thing I’d say when you’re choosing your fabric — be mindful of the useable width.
If your headboard is wider than this measurement, you’ll have to rotate the fabric. This is fine for a plain fabric — or one that has a pattern that can be used any which way. But if your fabric has a design that looks obvious (or odd) when it’s on its side etc, you may have to rethink your plans!
In the case of the fabric I’d chosen, the width was 139cm but my headboard was 170cm. Which meant I had to use the length of the roll, rather than the width.
Thankfully, the pattern I’d chosen worked when it was rotated 90º.
3. The Tools You’ll Need For a No Sew DIY Upholstered Headboard and Bed Frame
Thankfully, you don’t need many tools for a DIY upholstered bed. I treated myself to a new pair of upholstery scissors and a new staple gun, but apart from that, we already had all the necessary tools for the job.
This is what I used:
- Asdirne Fabric Scissors
- Tape Measure
- Tacwise 1702 Hobby 53-13EL Electric Staple/Brad Nail Gun
- Tacwise Type 13/6mm Staples
- Glue Gun/Glue Sticks
- Fabric Glue
- Clamps
- Allen/Hex Keys
- Screwdriver
- Sharpie (for marking up the fabric for the covered buttons)
4. Disassemble The Bed
We’ve assembled — and disassembled — our bedframe quite a few times as it’s been moved from room to room. So Mr D was pretty au fait with taking it apart.
But if this is the first time for you, make sure you keep all the fixtures and fittings safe. You don’t want to be searching for screws and bolts when it’s time to put the bed back together. And if you don’t have the assembly instructions, make a note of the steps.
5. Cut Your Fabric
This is where it can get a little tricky! If you have the luxury of lots of space—or a clear, large room with lots of floorspace—you can roll out your fabric and lay it out on the floor. If you don’t, just do your best! We were in the middle of decorating our guest room when I did this, so there was literally no space!
Instead, we cleared off our kitchen island to cut the fabric for our DIY upholstered bed.
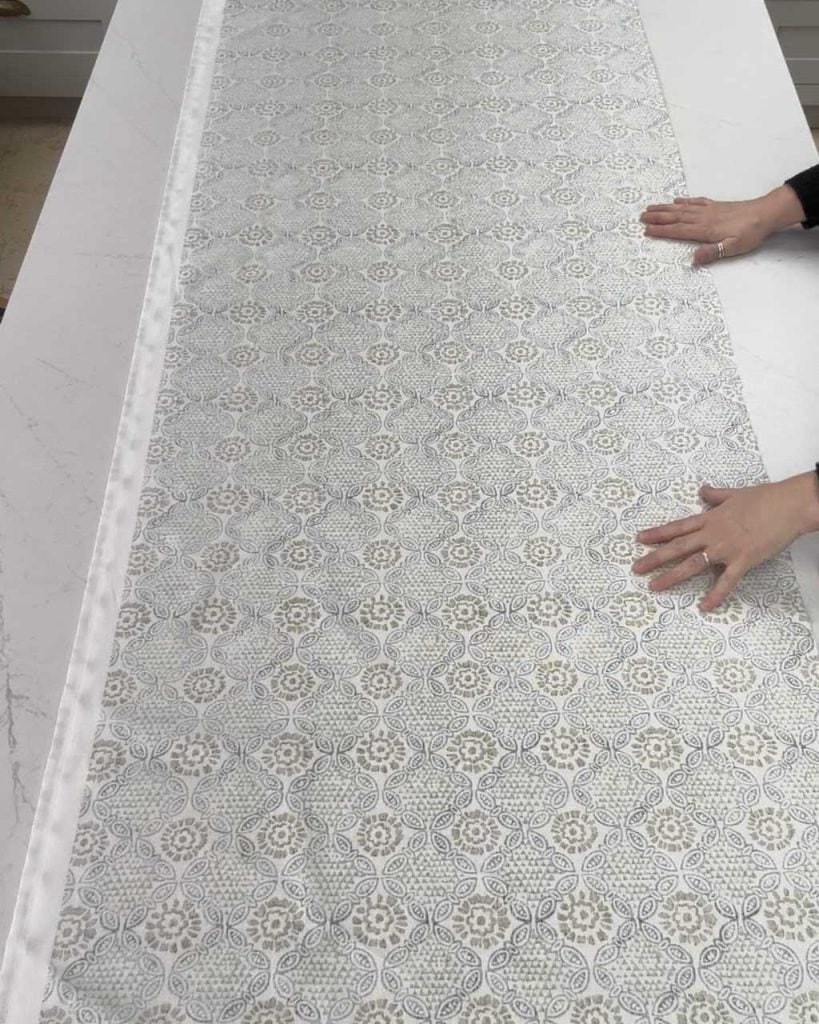
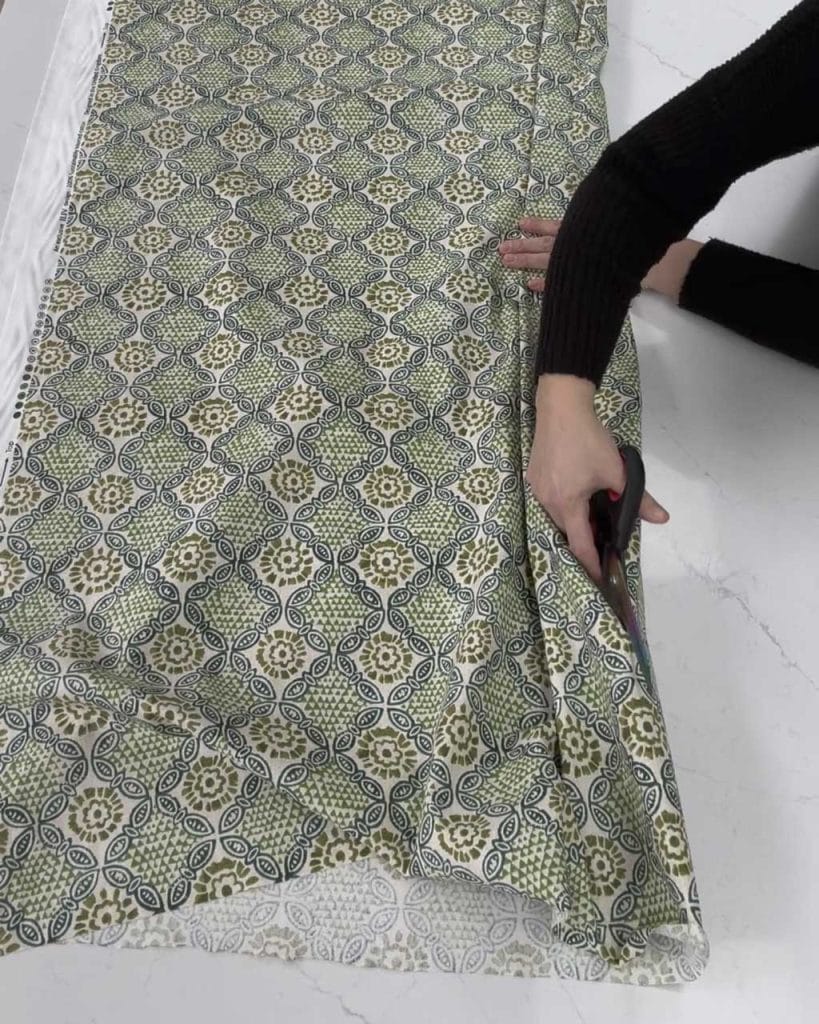
Lay the fabric out, face down, so you can cut your fabric to size. Place a section of the bed on top of the fabric, then turn it over to see where the pattern will be. If you’re happy with the placement then you’re ready to cut.
Make sure you leave a good amount of fabric all the way around each piece of bed so that you have plenty to pull back and staple.
6. How to Upholster a Headboard and Bedframe
Lay the fabric face down and smooth out any wrinkles or creases. Place the headboard — or a section of your bedframe — on top of the fabric. Make sure you’re happy with the placement of the pattern (if your fabric has a design).
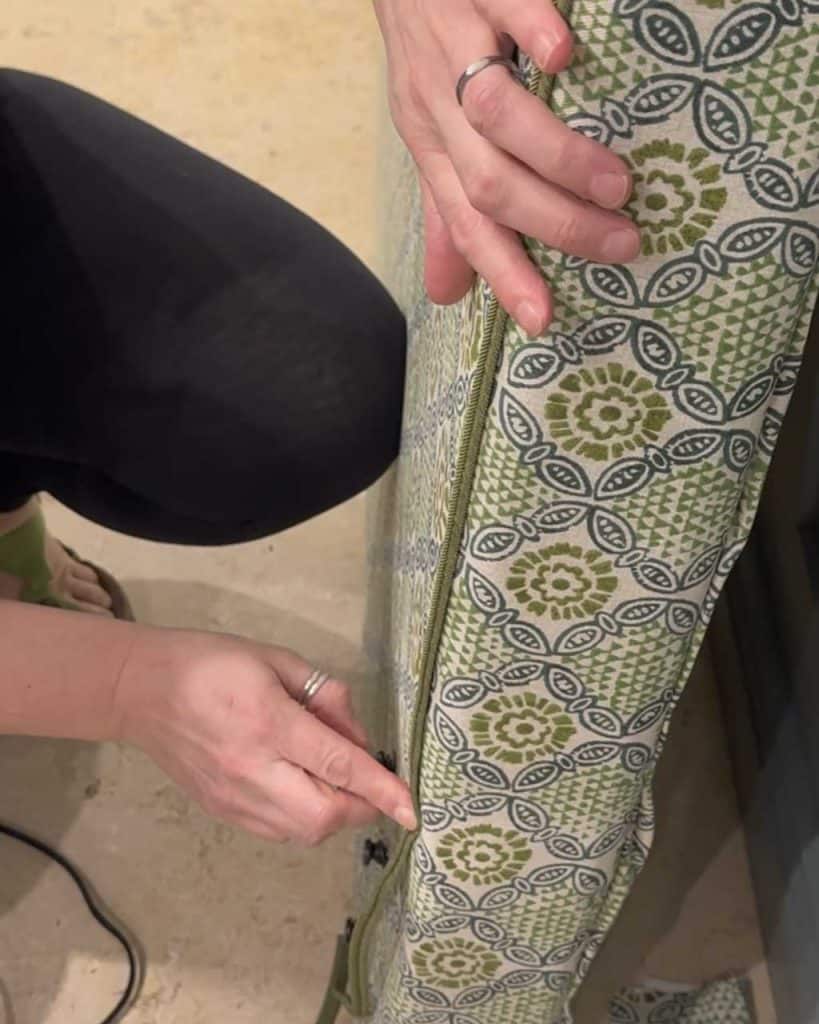
Fold over one side of the fabric, then staple it down onto the back of the headboard/bedframe piece using your staple gun.
Make sure you are stapling into the frame, rather than the foam/fabric. You must ensure the staples are secure and keep the fabric in place. Work along the row, keeping the fabric nice and taut.
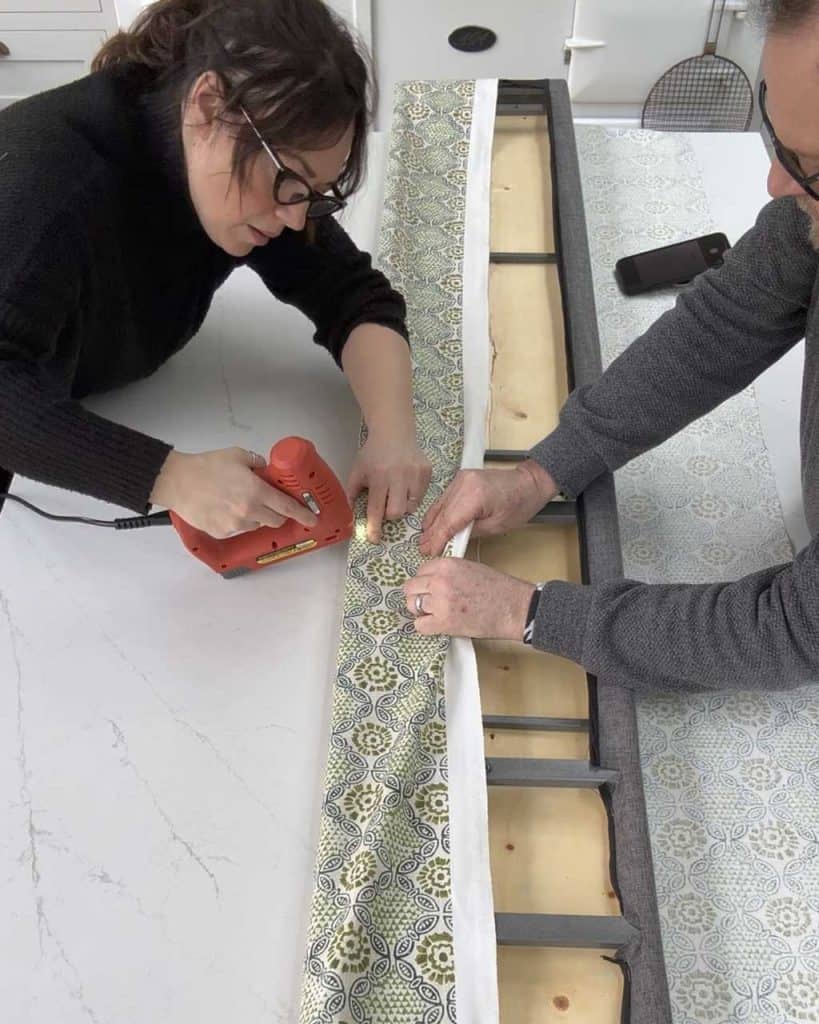
Do the same on the opposite side. Make sure you pull the fabric as tightly as possible, then secure the other edge with your staple gun.
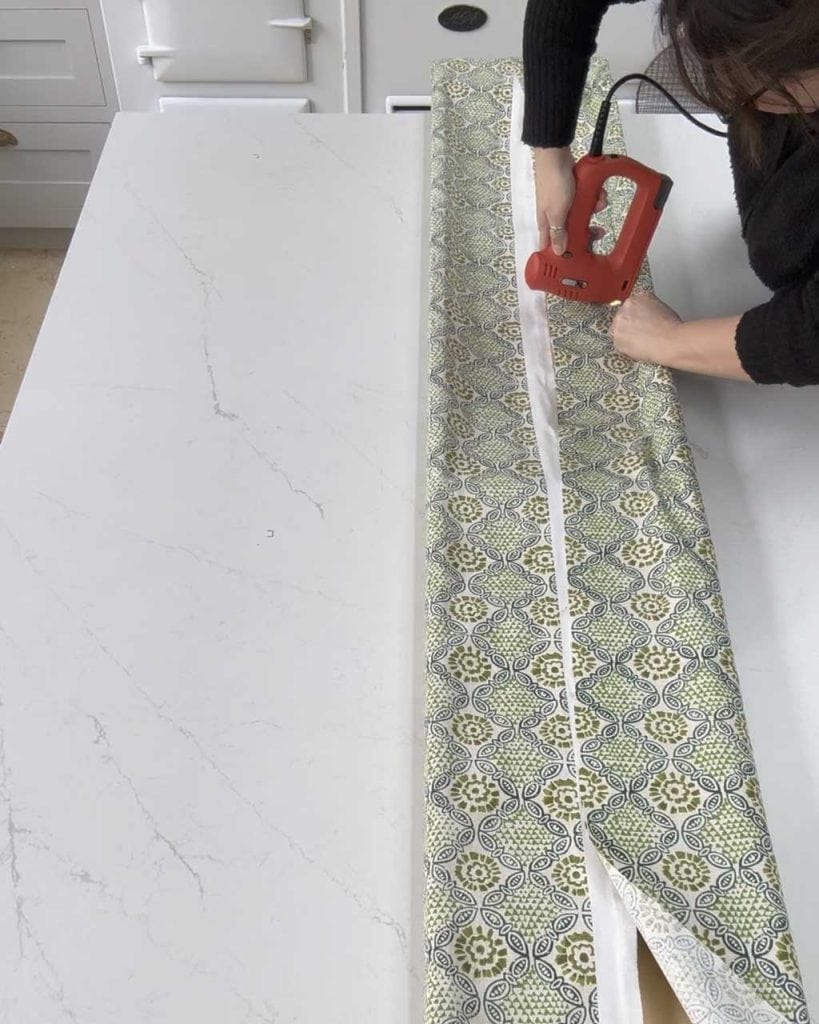
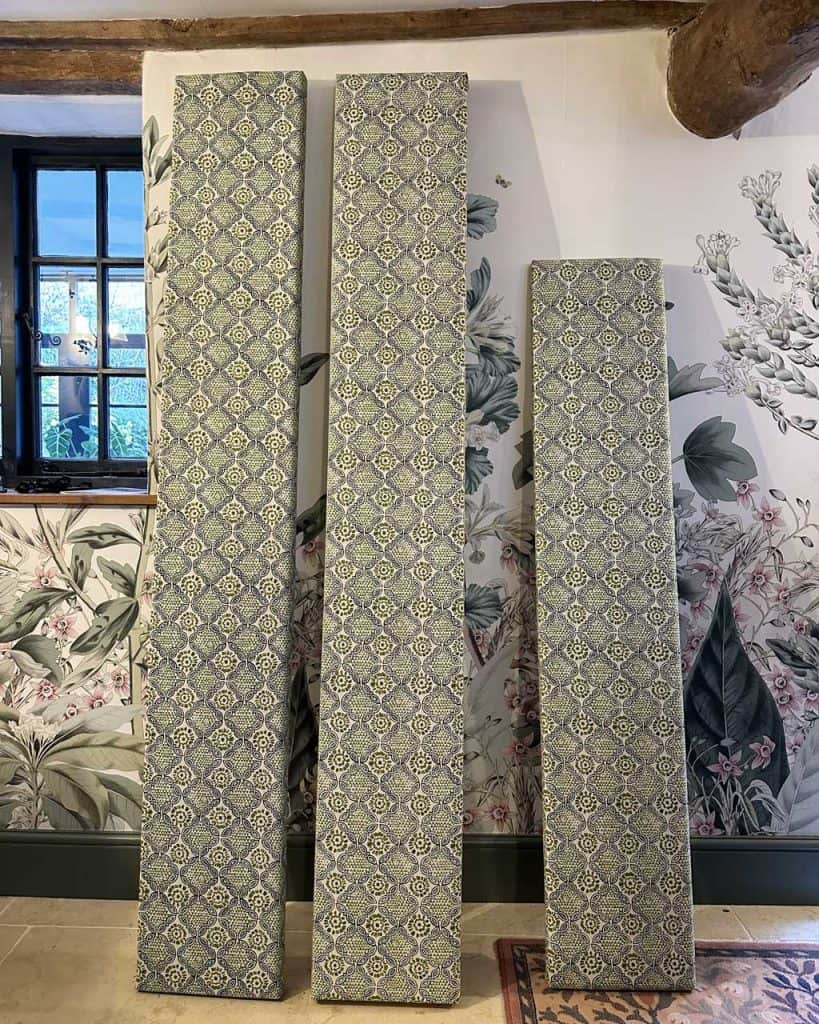
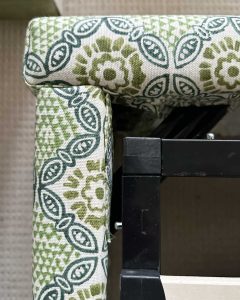
Covering the ends of the bed frame and headboard is similar to wrapping a present.
When you’re ready to do this, I found that fabric glue gave a really lovely, neat finish. Put a little fabric glue on the edges of the fabric before you fold.
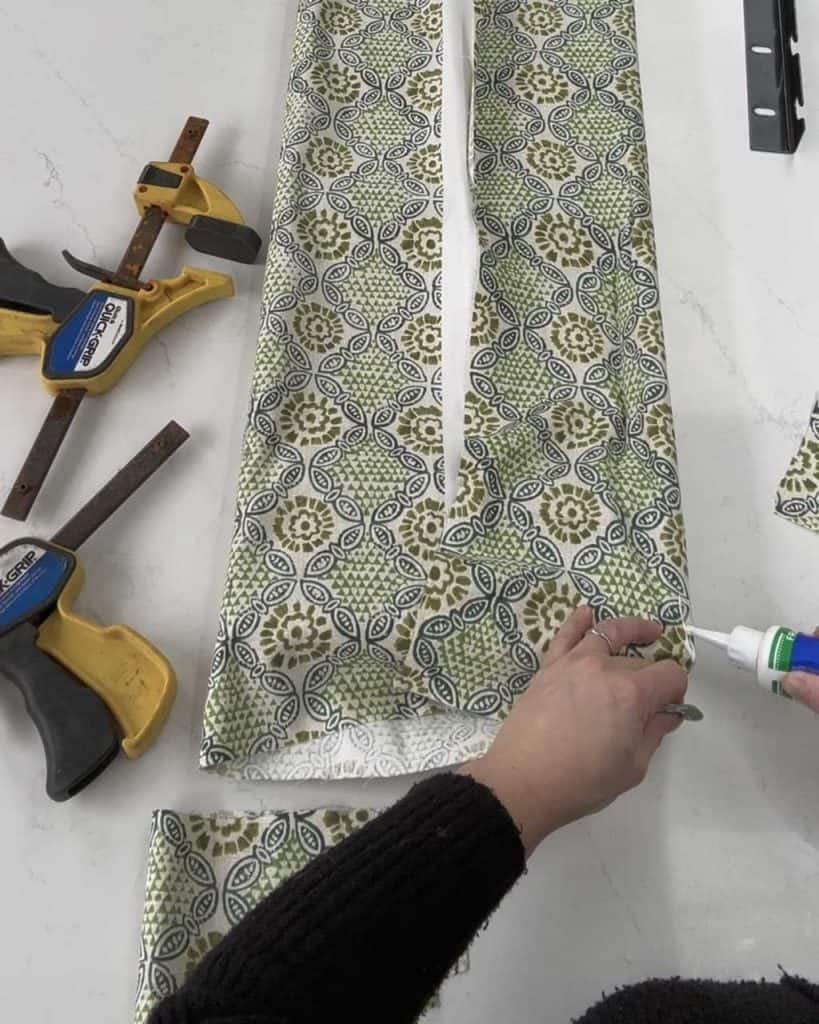
Then, carefully fold the fabric over and hold it in place with a clamp until the glue dries.
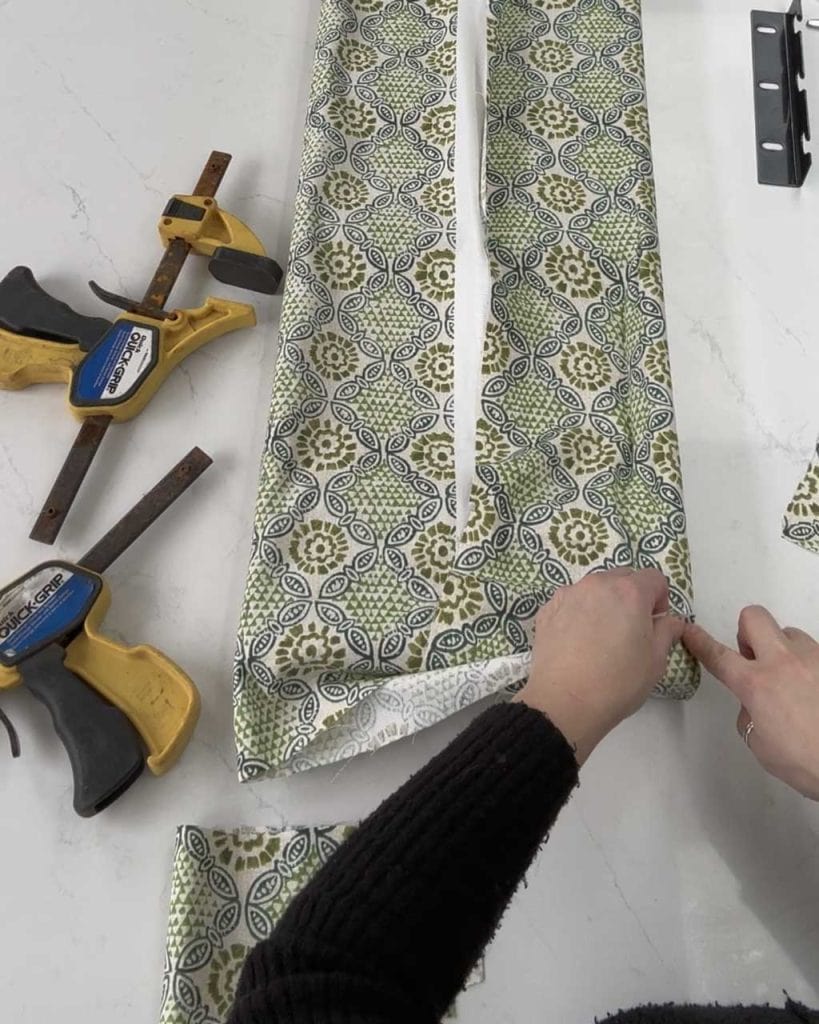
You can also add staples, across the length, afterwards if you feel that the fabric needs extra support to hold. But leave the corners held by the fabric glue for a tidy edge.
As you can see from the image below, this method gives a really neat finish.

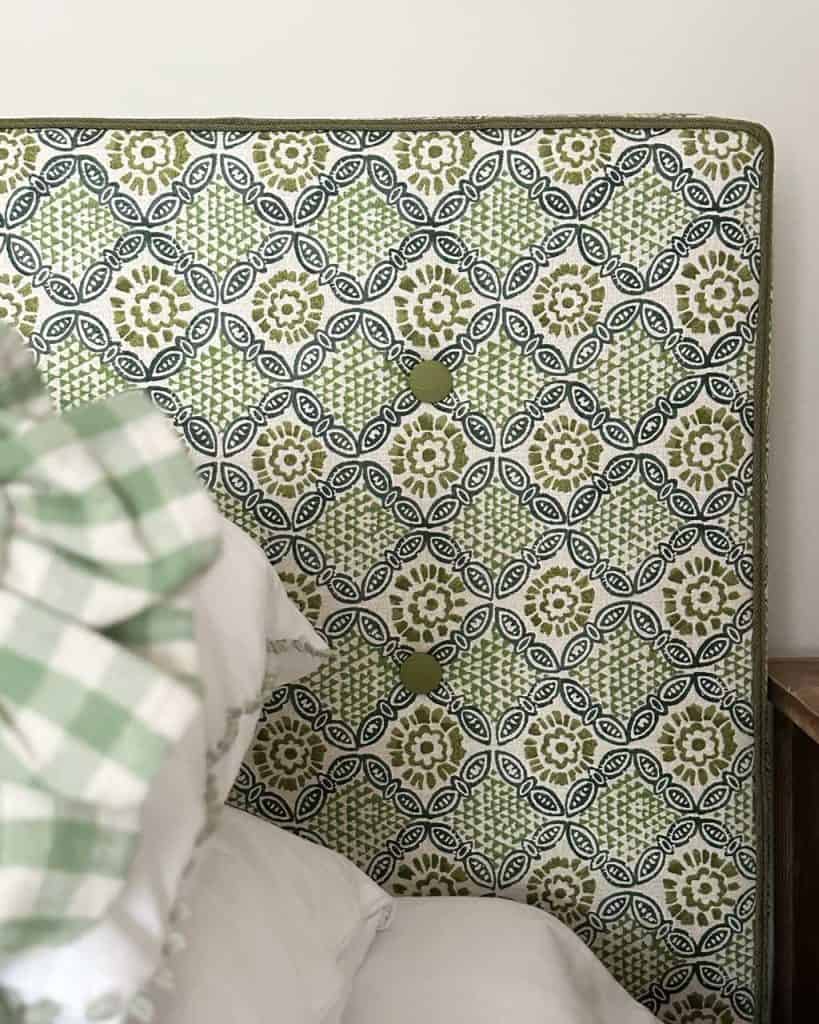
7. Adding Covered Buttons
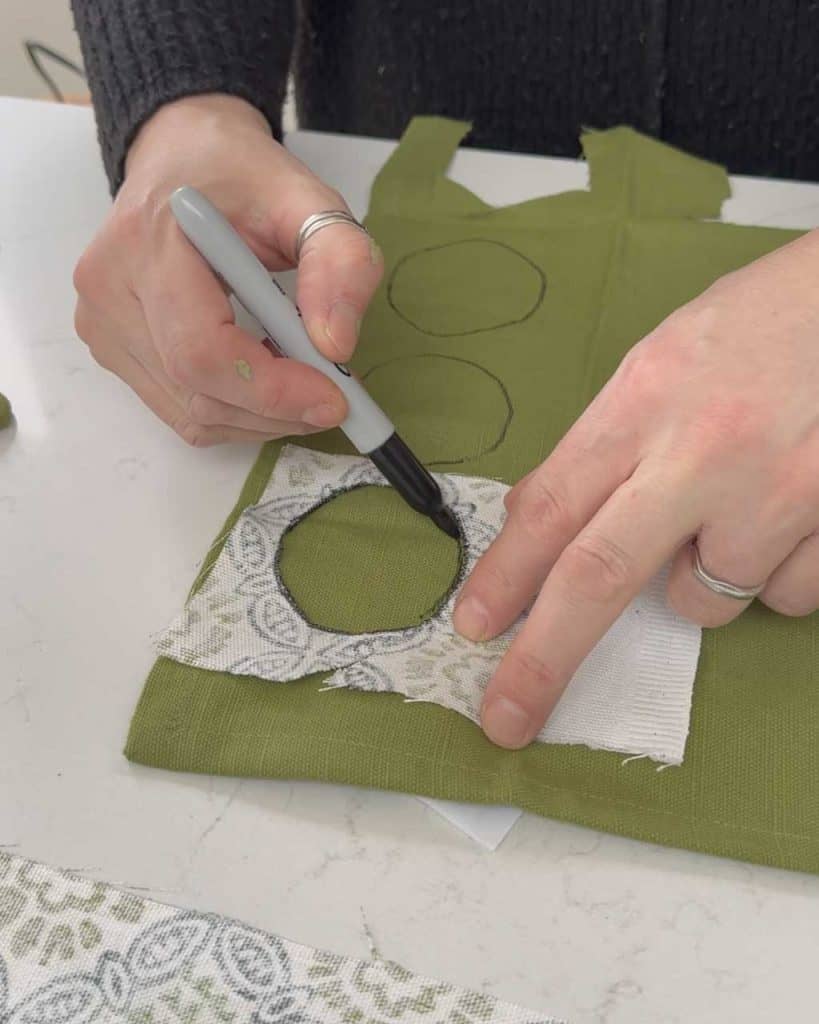
Our old upholstered bed had covered buttons along the base of the bedframe and also on the headboard.
I decided that it would make life easier to remove and cover over the ones on the base, but I wanted to keep the ones on the headboard.
I bought a packet of covered buttons and some fabric (unfortunately, the fabric I originally chose was much too thick to use with the buttons. I just couldn’t click them into place, no matter how hard I tried! But, thankfully, I had some cotton napkins that matched perfectly, so I cut one of those up instead.
The original buttons were attached to the headboard with wire, so I removed them and threaded the newly covered buttons onto the old wire.
I used my fingers to feel the hole in the headboard, where the button had originally been, and then fed the buttons/wire through to the other side.
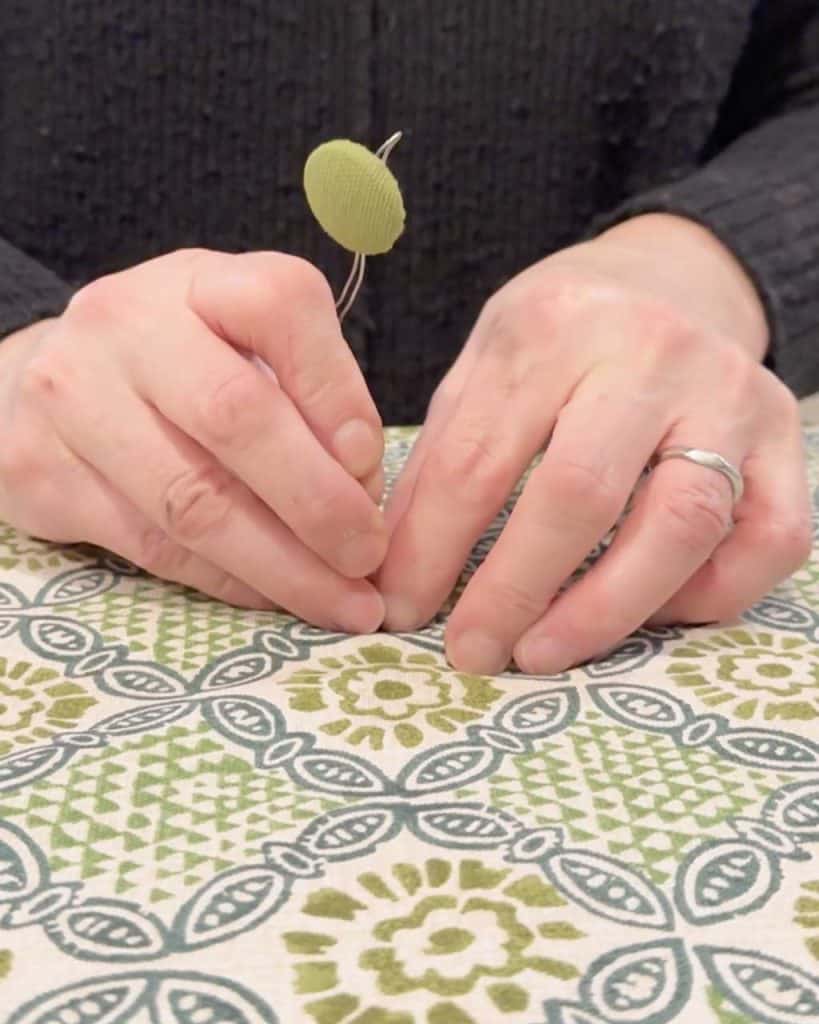
Then once the wire was on the other side, I fixed it to the board with a couple of staples, as it had been before I removed them.
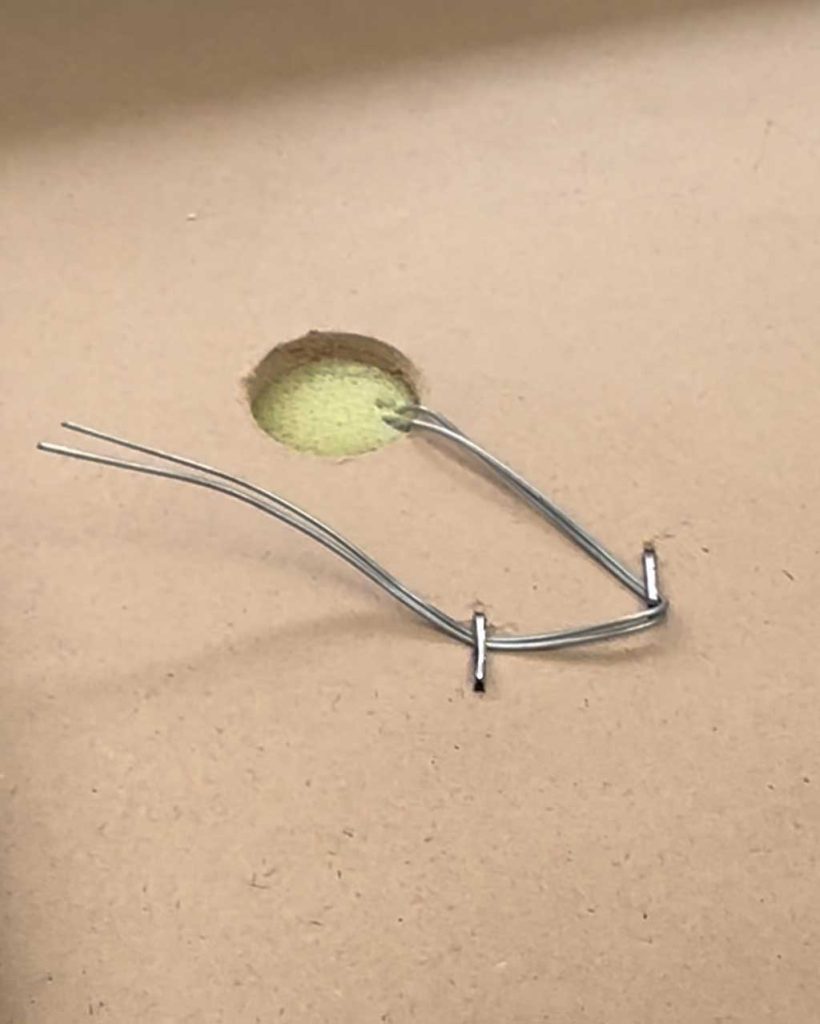
It was a little bit fiddly, but I’m so glad I did it! It gives the DIY upholstered headboard a really professional look.
8. Add Braid to The Headboard
This next step is optional (as are the covered buttons).
But many of the upholstered bed frame images I’d seen on Pinterest had beautiful piping or trim, so I really wanted to add it to my own DIY upholstered headboard.
I have done piping once before when I turned an IKEA shoe rack into a bench seat and found it really tricky. So I bought some beautiful flat gimp braid trim in an olive/khaki green shade, that matched the Stardust fabric perfectly. Then, using my trusty glue gun, I began sticking the braid to the headboard.
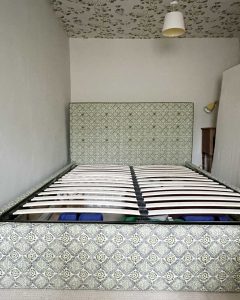
9. Rebuild The Bed
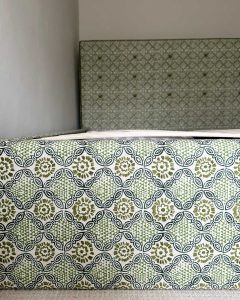
Once you’ve finished covering all the pieces, it’s time to put everything back together.
I was so looking forward to this bit! We’d been so excited as the fabric began going onto each piece of the bed. It was beginning to look exactly as I’d hoped it would and every bit as nice as some of the upholstered beds I’d seen on Pinterest.

So there we have it. That’s how I did my no sew DIY upholstered headboard and bed frame.
It was pretty easy. I’d highly recommend getting an electric stapler—I imagine it would be pretty hard to use a manual one.
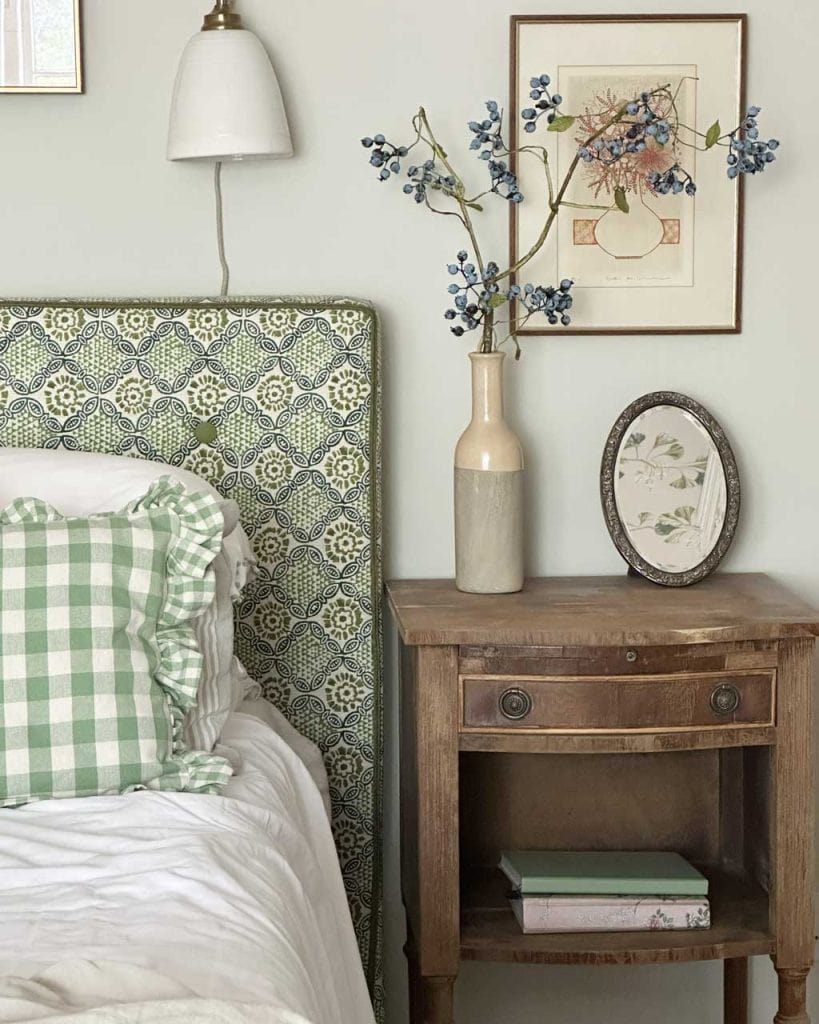
It’s one of the easiest projects we’ve ever done and has completely changed the look of the bed, and the feel of the room, as a result.

Caro Davies is a former art-director turned writer and content-creator, and editor behind UK lifestyle blog The Listed Home. She writes about home-related topics, from interiors and DIY to food and craft. The Listed Home has been featured in various publications, including Ideal Home, Grazia, and Homes & Antiques magazines.

Really very nice. Clean sharp details and beautiful choices of fabric. How though do I cover an existing headboard that already has nailheads running across the top and sides? Won’t they show through the fabric or should I remove them ? Thanks 😊
Aaah thank you!! I’m really, really please with how it turned out :) and — yes — I think if mine had a nailhead trim around the edges, I would have removed it. After you’ve re-covered the headboard with the new fabric, if you like the look of the nails, you could always add a readymade nailhead trim.
Looks great! I’m looking for something to sit behind my Victorian bed frame to cover an eaves door. For symmetry, probably needs to be wider than the bed but also moveable for the odd time the eaves are needed for access. Can’t find anything to buy so this might be an idea. Do you have other ideas? 😊
That’s a great idea! Or — a simpler solution would be to buy a sheet of MDF or hardboard and create a wallpapered panel to sit behind. I think either of those options would be great! :)
Hi,
Please could you tell me what make of electric stapler and glue gun you use. Just about to do a headboard and getting equipment ready.
Thank you
Hello! Sorry — I’ve only just seen this! I bought this stapler — https://amzn.to/4qQDUiO — and my glue gun is ancient. I’ve had it for donkeys years. Good luck with your project!
I love this fabric. Where did it come from please
All the info is in the blogpost :)