
Quick View of What You'll Find on This Page
Want to Know How to Make Fabric Buttons?
Ever wondered how to make fabric buttons? They’re the perfect thing to make a plain garment look fabulous. Plus, with a covered buttons machine, they’re really quick and easy to make. And when you create them with Liberty print fabric, they look sensational!
Covered Buttons Are The Perfect Finishing Touch
My lovely boy and have been planning our twins’ naming ceremony.
Given that we don’t hold any religious beliefs, it would have felt hypocritical to have them Christened in a church, but equally, we didn’t want to let their birth pass without marking it in some significant and special way.
A naming ceremony —or naming day celebration— is the perfect solution. Just formal enough to give a real sense of occasion but without any reference having to be made to a third party, who plays no part in our lives — ie god/ the devil/the holy spirt/Jesus. We’ve met up with the celebrant who we’ve chosen to conduct the ceremony. And, so far, from the examples of work he’s sent over for us to look at, the service is going to be absolutely beautiful. Very moving, very meaningful and very ‘us’.
Perfect.
I have asked my sister’s mother-in-law—who is a wonderful seamstress—to make a couple of little shirts for the twins to wear on the day. As a finishing touch, I decided to buy some fabric covered buttons.
There were a couple of sellers on Etsy, but after doing a bit of research, I decided that I would make my own.
After a bit of hunting, I found a great online haberdashery called MacCulloch and Wallis who had everything I needed.
The Fabric Button Making Machine
The covered button maker tool is one of the most fantastic inventions of all time! Right up there with smartphones and Sonos.
A couple of little bits of plastic that slot together to enable you to create the most wonderful buttons! Who knew??!
I was in ‘crafty’ heaven! ;)
The fabric button making machine is SO simple — inexpensive — and very, very rewarding.
How to Make Covered Buttons
This method uses a fabric button making machine. Mine cost less than £5 and I’d say it’s worth every penny!
Supplies for Making Fabric Buttons
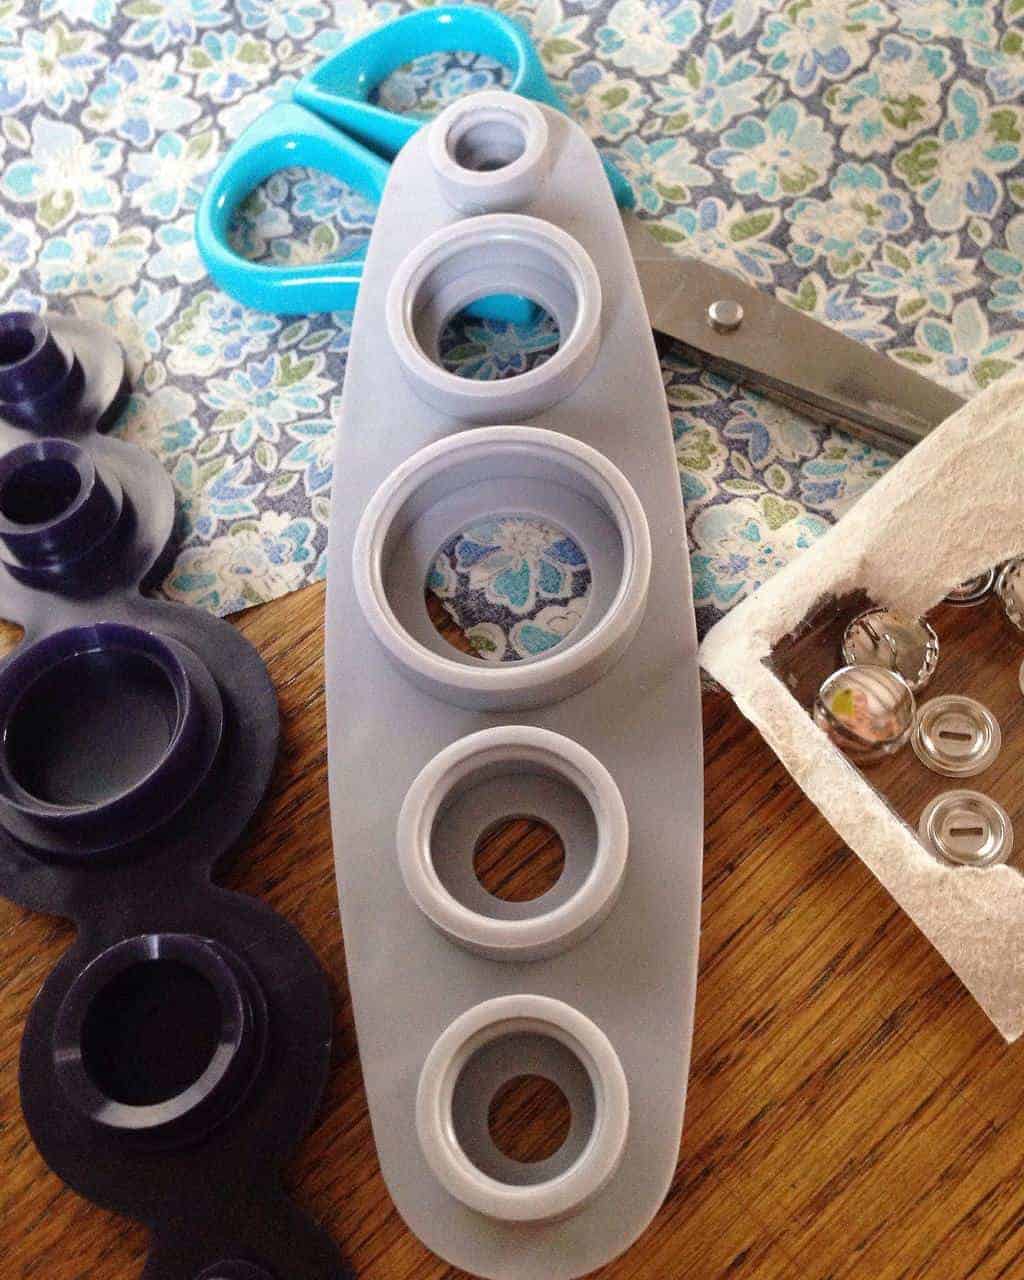
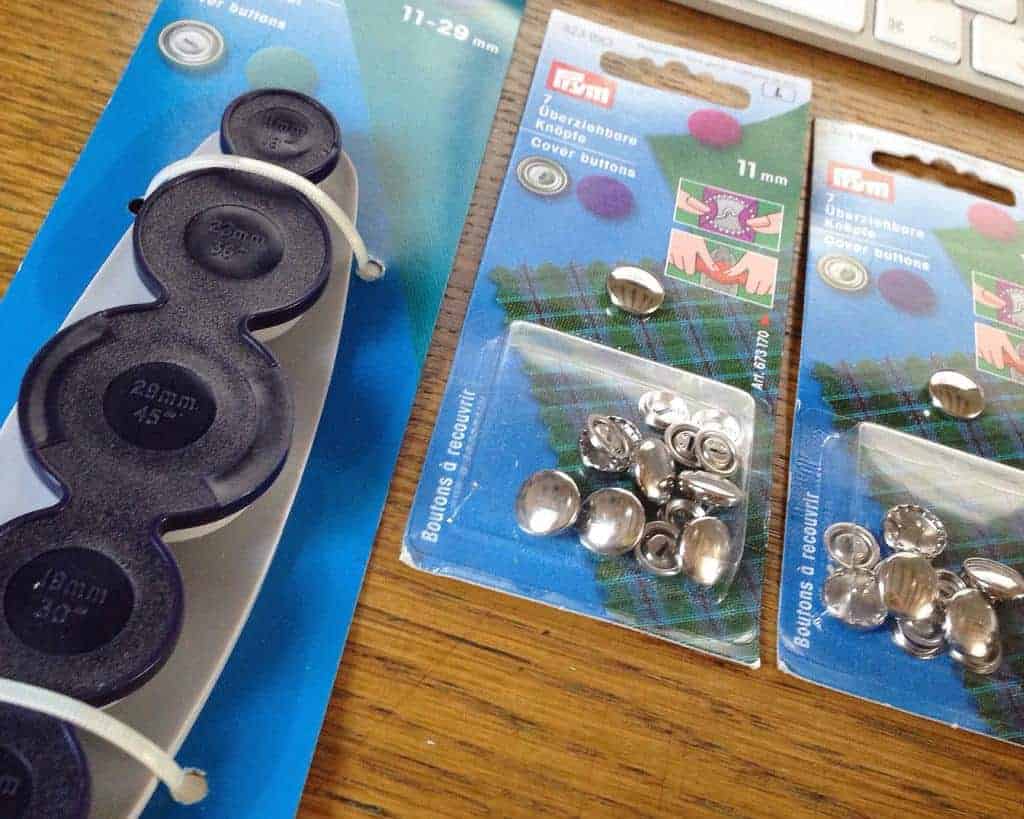
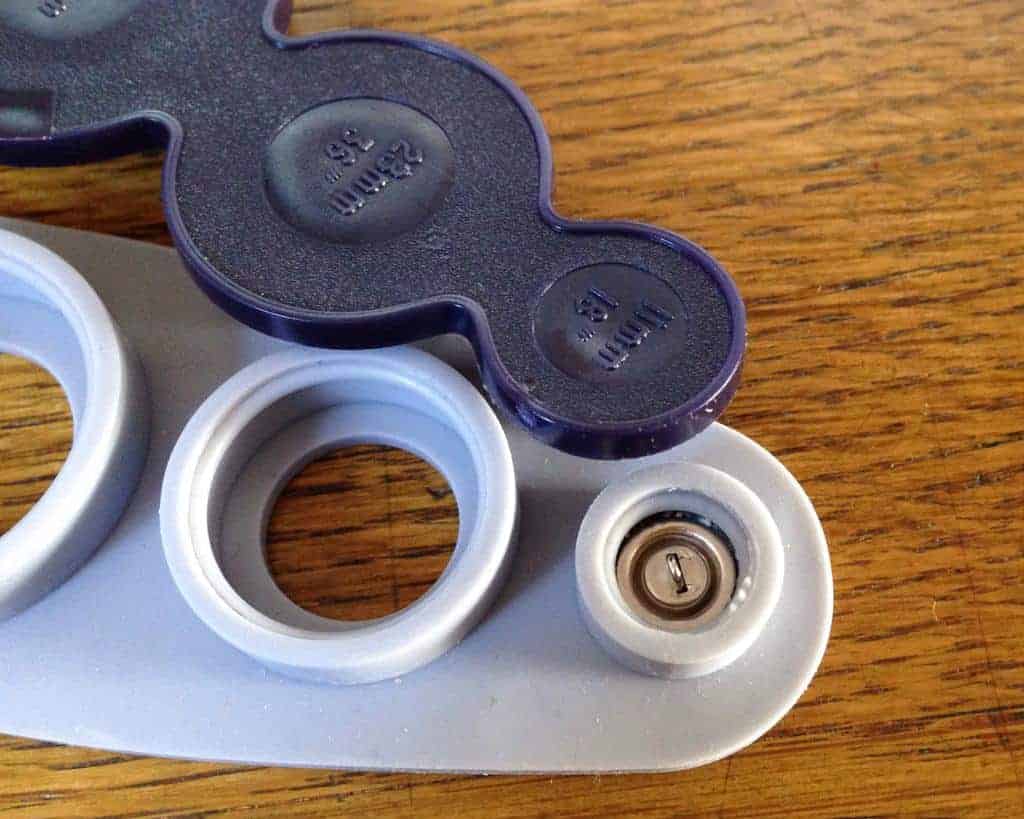
- A Prym button maker tool — The version of self cover button tool I chose can make 5 different sizes of button; 29mm, 23mm, 19mm, 15mm and 11mm
- A metal button making kit
- Fabric Scissors
- Your choice of fabric
How To Make Fabric Buttons with a Prym Button Maker Tool
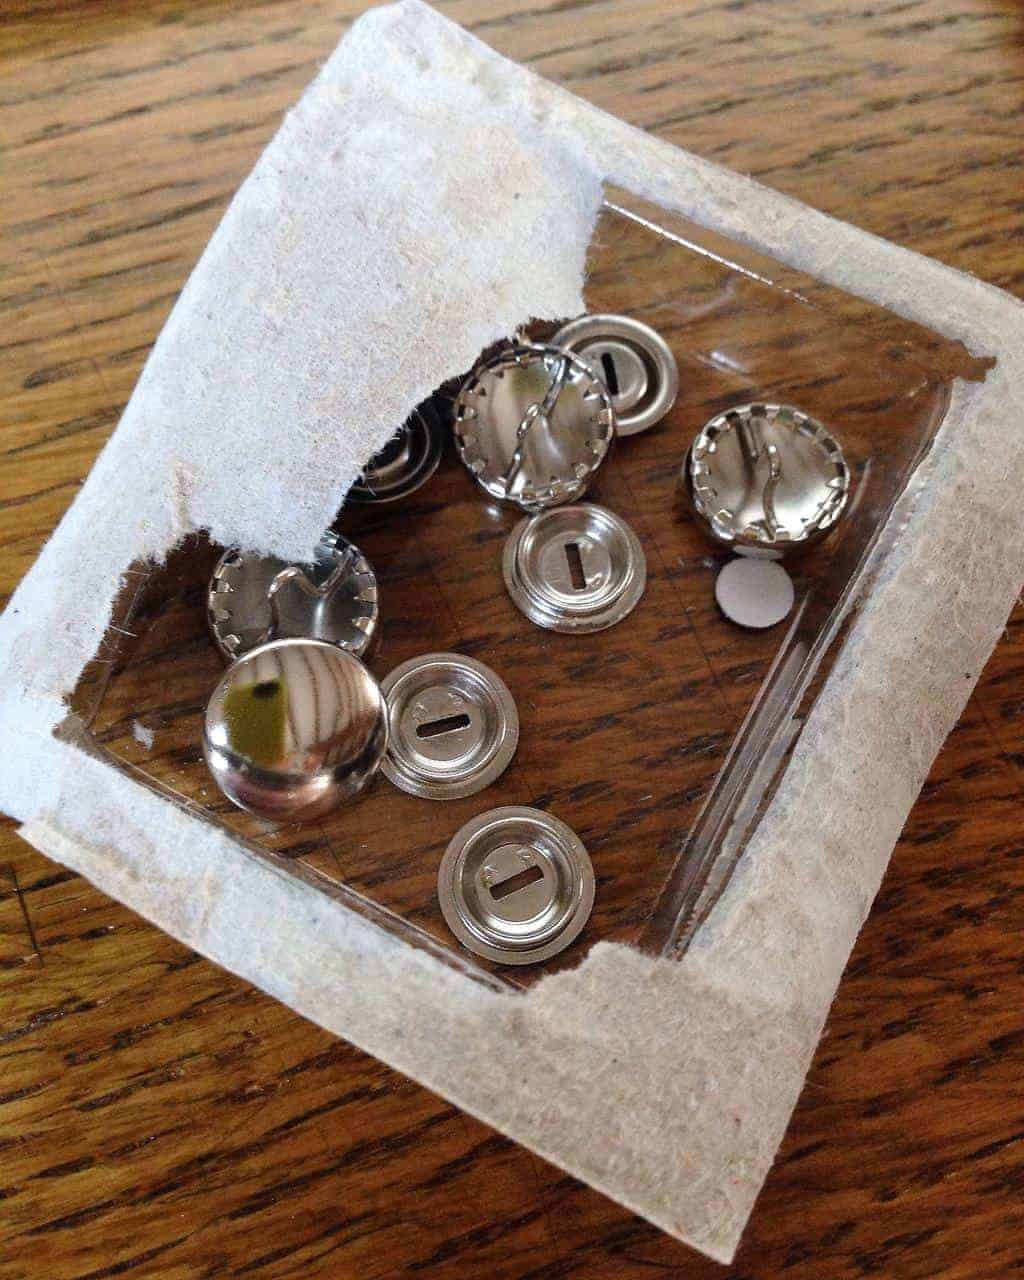
The self cover buttons are supplied with backs and fronts. You can buy plastic as well as metal versions.
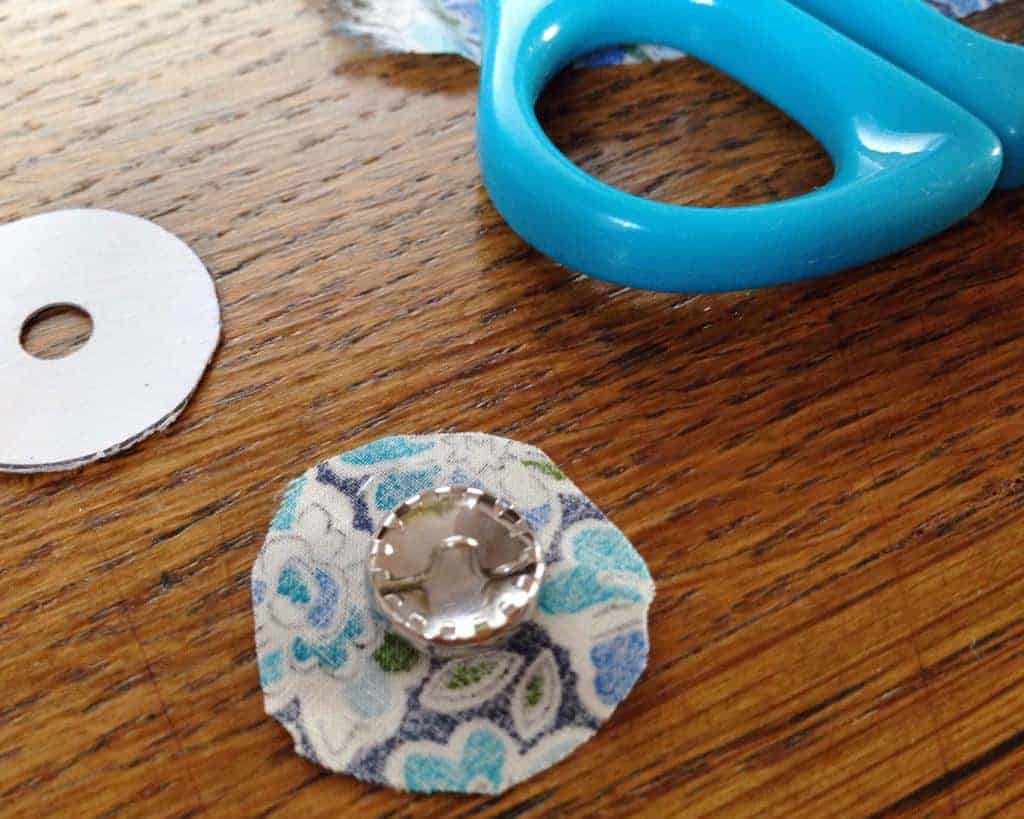
Using the guide on the box, cut a circle to use as a template for your fabric. This is quite a bit larger than the diameter of the buttons.

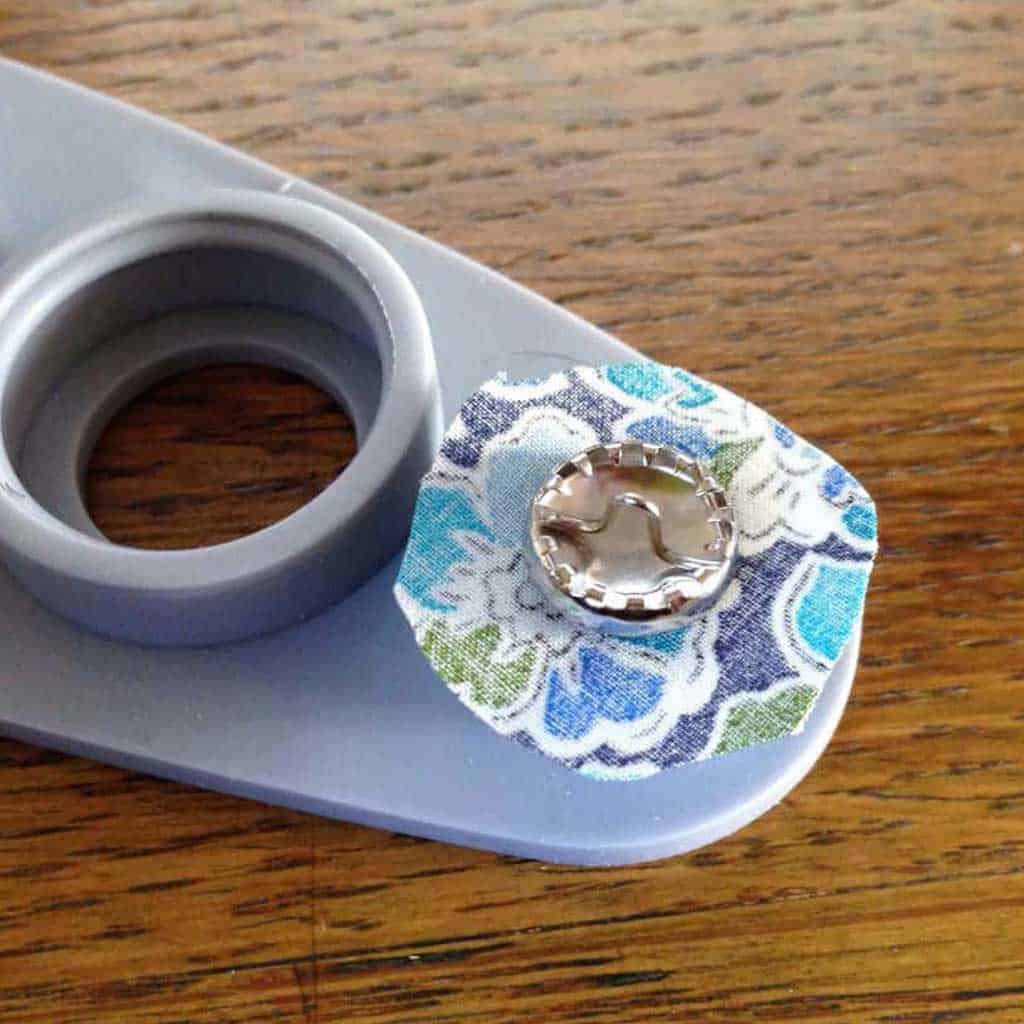
Lay your fabric face down, and place a button front in the middle of the fabric circle.
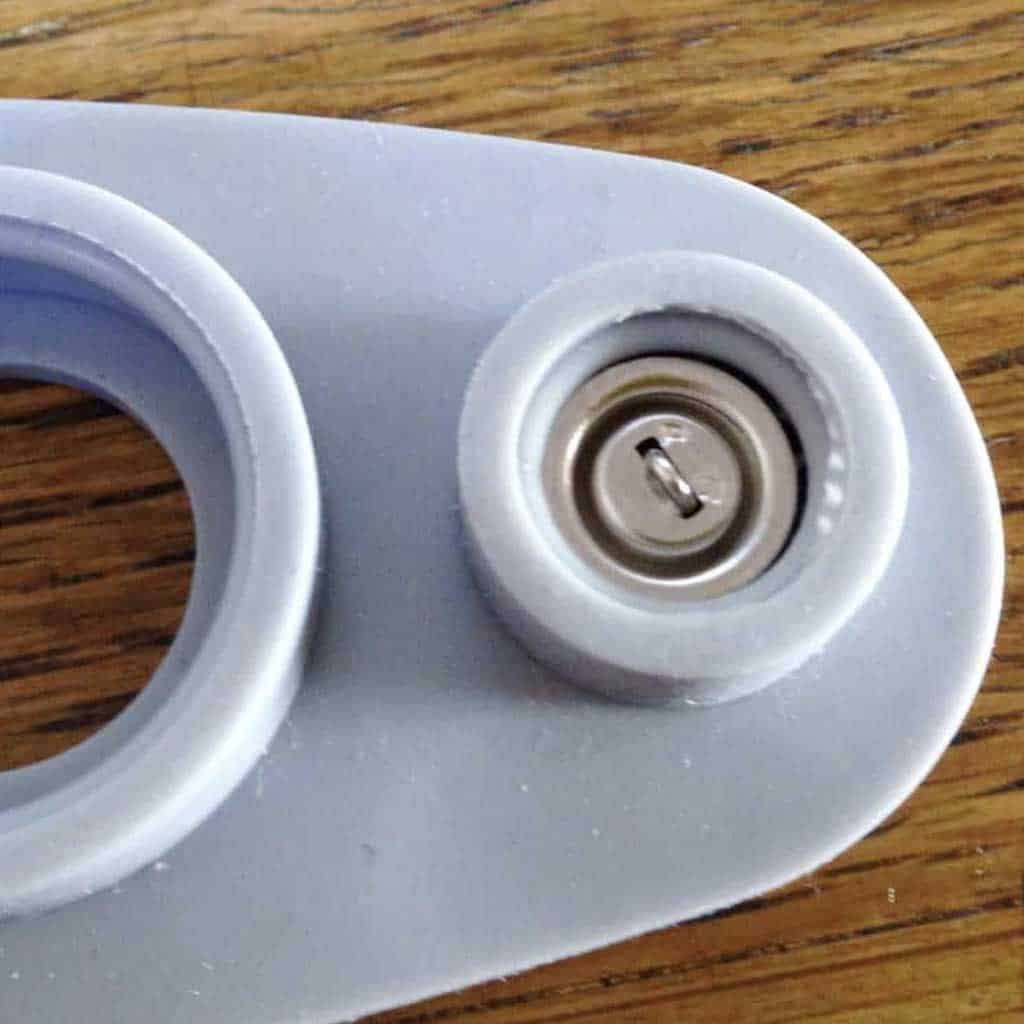
Pop it into the corresponding sized hole in the Prym button maker tool. I chose the smallest size — 11mm — for my fabric buttons.
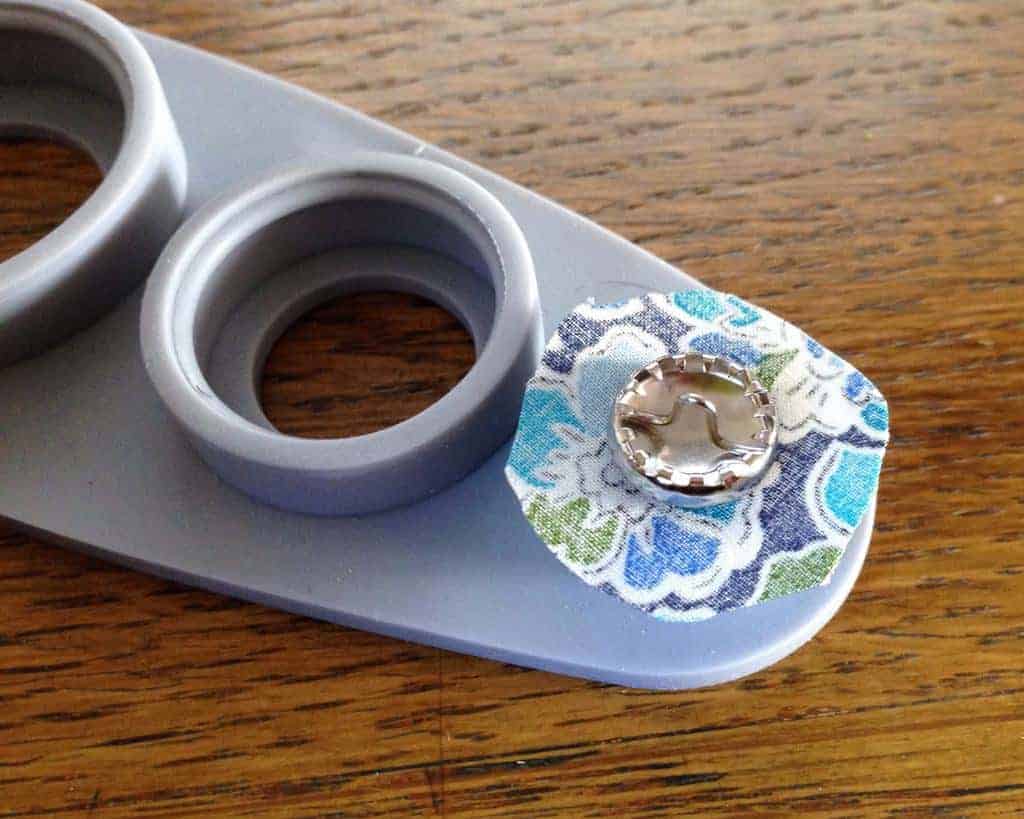
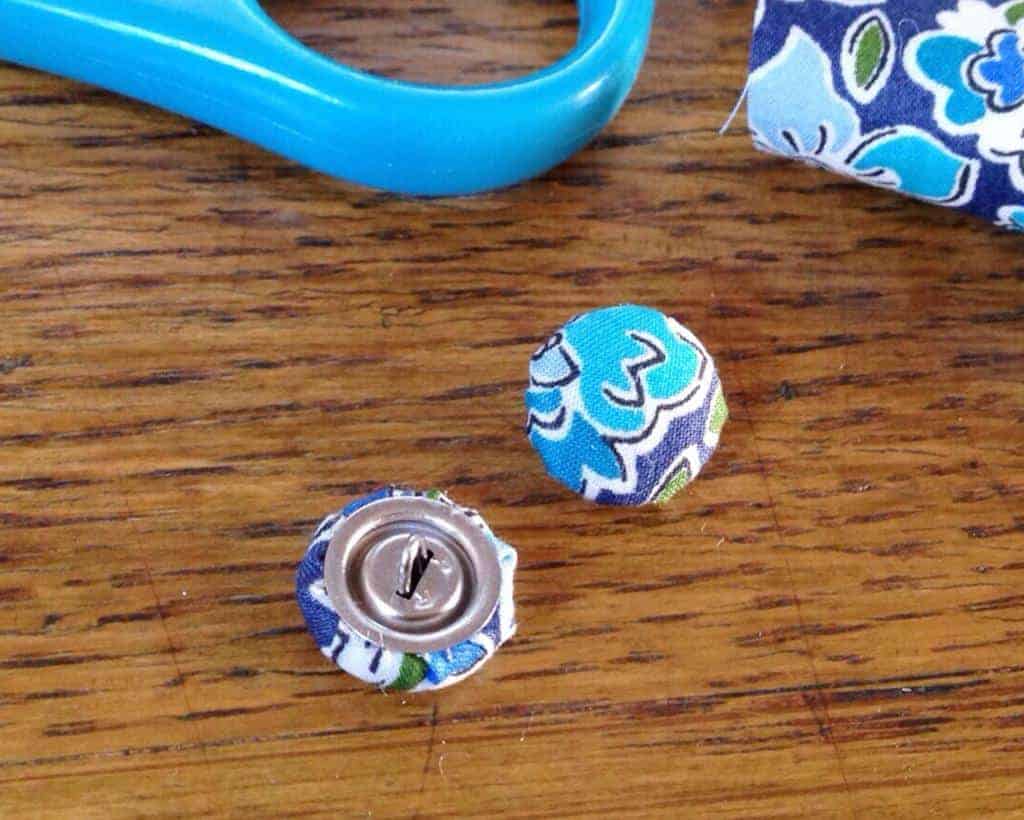
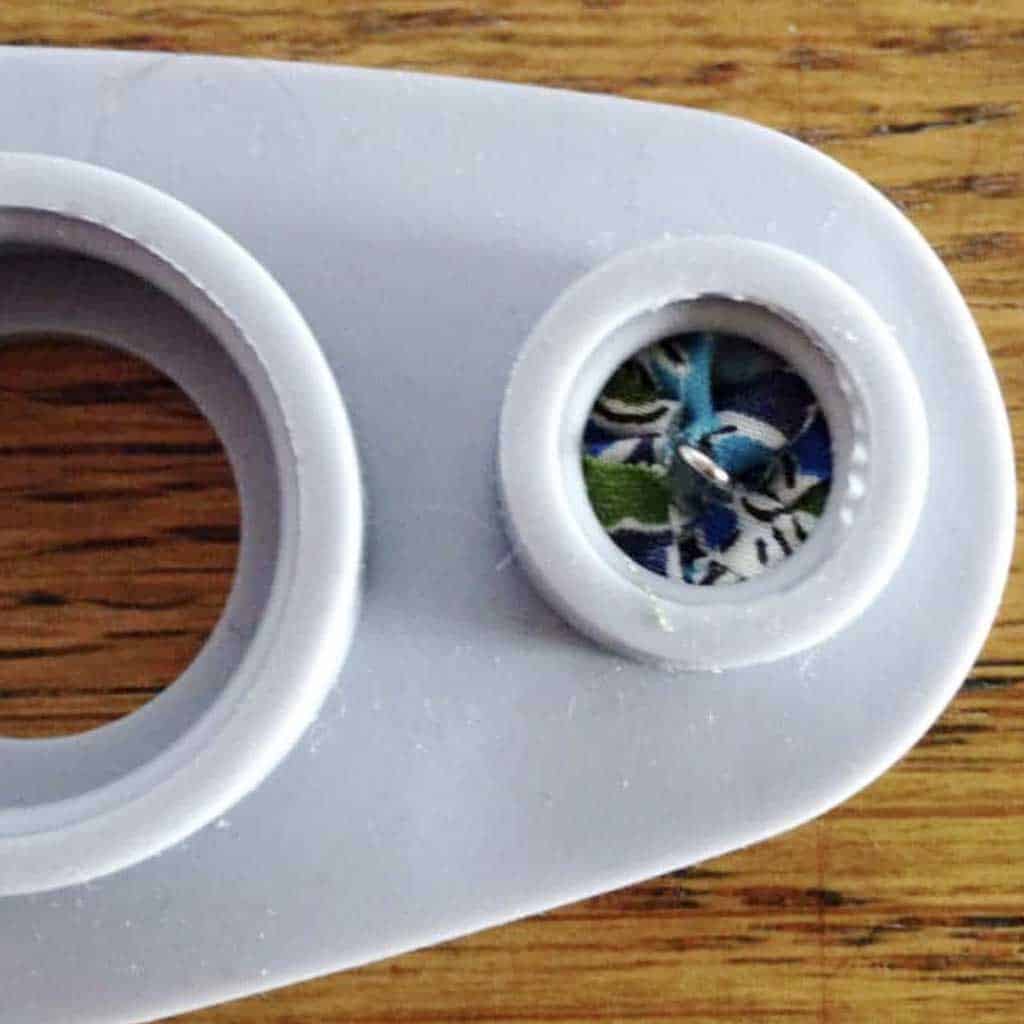
Press it down and fold in all of the edges of the fabric to the middle of the button. I used a cotton bud to do this, because it was fairly fiddly to do by hand!

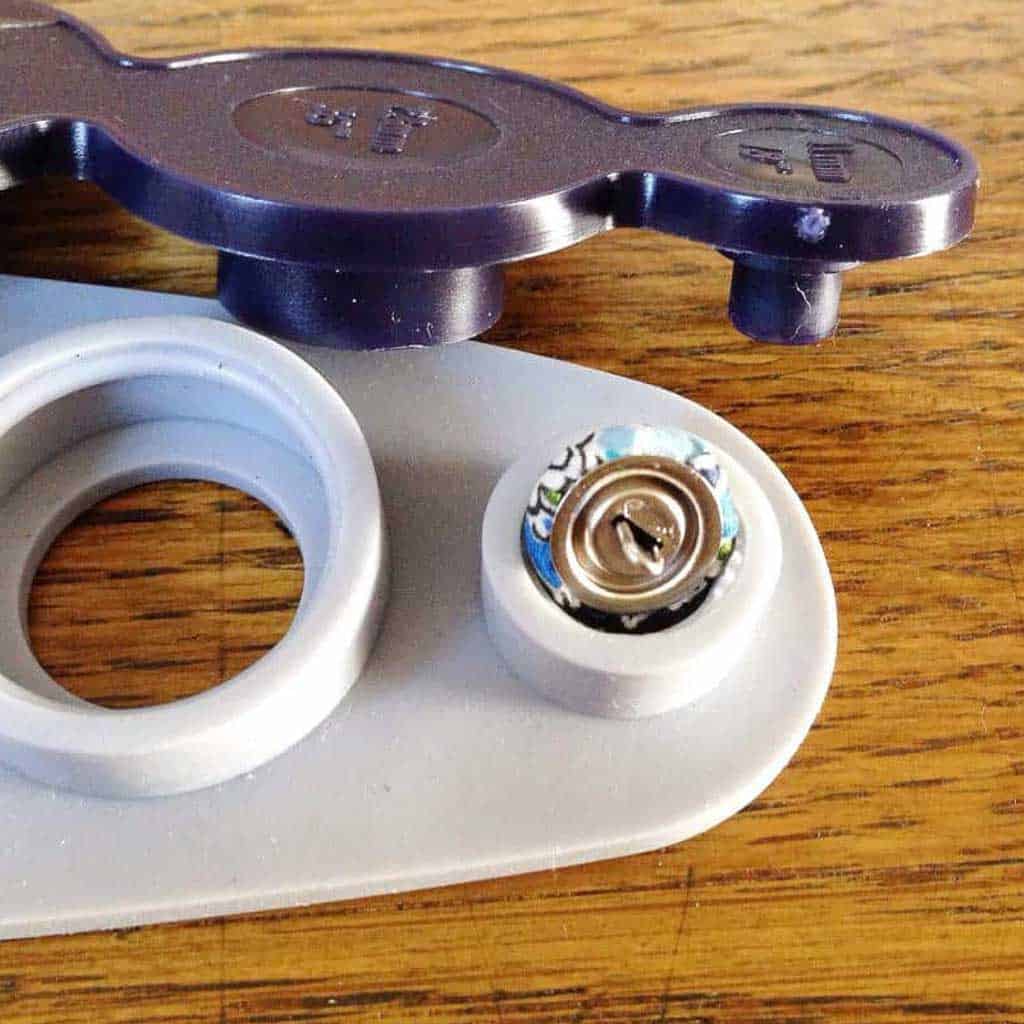
Next, you take the button back and position it over the button clasp.
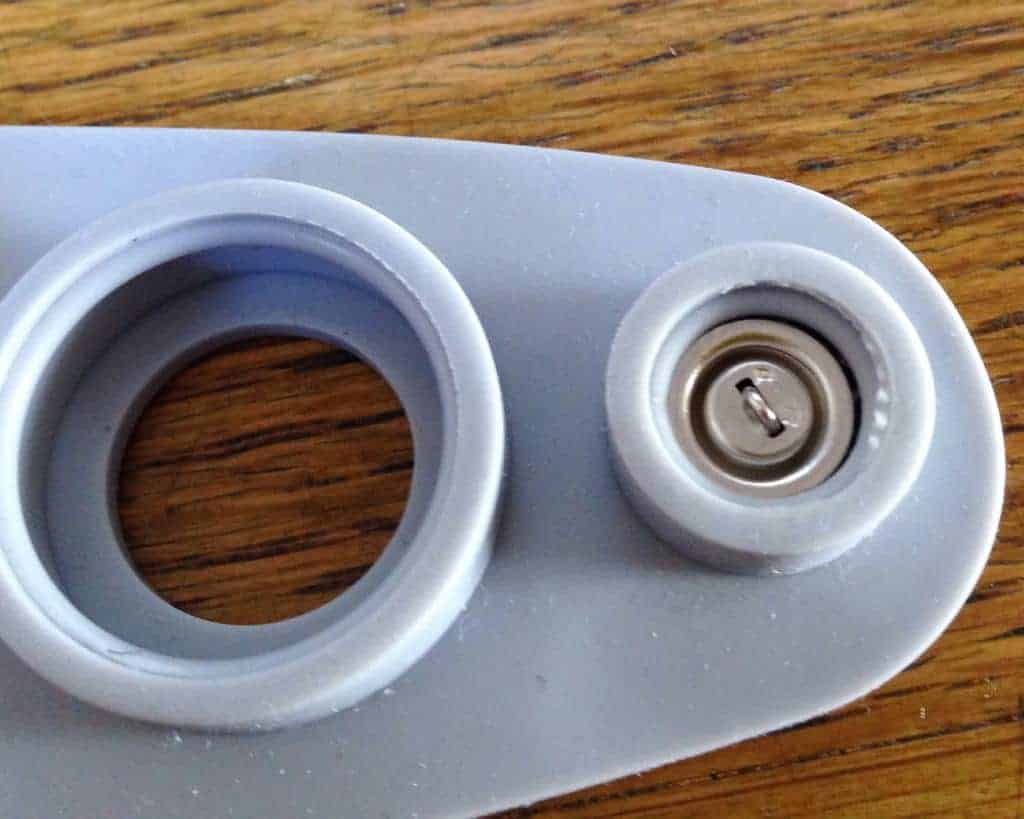
Then place the other half of the button maker over the top of your button back.
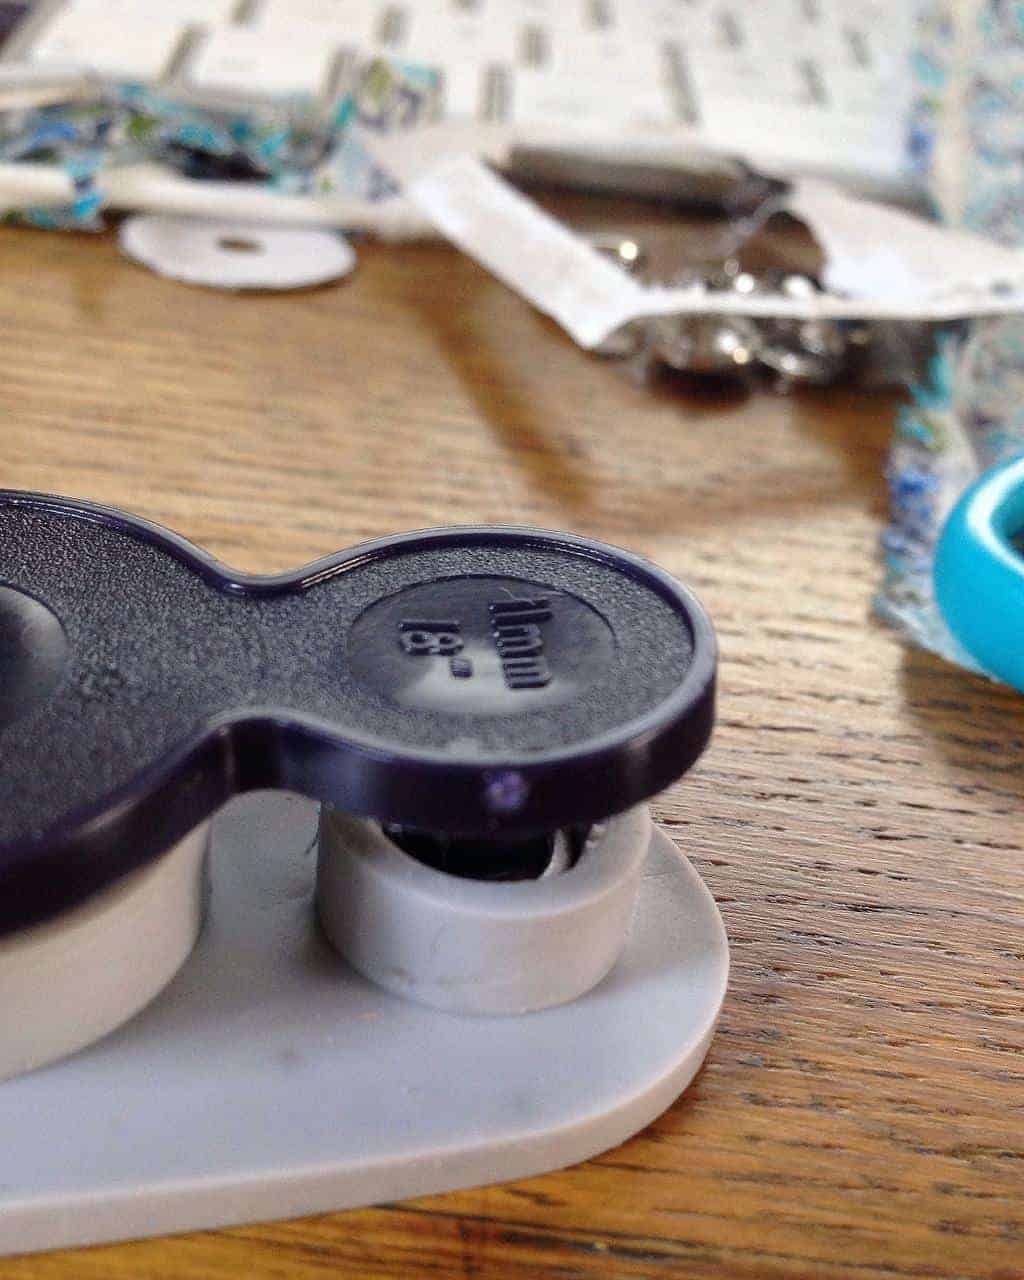
Simply press down hard until you hear a click. Your button back will now be securely fastened to the front.
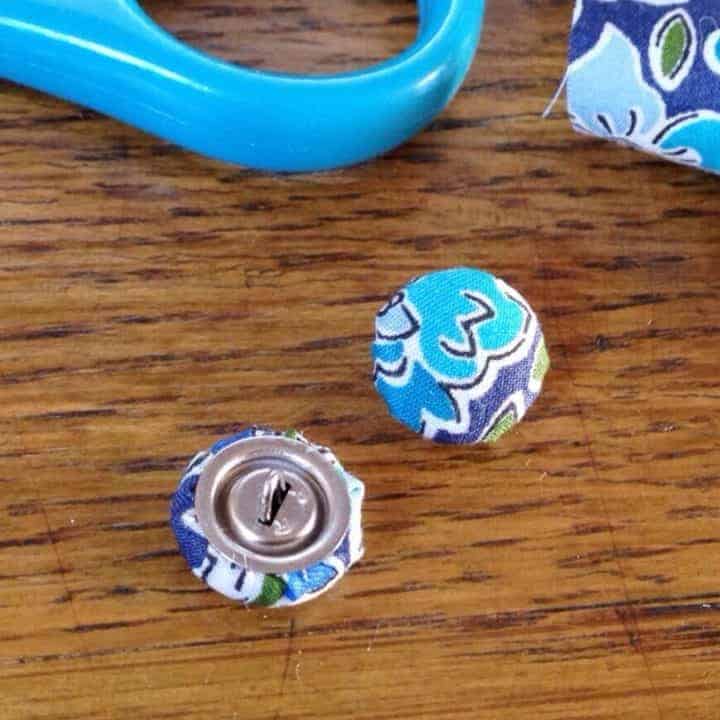
Pop your newly made fabric button out of the maker.

Ta-daaaa! Beautiful fabric covered buttons.
Simple.
Make Covered Buttons
Learning how to make fabric buttons with a button making machine is so satisfying! You can give an outfit a totally new look — it's as easy as pie.
Materials
- Fabric
- Some card or paper to make a template
Tools
- Pack of self cover buttons
- Prym button maker tool
- Scissors
Instructions
- Cut a circle to use as a template for your fabric. This is quite a bit larger than the diameter of the buttons. There will be a guide on the button maker tool packaging. Then lay it, pattern side side, and place a button front in the centre of the fabric circle.

- Place it into the corresponding-sized hole in the button maker mould.
- Press it down and fold in all of the edges of the fabric to the middle of the button. You can use a cotton bud to help you,
- Position the button back over the button clasp.
- Then place the other half of the button maker over the top of your button back.

- Press down hard until you hear a click. Your button back will now be securely fastened to the front, then pop your newly made button out of the maker.
Notes
If you're using the smallest sized self cover buttons — as I have here — thin fabric works much better than thick. Tana Lawn Liberty print fabric is absolutely perfect.

Caro Davies is a former art-director turned writer and content-creator, and editor behind UK lifestyle blog The Listed Home. She writes about home-related topics, from interiors and DIY to food and craft. The Listed Home has been featured in various publications, including Ideal Home, Grazia, and Homes & Antiques magazines.

I have made a lot of cross stitch buttons and I always struggle with getting the buttons on nicely. I have never seen a tool like that before and it looks like it would make things so much easier! I am going to have to see if I can find one of them in the US. I love the fabric you chose for your buttons!
Aaah thanks so much Rebecca :) I’m sure that you’d be able to get one of the button makers in the states! I can’t believe how easy it makes everything! Would highly recommend! X
These are really lovely! Who knew it was so simple, I might have to get myself one! I could then add elastic bobbles through the ring on the back to make pretty hair bobbles for my little girl!
It’s the handmade little touches that help to make it extra special and a lovely keepsake :) xx
Thanks Tracy!! I am totally hooked… new shirts for my husband’s shirts, my cardi’s, coats… I am going to be a button making factory!! :) X