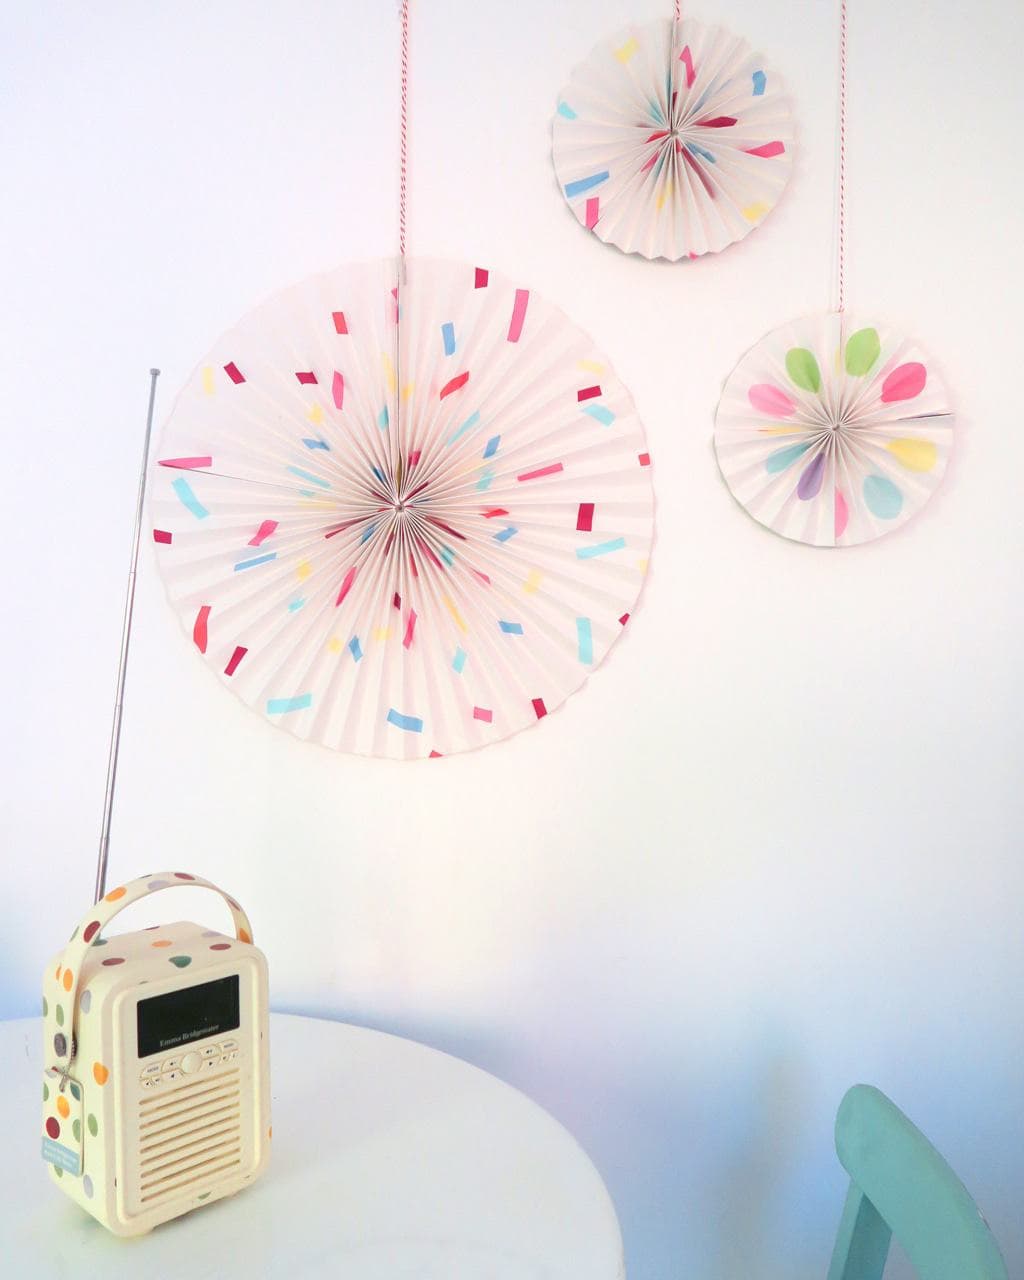
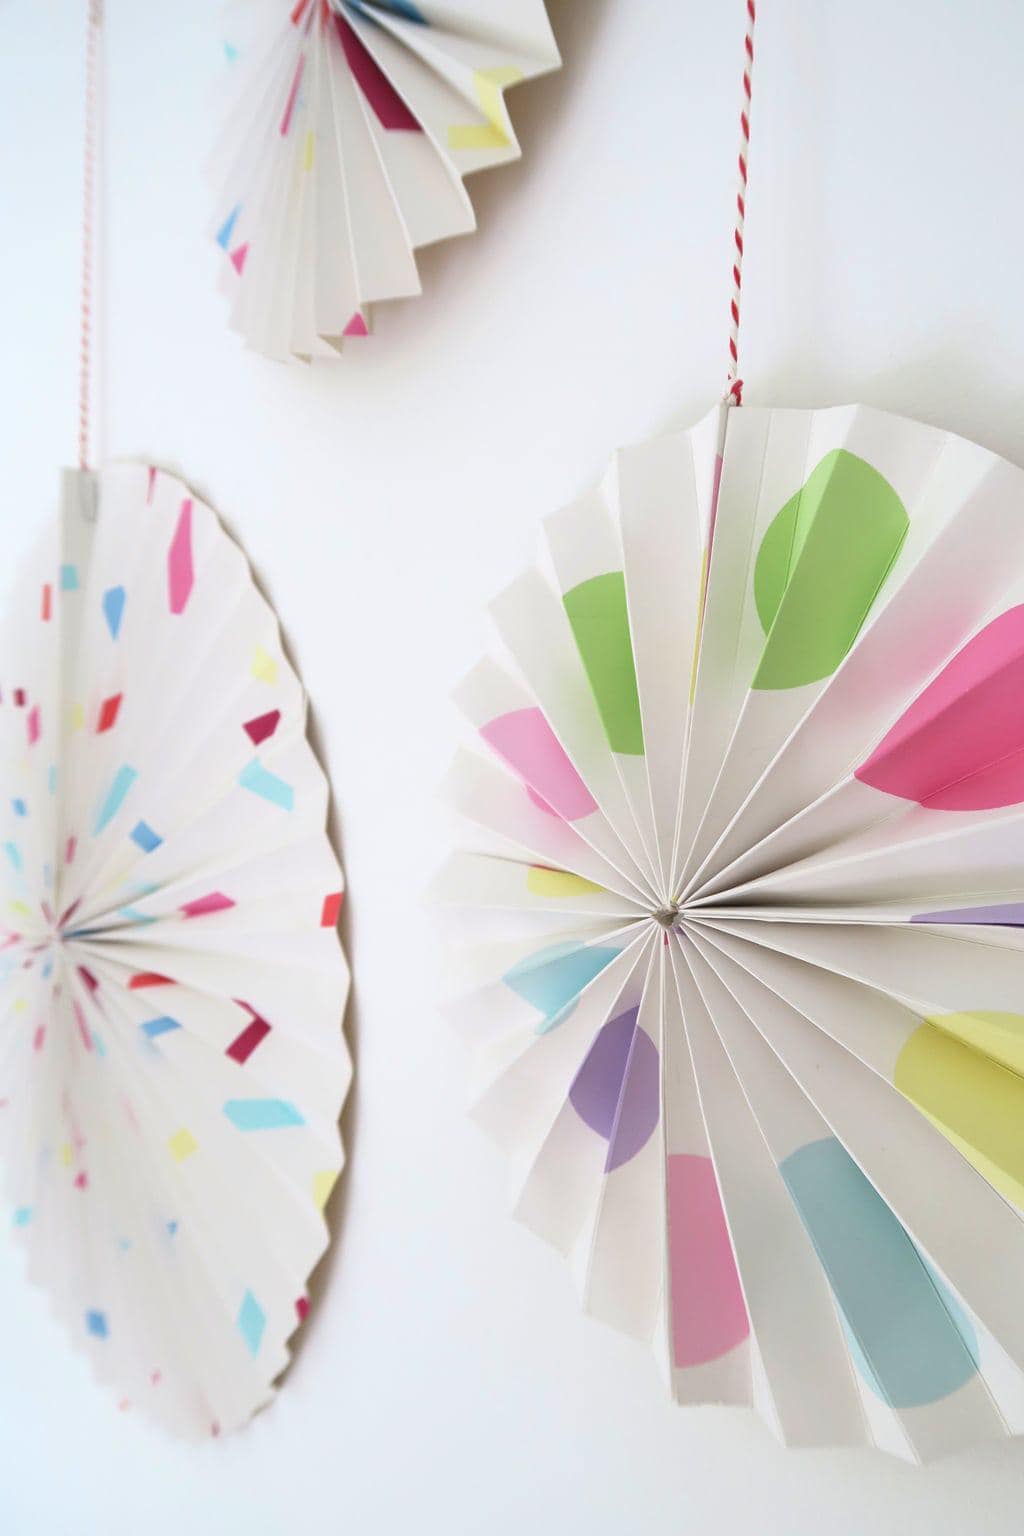
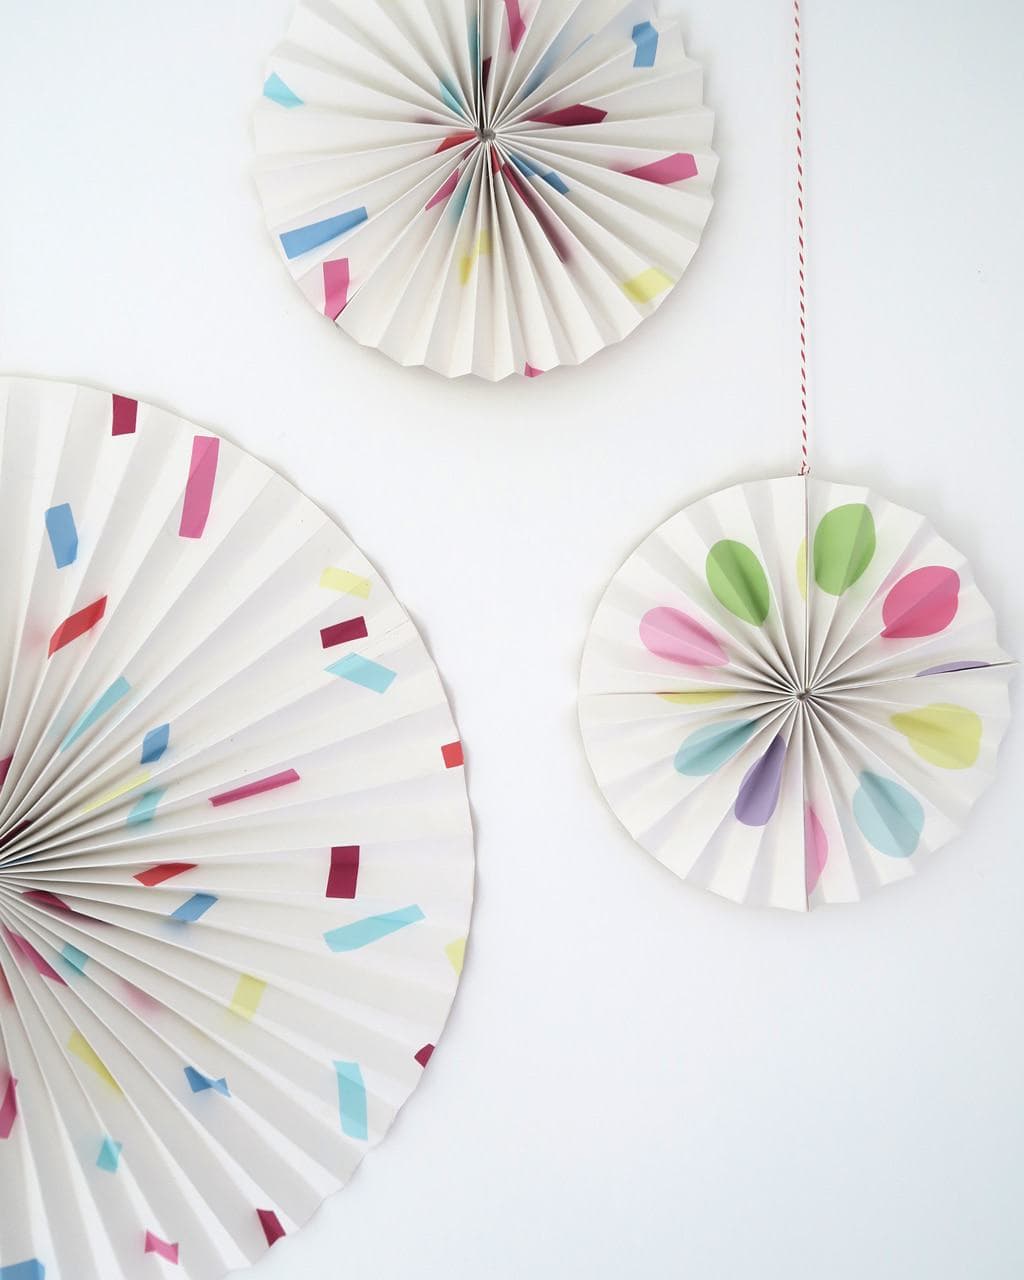
Have you ever wanted to know how to make a paper circle fan decoration? They’re super easy to make and look fabulous! Here’s a quick tutorial showing how I make mine.
Quick View of What You'll Find on This Page
Making a House a Home
When my sister and her husband sold their house recently they couldn’t find anywhere they wanted to buy.
So — as a stop gap — they rented a house until one they liked came on the market.
Funnily enough, we did exactly the same when we moved to our village.
It reminded me how tricky landlords can be sometimes; and how annoying it is when you’re not allowed to change the wall colour.
Or do very much to make the property really feel like home.
So I’ve been having a little think about the things that we can do. Thingsto make a rented house feel homely and completely change the look and feel of a room with wallpaper.
Without actually sticking it to the walls.
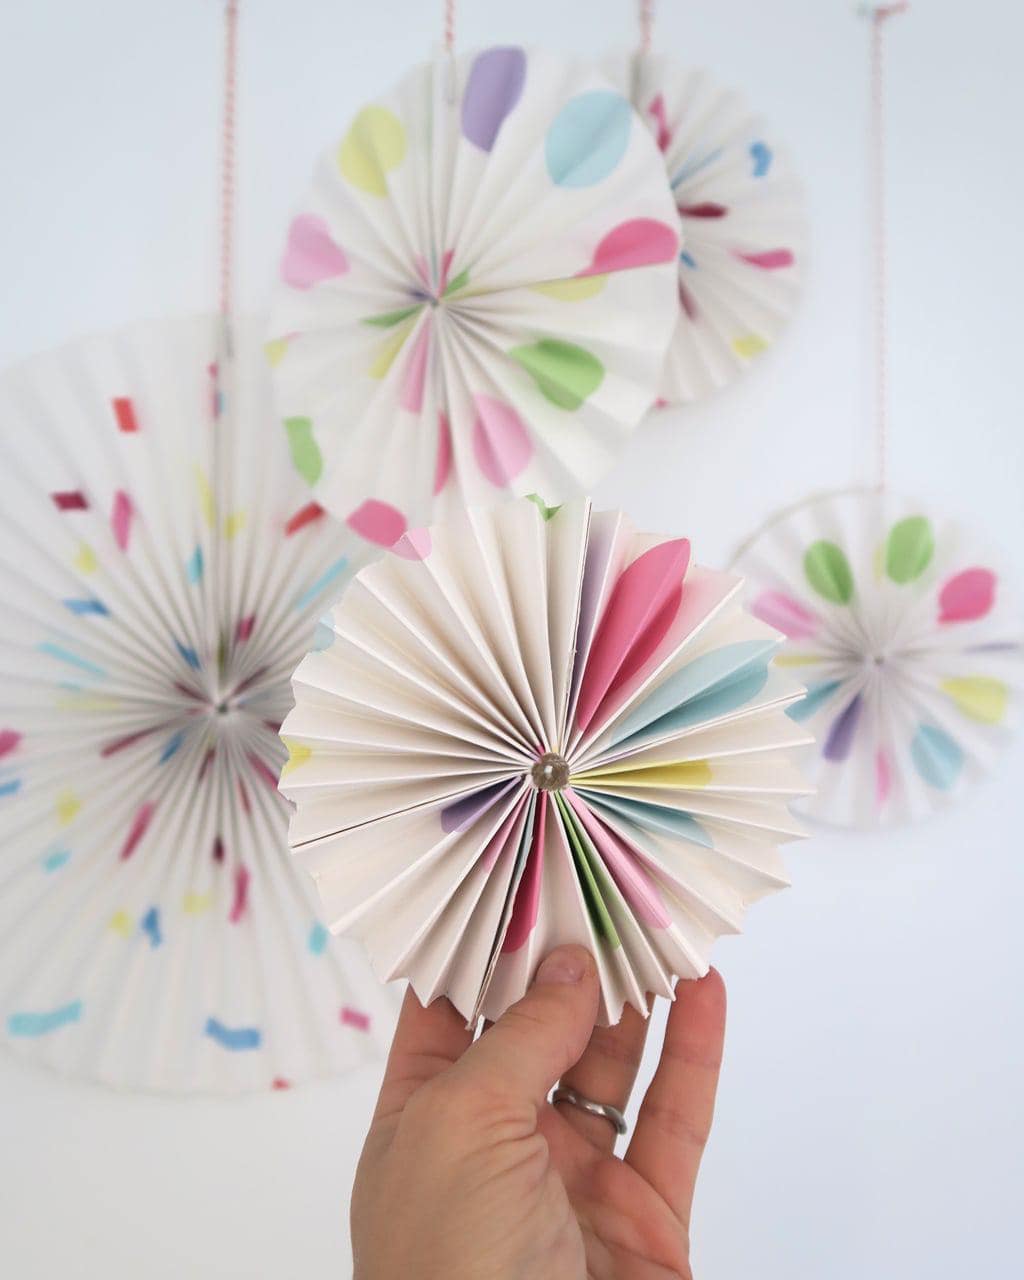
This tutorial shows how to make a Paper Circle Fan Decoration.
I’ve always used shop bought versions of these — to style my products when I photograph them.
But when I was looking at one recently, it struck me how easy they’d be to make.
And how cool they’d look in various patterns, rather than the block colours that they’re usually sold in.
So here we go — super simple and they look a million dollars!
How To Make A Paper Circle Fan Decoration
You will need:
Wallpaper
Scissors or scalpel (whichever you prefer to use)
Ruler and pencil
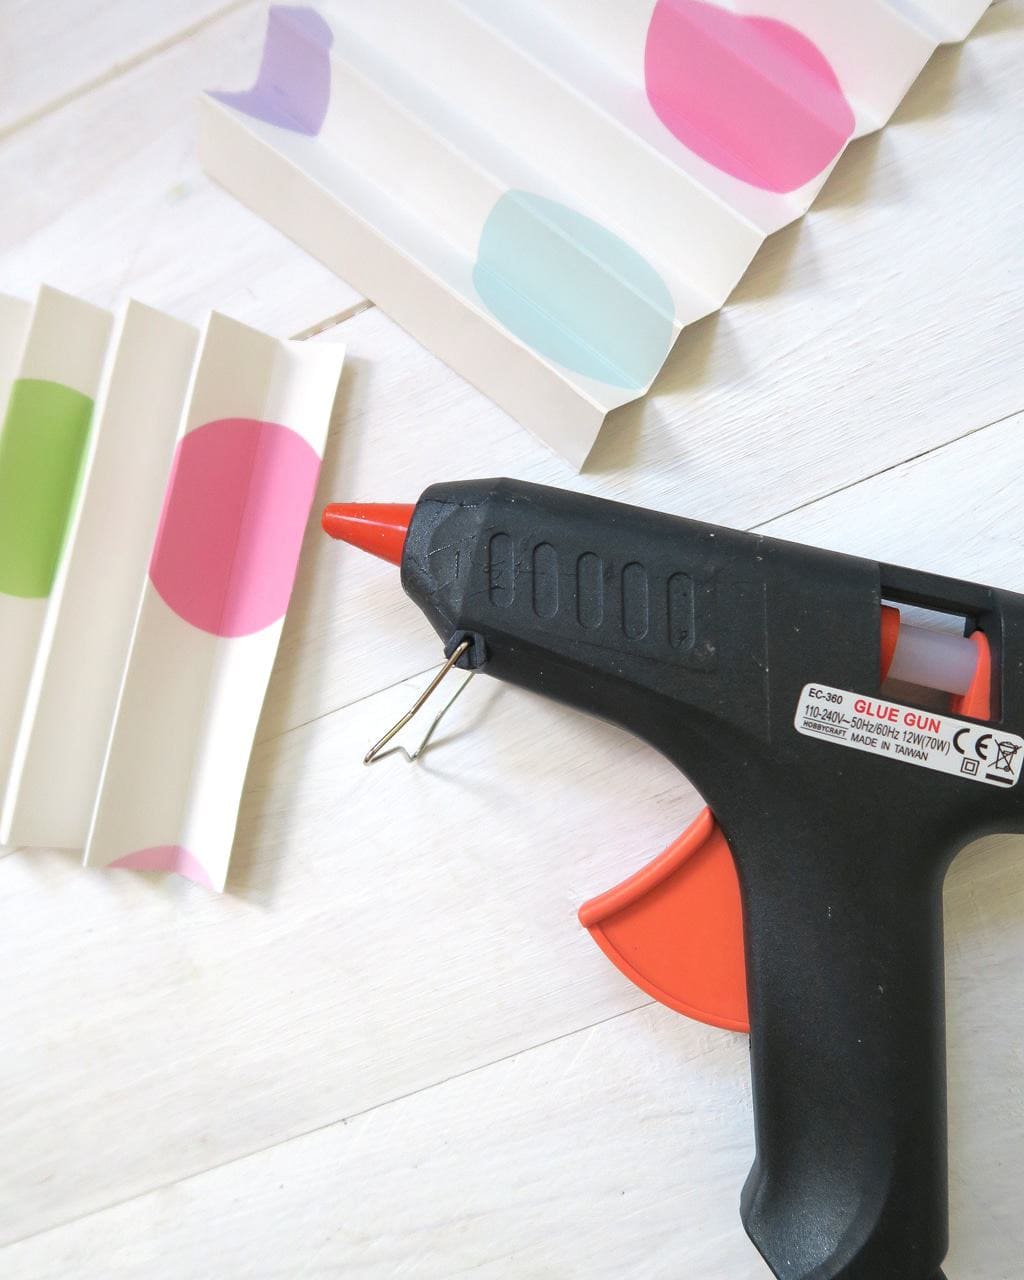
Glue-gun
Paper-clips
String
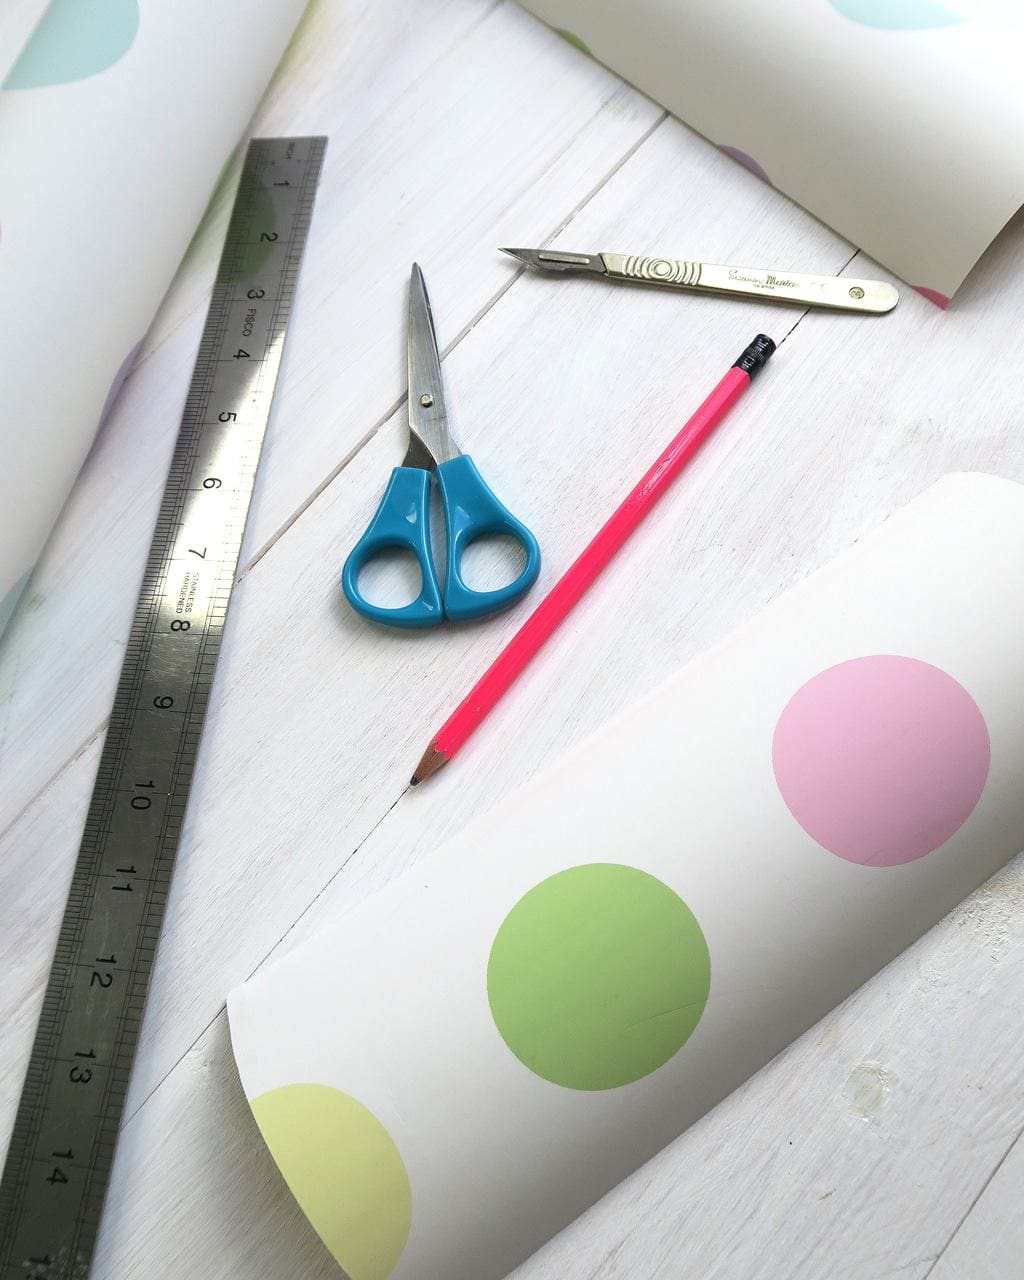
1 — Choose your wallpaper! You can use offcuts for smaller circles or for a larger circle you’ll need a decent length.
Perfect for a little girl’s bedroom. Or a big girl’s she-shed ;)
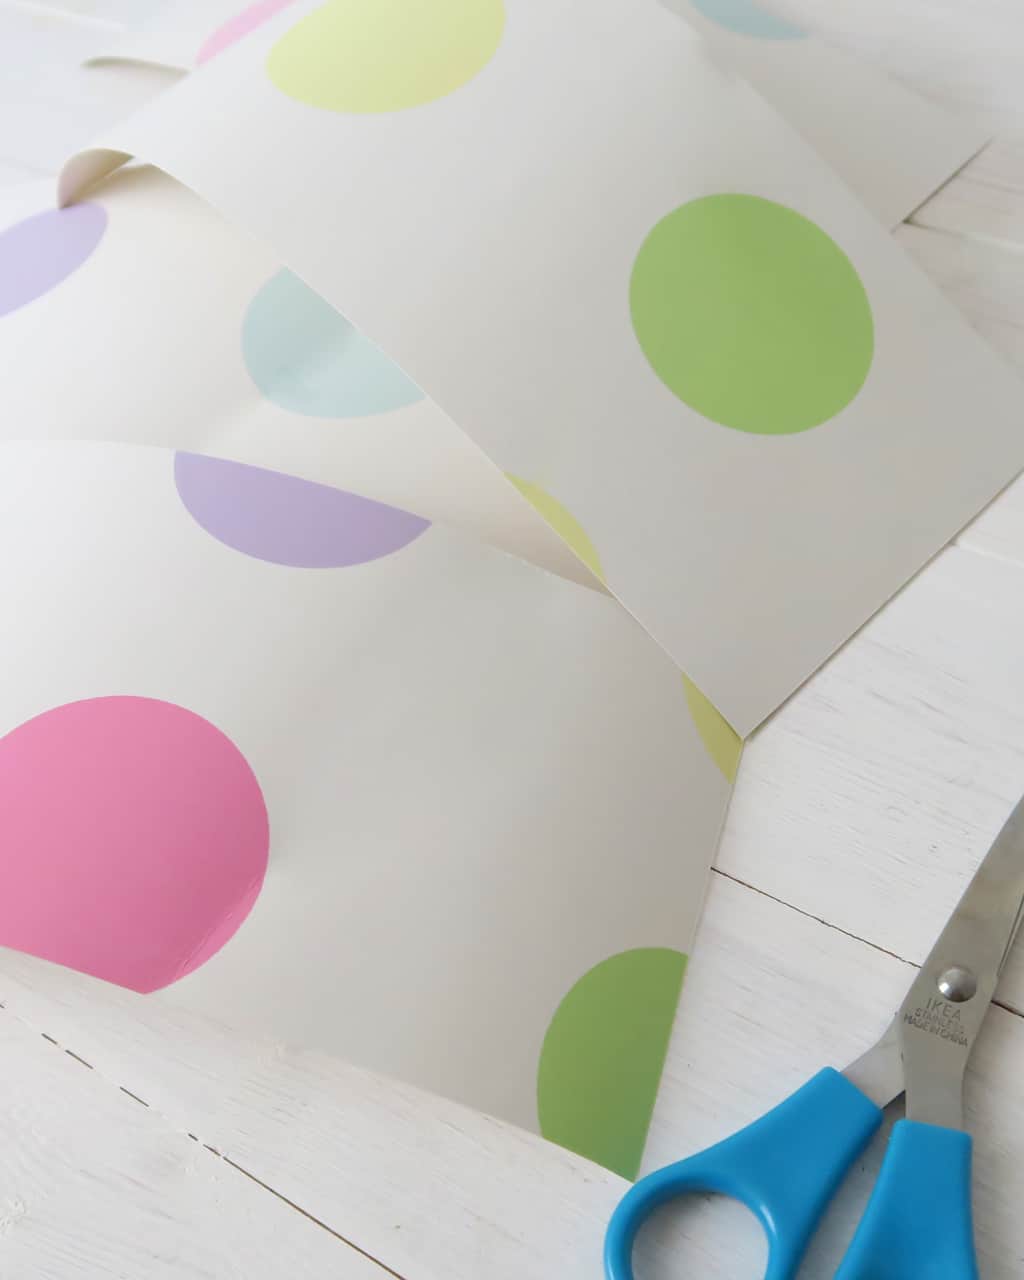
2 — Cut your paper to size.
I used 4 rectangles of wallpaper per circle. One to make up each quarter of my circle fan.
There’s no hard and fast rule with regards to size.
For mine, I worked to the rule of thumb that each fold was 2cm apart. I had 13 folds in each quarter segment of my circle fan. So the width of each piece of paper was 26cm.
The height of the paper determines the radius of your circle; more height = a larger circle!
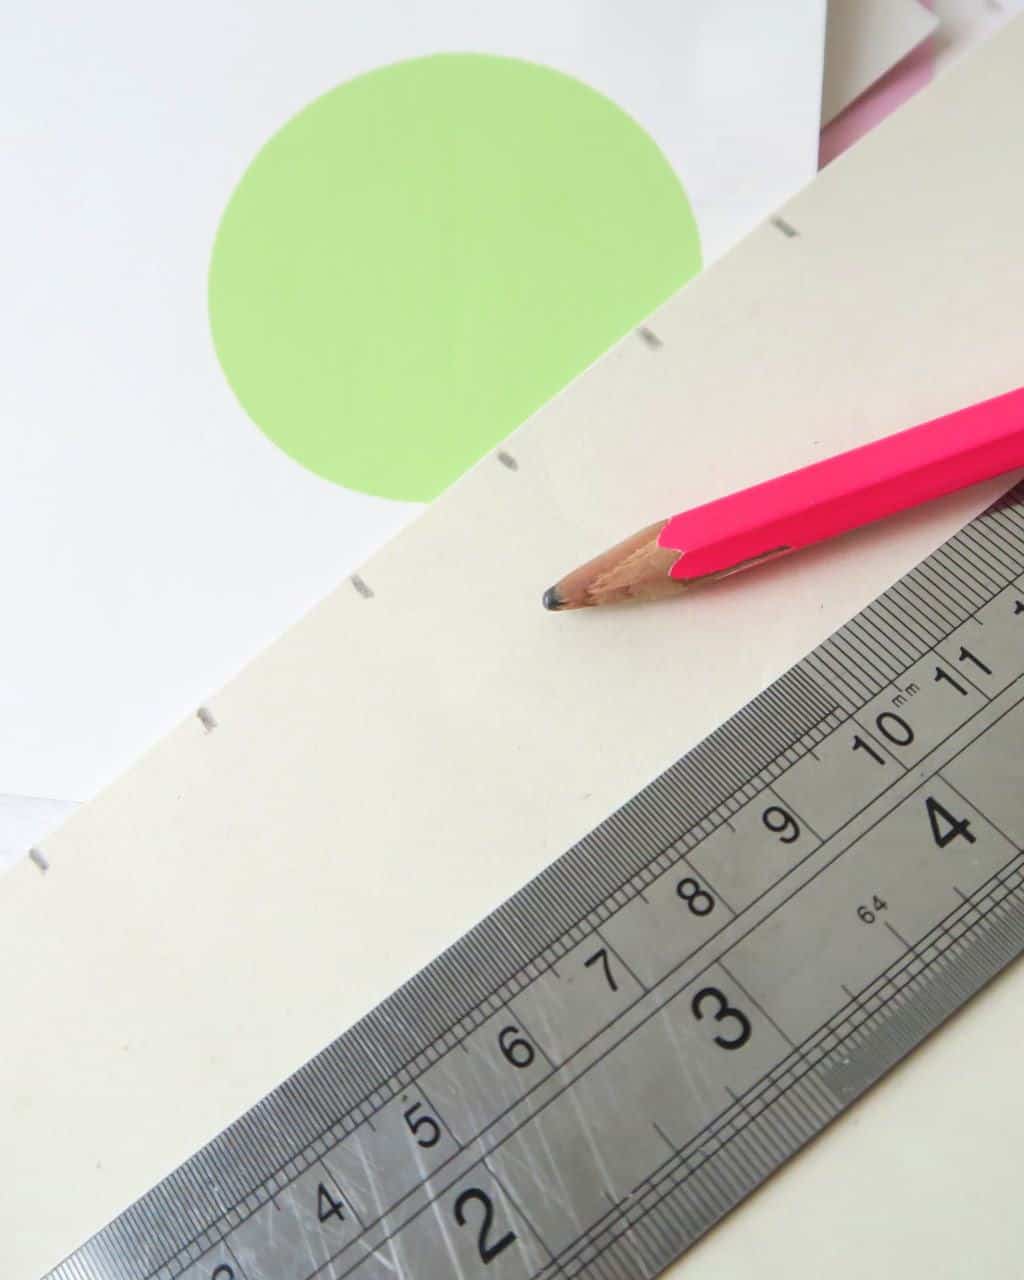
3 — Mark out the 2cm sections along the length of each piece of paper.
If you wanted your folds to be further apart — or closer together — you can change this measurement to suit.

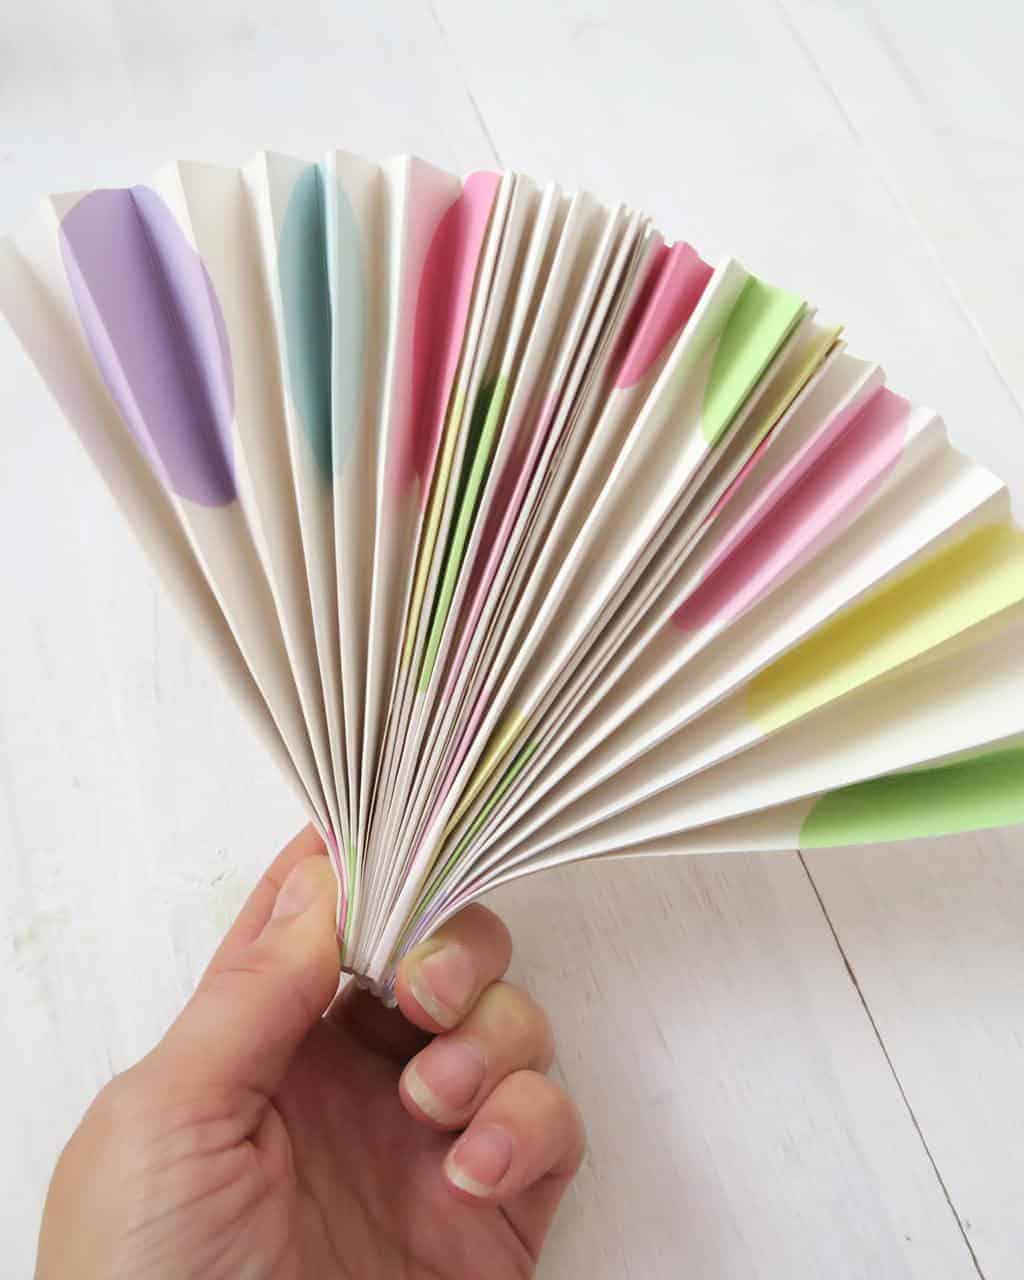
4— Begin to fold the paper— concertina style — every 2cm.
Fold the paper backwards and forwards until you reach the end of the rectangle.
Then do the same with the other three pieces, until you have 4 concertinaed rectangles of paper, of equal size.
5— Next stick the four sections together.
Glue down the right hand edge of your first piece of paper. Then attach it to the left hand edge of one of the other pieces. Repeat this process until all 4 pieces are glued together, to form one long concertinaed rectangle.
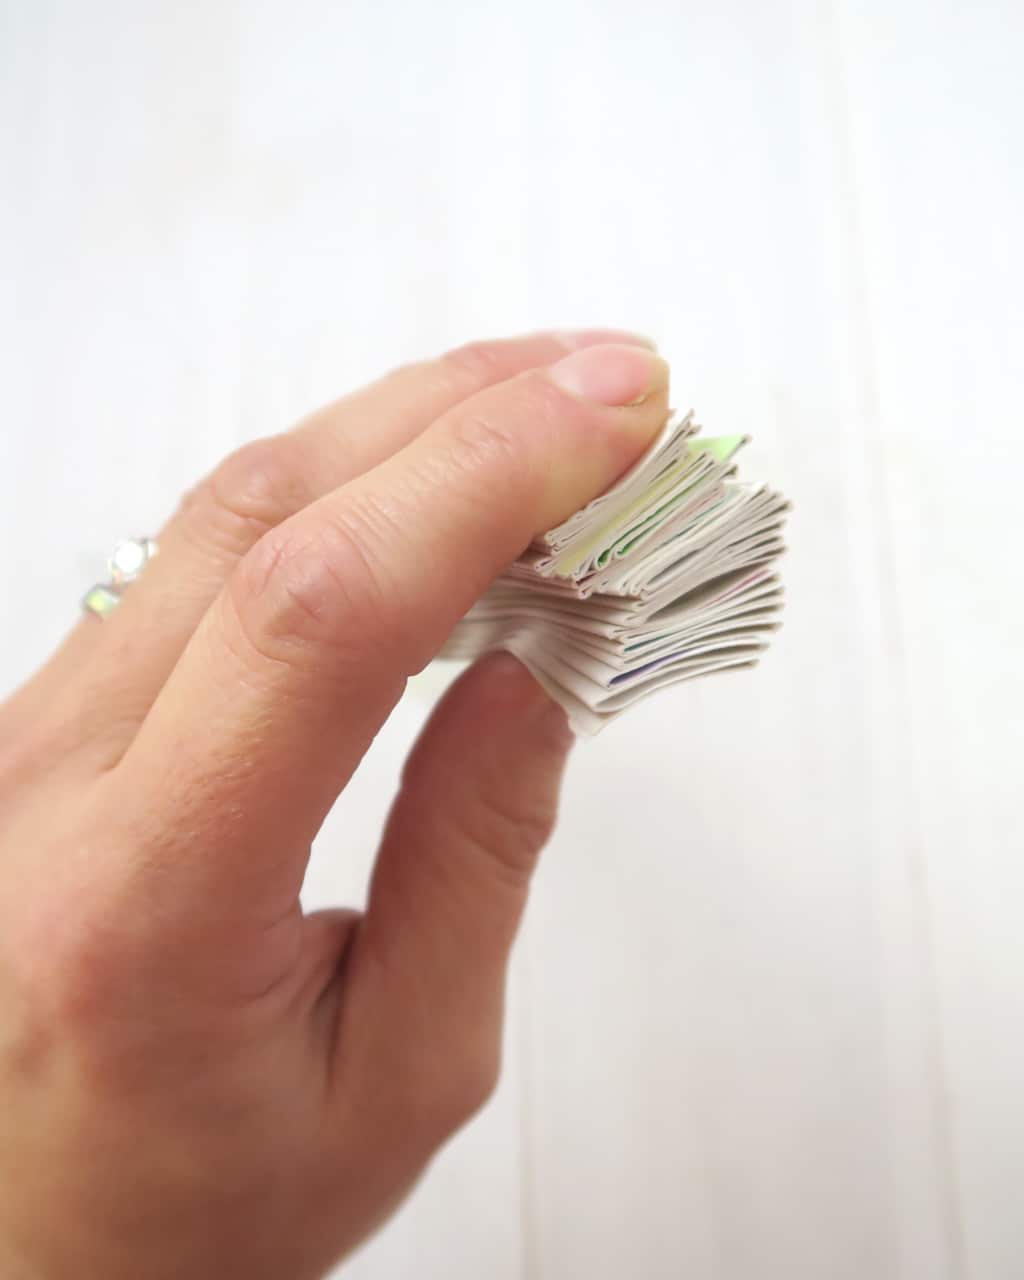
Once you have done this, fold along the lines and pinch one end to create a little fan shape.
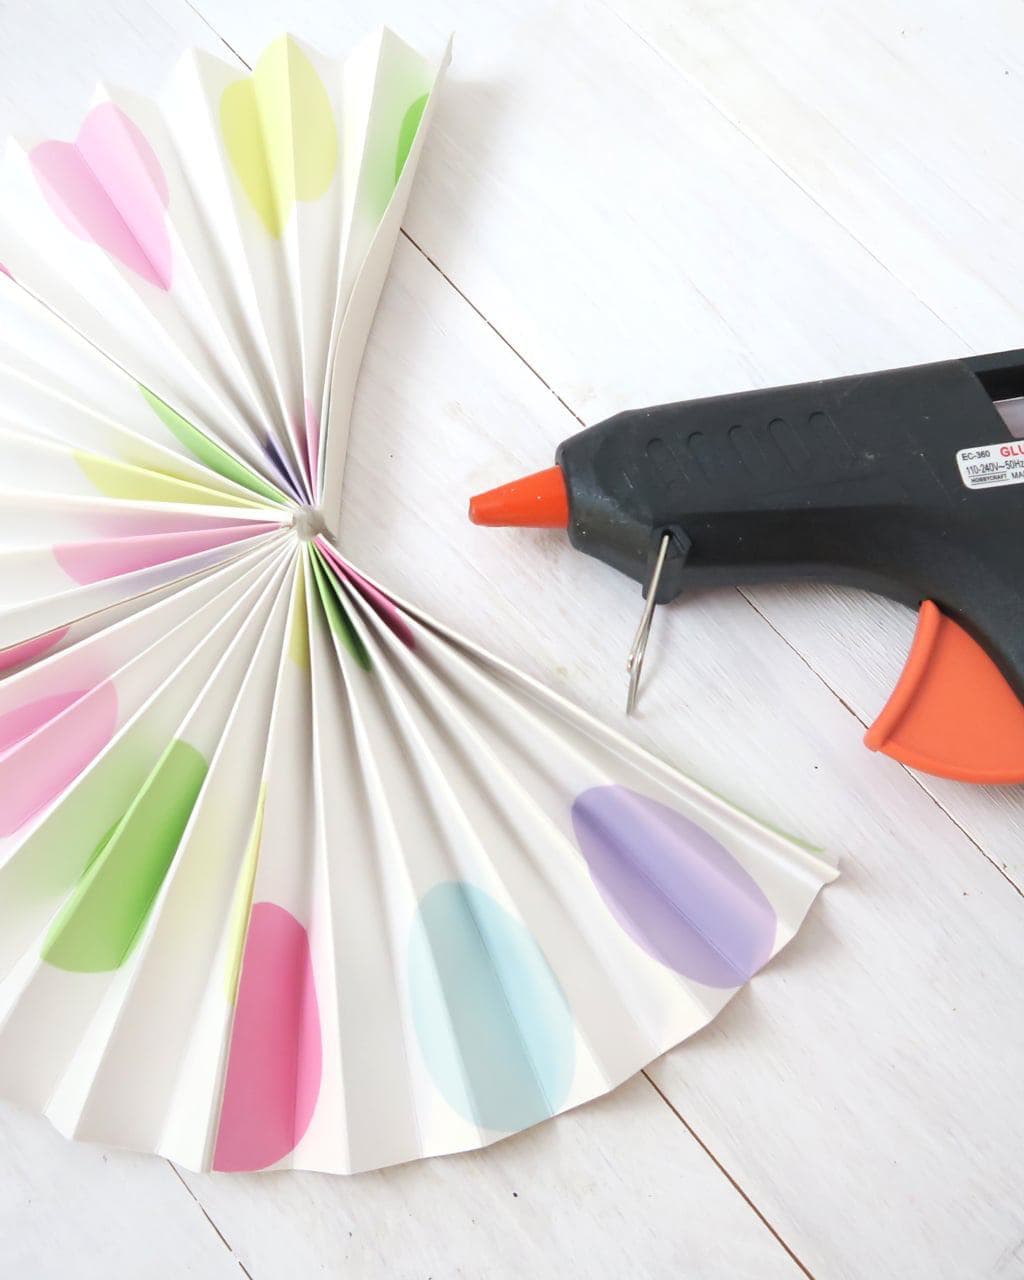
6— Pinching down on the one end very tightly, use the nozzle of the glue gun to spread glue on to the end of the paper that you’re holding.
Be really careful when you do this, as the glue is very hot!!
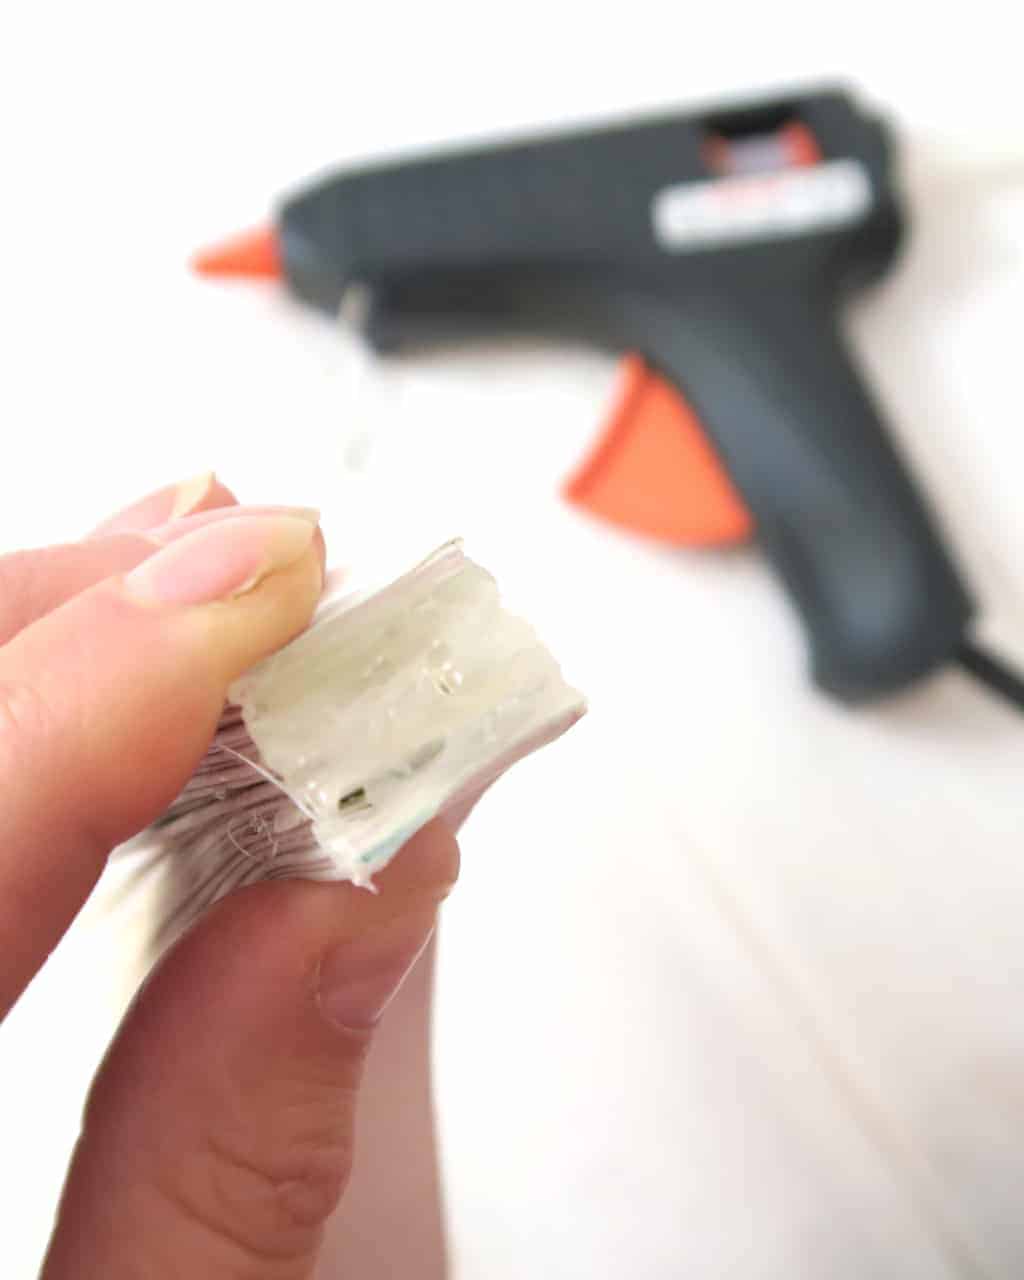
7— Keep hold of the paper, pinching down tightly for a couple of minutes, until the glue has cooled down. After a little while, you’ll be able to touch it with your fingertip — it should feel tacky (a little like blue tack) — then you can pat it down to form a bond over the end of the paper.
Now when you let go of the paper, you’ll see that the circle fan has formed and is nearly complete!
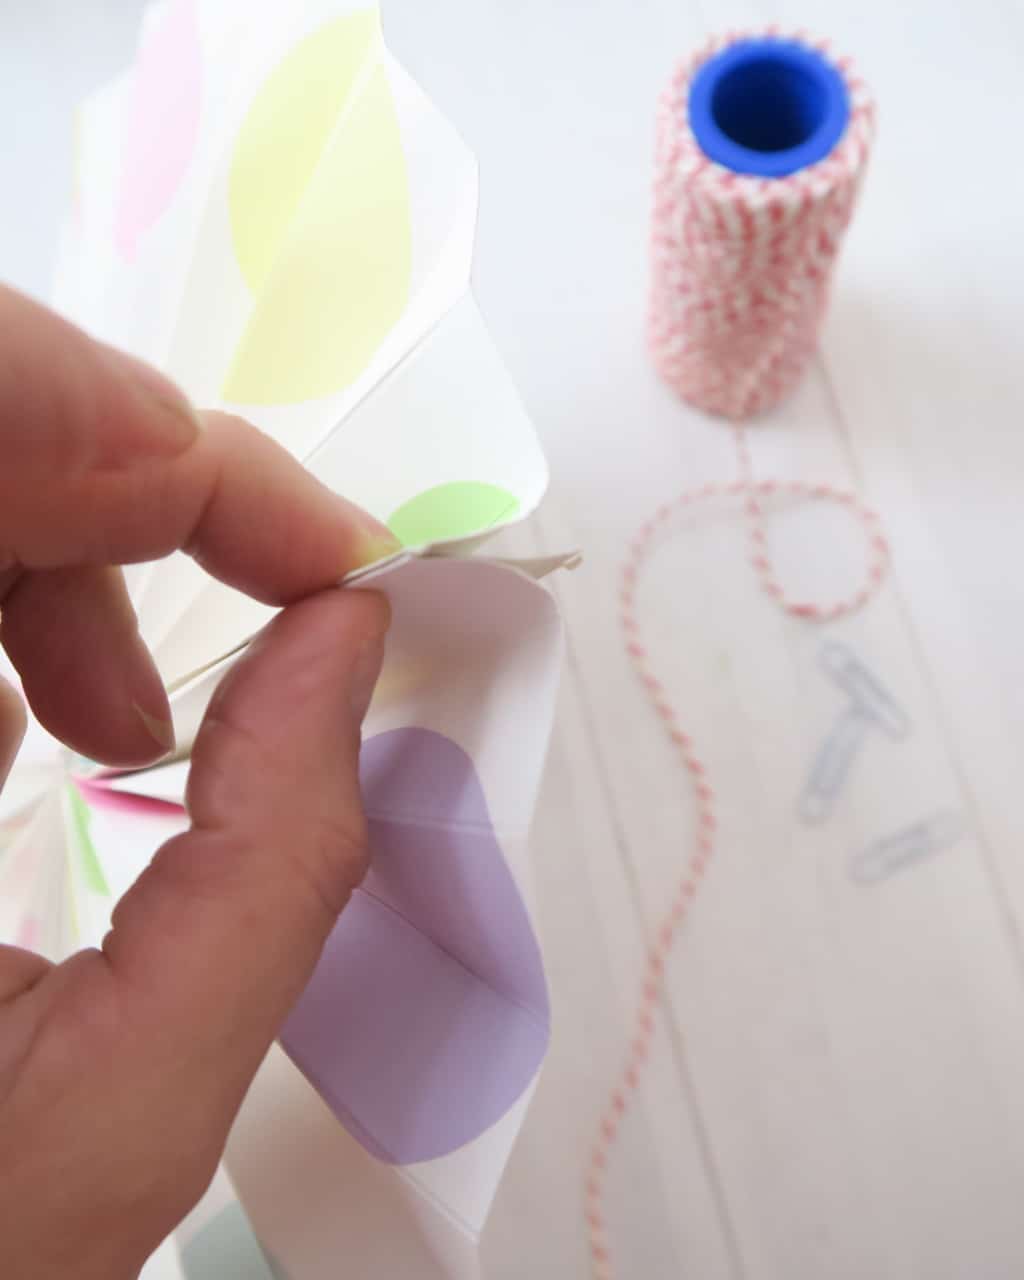
8— To finish off you can use one of two ways, depending on where you’re planning on displaying your circle fan decorations.
If you’re using your circle fans at home you can stick the two edges together with the glue-gun; for a more permanent fix.
If you’re making them to transport to a wedding or party —for example —simply use a paperclip to keep the two sides together. This will ensure that they don’t get bashed or damaged — especially if you’ve made some really large ones.
You can’t see the join from a distance and it means that you can keep them nice and compact, when you’re transporting them.
Simply pinch the two edges together and secure with a paperclip; I used white ones so they’d blend in with the paper.
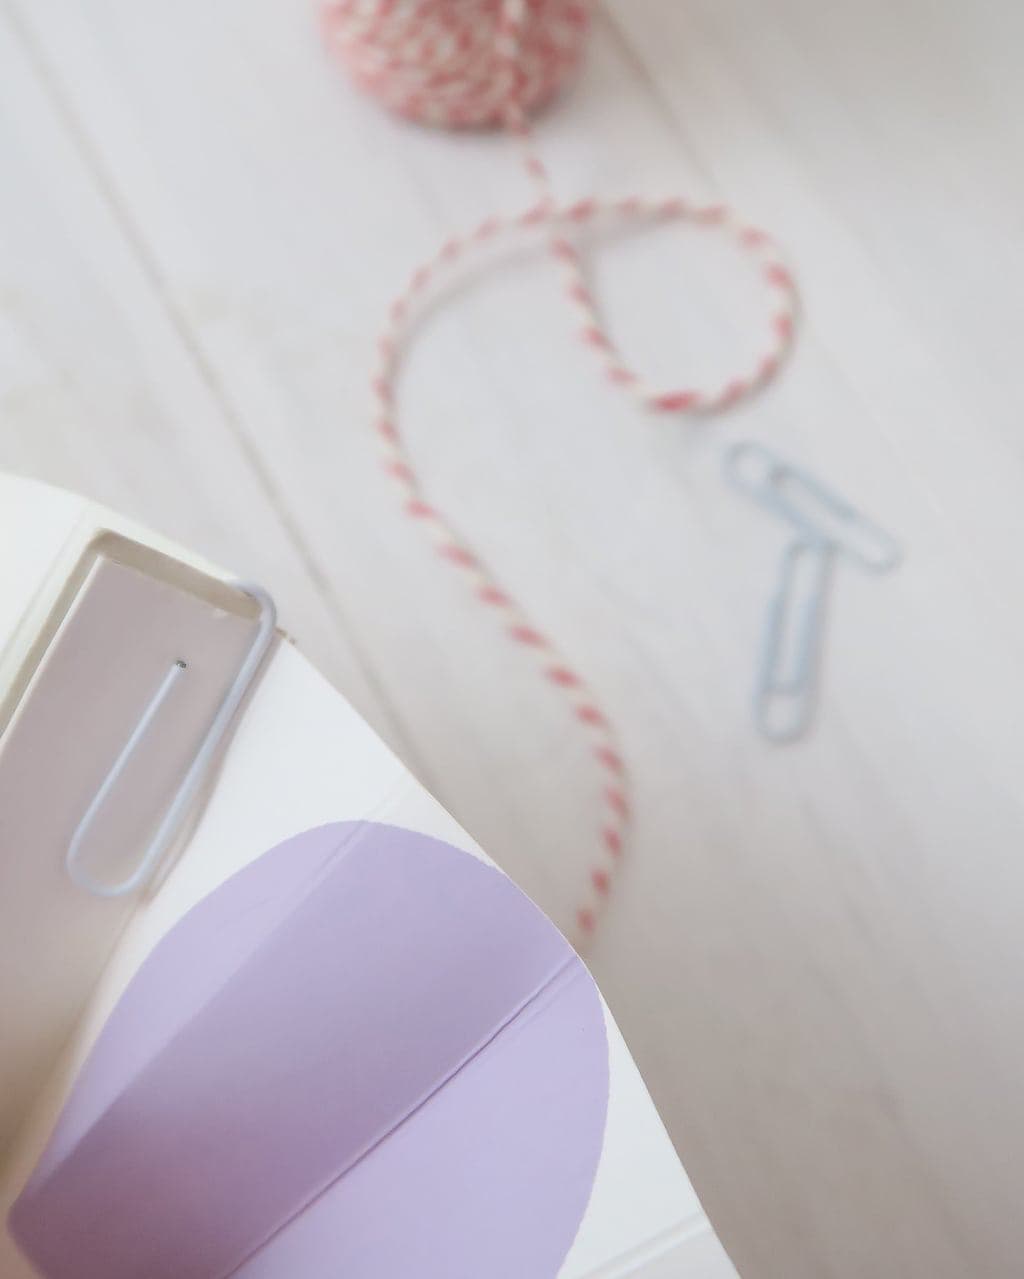
The paperclip also acts as a hanger for the string; so even if you’ve glued your paper circle fan, use one to hang it up.
Simply thread the string through the paperclip, to the length you’d like the circle fan to hang and that’s it!
Bob’s your uncle.

I’ve also made a quick little film tutorial. I sometimes find that it’s easier to watch someone making something rather than reading written instructions.
Pop along and have a look and please give it a thumbs up if you like it :)

Caro Davies is a former art-director turned writer and content-creator, and editor behind UK lifestyle blog The Listed Home. She writes about home-related topics, from interiors and DIY to food and craft. The Listed Home has been featured in various publications, including Ideal Home, Grazia, and Homes & Antiques magazines.

You are brilliant and you’d make a fantastic teacher.
Aaah thanks mama :) xxxxx
These are fantastic! We could make some for Halloween, with a halloween theme and hang them in the window! Thanks for sharing #TheList
Do you know? I thought EXACTLY that the other day!!!! I picked up some orange paper too, with the intention of doing the same! Great minds Sarah!
Oooh I love this so much! So simple but so effective, especially with that lush wallpaper. I have been trying to justify getting a glue gun for ages, I think this is the reason I’ve been waiting for! xx
Aaah GET ONE!! Honestly! No home should be without one. They’re cheap as chips and the BEST thing for making all kinds of stuff!!! Would definitely recommend getting one!! xx
These are adorable girl. What a lovely craft project. I have some similar ones hanging in MM bedroom. Great for a party style bedroom theme. lol :) Brings color to her room Love the patterns you have choose here. Just catching up on your beautiful blog. I haven’t been commenting this summer and I need to catch up with all my favorites. :) Hope you are well.
Thanks so much chickie!! They are SO easy to make — honestly!! And same — I have been absolutely RUBBISH at reading and commenting over the summer. As soon as I’ve caught up and got myself sorted, I’m going to have a mammoth blog commenting session!!! xxx
Ooh I LOVE this, I want you to make me some for every room! Thanks for linking up to #TheList xx
Haha!!! They’re SO easy!! You should have a go at making them chick! Would look good in Baby’s bedroom :) PS — thanks so much for featuring my post.That made my day on Friday xx
These are so lovely. What a great idea. And so easy to change designs when you want a different look.
Thanks for posting.
Thanks so much for stopping by Susanna xx
Brilliant! Anything that gives me an excuse to the the glue gun out is fine by me, and these are just so pretty. My 5 year old would love to have a go at the non-hot bits too!
It’s such an easy make — but they look fab!!! :)